
What First-Timers Need to Know Before Setting Up Starlink

Starlink for first-timers can feel overwhelming — but the setup is far simpler than most people expect.
Here is a quick overview of what getting started with Starlink actually involves:
- Check availability — Visit the Starlink website and enter your address to confirm service in your area.
- Order your kit — Choose the right hardware for your situation (residential, mobile, or performance).
- Find a clear sky view — Use the Starlink app's obstruction scanner to pick the best spot for your dish.
- Mount and connect — Assemble the dish, connect it to the router, and plug in the power.
- Configure your network — Download the Starlink app, name your Wi-Fi, set a password, and go online.
- Optimise over time — Allow up to 12 hours for the system to fully calibrate after first connection.
For Australians in rural and remote areas, reliable internet has long been a frustration.
Traditional satellite services came with painful latency, data caps, and speeds that barely handled a video call — let alone streaming or running a business.
Starlink changed that.
By operating a constellation of satellites at just 550 km above Earth — compared to 35,000 km for older geostationary satellites — Starlink delivers speeds typically ranging from 50 to 200 Mbps with latency as low as 25 ms.
Australian users have reported median download speeds of around 106 Mbps, which is genuinely usable for remote work, streaming, video calls, and multi-device households.
The hardware itself is designed for self-installation. Most people go from unboxing to a live connection in under two to four hours — no technician required.
That said, getting the most out of Starlink in Australian conditions — extreme heat, UV exposure, corrugated roads, salt air, and high winds — means thinking carefully about how and where you install it.
This guide walks you through everything, from checking availability to optimising your setup for long-term reliability.
Choosing the Right Starlink Mount and Accessories for Your Setup
Choosing the right mount means matching your hardware to your lifestyle and the specific environmental challenges of your location. We recommend doing it properly the first time to avoid signal dropouts and hardware damage.

Understanding the relationship between your hardware and its physical placement is the first step toward a stable connection. You can learn more about this in our article Starlink Explained for First Timers What it is and Why Mounts Matter. For a deep dive into the hardware side, check out our Starlink Mounts Complete Guide.
Starlink for First-Timers: Residential vs Commercial
For most households, the standard residential kit is the go-to choice. It provides ample bandwidth for streaming, gaming, and remote work. However, high-demand users or those running businesses from remote stations might require the commercial solutions. These kits often feature larger antennas with a wider field of view, designed to maintain higher speeds during peak congestion and endure more rigorous use cases.
Permanent vs Portable
One of the biggest decisions for Starlink for First-Timers is whether the dish stays put or travels with you.
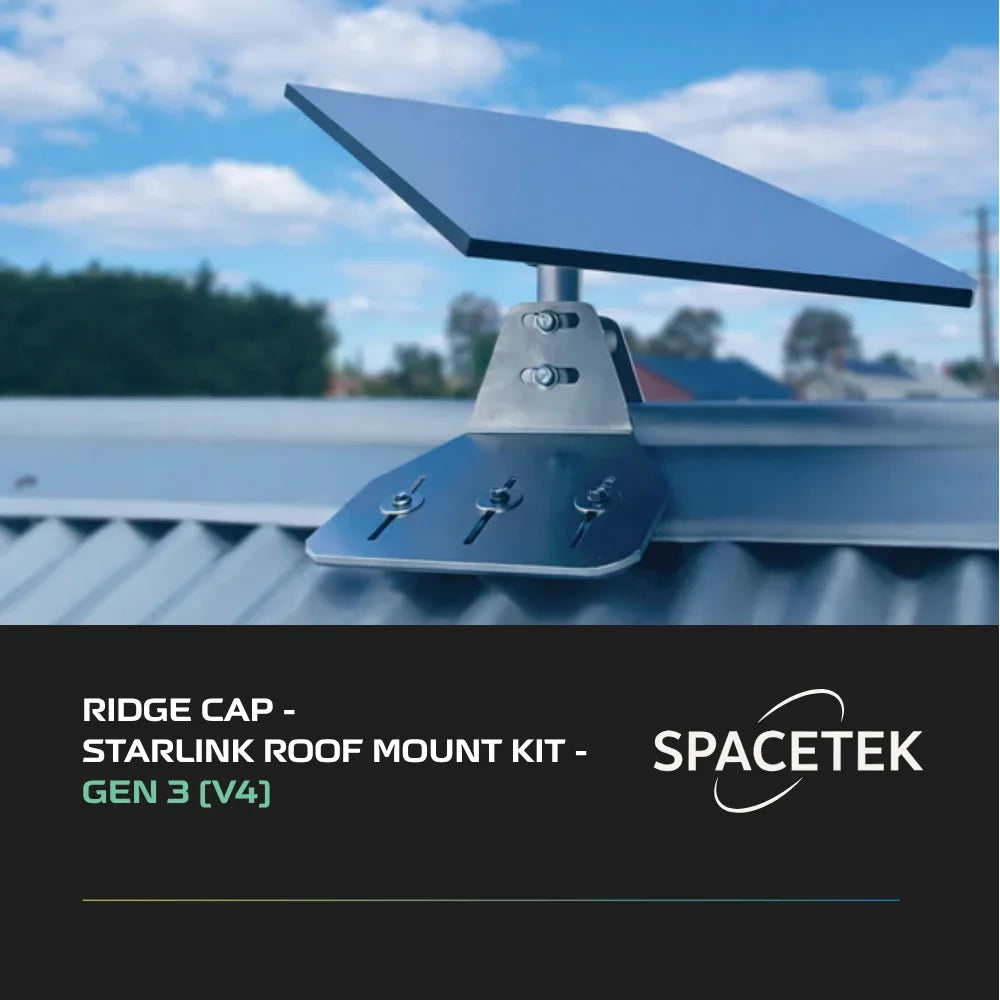
- Permanent installations usually involve roof mounts that provide the highest possible elevation to clear trees and structures.
- Portable setups rely on ground tripods or temporary mounts, ideal for those on roaming plans who move between campsites.
Finding the sweet spot is essential; our Starlink Installation Guide Where Should You Set Up Your Dish helps you navigate this choice.
Choosing Mounts Based on Your Starlink Dish
The mounting solution you need depends entirely on which "generation" of dish you receive. The Gen 2 Actuated dish features a motor and requires a mount that allows for its specific tilting movement. The Gen 3 (Standard) dish uses a kickstand and often requires a pipe adapter if you want to move it from the ground to a pole. Then there is the Starlink Mini, which is built for ultra-portability. We offer a range of residential mounting kits specifically tailored to each of these hardware versions.
Why Quality Starlink Mounts and Accessories Matter in Australian Conditions
Australian conditions are uniquely harsh, and standard plastic mounts often fail under the combined assault of intense UV radiation and high wind loads. We focus on providing infrastructure that can withstand the "Big Five" of the Australian climate: UV, heat, salt, wind, and vibration.

When you are out on corrugated roads or parked near the coast, your equipment is under constant stress. A dish that vibrates or wobbles will lose its "lock" on the satellites, causing frustrating micro-dropouts. Our mounts are engineered from precision-machined aluminium to ensure they remain rock-solid. Furthermore, Starlink hardware is designed to endure winds up to 270kph, but that rating only matters if the mount holding it doesn't snap first.
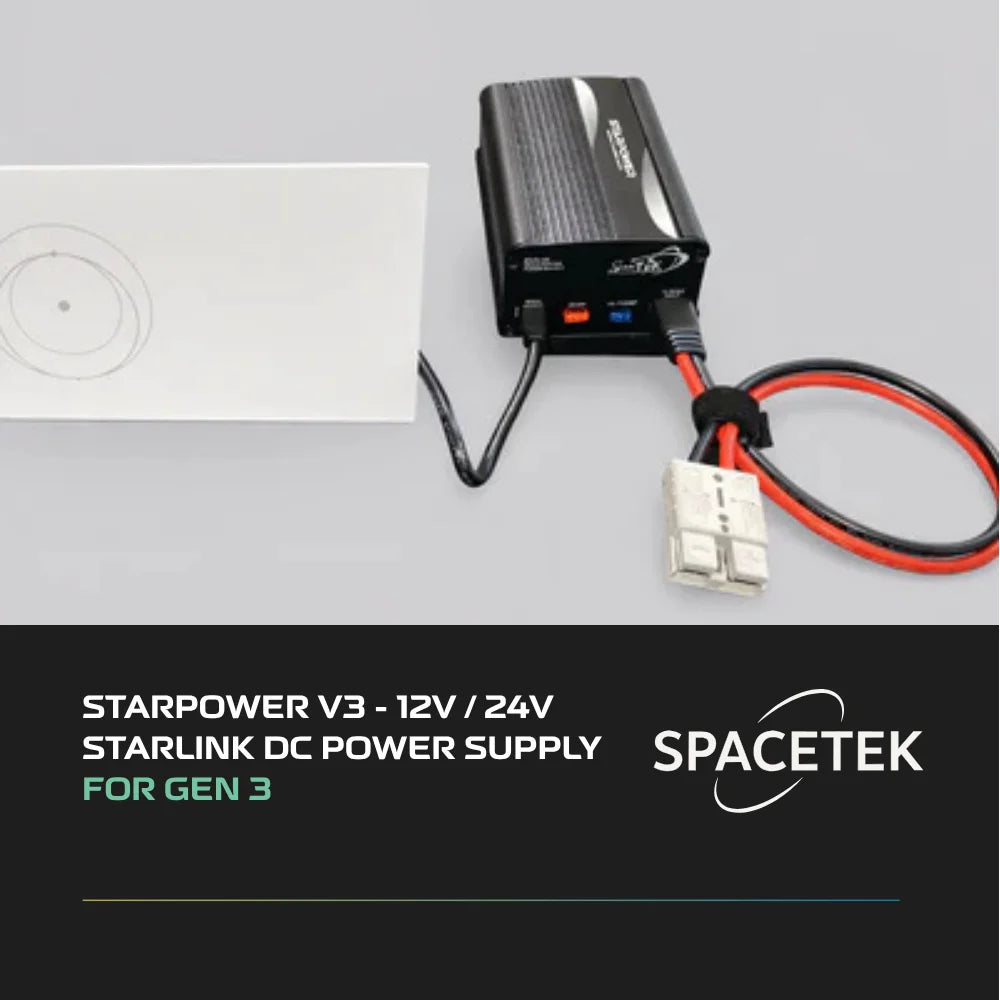
Another critical factor is power. While many try to run their systems off simple 12V batteries, standard 12V fluctuations can cause the router to reboot or the dish to lose connection. Starlink systems typically draw 50-75 watts, but this can spike to over 100 watts during heavy use or when the snow-melt (heating) feature activates. Achieving infrastructure independence requires stable, regulated DC power to ensure the system receives a consistent flow regardless of your battery’s state of charge. Explore these Starlink Essentials Must Have Accessories in Australia to see how we tackle these challenges.

SpaceTek Starlink Mounts and Accessories for Every Setup
We design our gear to bridge the gap between the "out of the box" Starlink experience and the rugged reality of the Australian outback. Whether you are setting up at home or on the roof of a 4WD, the goal is a seamless, professional installation.

For a broad overview of the local landscape, see A Quick Start Guide to Getting Starlink in Australia. You can also refer to the official Getting Started - Starlink Help Center for basic factory instructions.
Starlink Mini
The Mini is a game-changer for hikers and light travellers, but its portability shouldn't mean compromising on power stability. We provide vehicle mounting solutions that include integrated power sockets and DC-DC boosters. This ensures that even the compact Mini receives the stable regulated power it needs to perform at its peak while you are off-grid.
Gen 2 and Gen 3
The Gen 2 dish is the "actuated" model that moves itself, while the Gen 3 is the newer, slightly larger "manual" alignment model.
For first-timers, the Gen 3 kickstand is fine for a weekend, but for a permanent home setup, you’ll likely want to convert that kickstand into a pole mount. Using pipe adapters allows you to secure these dishes to existing masts or new poles.
For a detailed walkthrough, our How to Install Starlink: Complete Step-by-Step Guide (2026) covers the nuances of these different hardware generations.
RV and Caravan
Corrugated roads will rattle a standard mount to pieces. Our RV-specific brackets are designed for high vibration resistance and often feature quick-release mechanisms. This allows you to keep the dish securely on the roof while driving and quickly deploy it to a better location if you park under a thick canopy of gum trees.
If the DIY aspect seems daunting, you can always find a professional installer through our network.
Performance, Cables, and Accessories
If you are using the High-Performance kit, you are likely dealing with larger cables and higher power requirements. We stock everything from 150-foot extension cables for those difficult "long-run" installs to RJ45 connectors for custom networking. You can find all these "best friends" for your dish in our Starlink Accessories section.
Essential Features to Look for in Starlink Mounting Kits and Accessories
When shopping for accessories, "cheap" often ends up being expensive when the hardware fails in the sun or rain. We believe in buying once and installing right.
Key features to look for include:
- Weatherproofing: All hardware should be rust-resistant. We use marine-grade aluminium and stainless steel to prevent the "bleeding" of rust onto your roof or vehicle.
- Aluminium Construction: Unlike plastic, aluminium won't become brittle after a summer in the Pilbara or the Red Centre.
- Cable Protection: Starlink cables are proprietary and expensive. Look for mounts that allow for internal cable routing or provide UV-resistant conduit to protect the outer jacket from cockatoos and sun damage.
- Efficient Power Management: As mentioned, stable regulated DC power is the backbone of a reliable mobile setup.
- Easy Installation: A good mount shouldn't require an engineering degree to install.
For more on technical performance, see our Starlink Performance Complete Guide.
Common Starlink Mounting Mistakes to Avoid
The most common mistake Starlink for First-Timers make is underestimating the "view" the dish needs.
%20(16)_compressed.webp?alt=media&token=543e4176-83d1-4160-96a9-52c678459b74 "Starlink dish heavily obstructed by the canopy of a large gum tree")
- Obstructions: Even a single overhanging branch can cause a "no satellites" error. You need a 110-degree clear sky view. Use the app to ensure a 0% obstruction grade before you drill any holes.
- Non-weatherproof Hardware: Using standard hardware store bolts that aren't galvanized or stainless will lead to rust streaks and structural failure.
- Poor Cable Routing: Never kink the cable. A sharp bend can damage the internal fibre-like conductors. Always use a "drip loop" before the cable enters a building to prevent water from running down the wire and into your wall.
- Vibration: Mounting a dish to a flimsy gutter or a loose pole will cause speed fluctuations every time the wind blows.
- Poor Waterproofing: If you are mounting on a roof, use proper solar-rated sealants and flashings. A "bit of silicone" is rarely enough for a 10-year seal.
If you run into trouble, our Starlink Troubleshooting Guide is a great place to start.
Best Starlink Mounting Solutions for RVs, Caravans, Homes, and Off-Grid Travel
The "best" solution depends on how you use the internet. For a stationary home, a roof-peak mount or a tall mast is usually best to clear the roofline. For off-grid travel, the priority shifts to aerodynamic in-motion mounts and extreme heat tolerance.
%20(17)_compressed.webp?alt=media&token=3387c853-9cb2-40c4-b95e-fad0cbb6a98e "Caravan with a roof-mounted Starlink dish using an aerodynamic in-motion mount")
In the outback, temperatures can soar. Your mounting hardware should allow for adequate airflow around the dish to prevent thermal throttling. Our How to Set Up Starlink in Australia Step by Step for First Timers provides a roadmap for these various scenarios.
Starlink for First-Timers on the Road
If you want internet while moving, you need a flat-mount setup and a Mobile-Priority plan. This is where DC power conversion becomes essential. Running an inverter just to power the Starlink AC plug is inefficient and wastes precious battery capacity. A direct DC-DC setup is much more efficient for long-term touring.
Frequently Asked Questions About Starlink for First-Timers
How do I check for obstructions?
You must use the Starlink app. It features an Augmented Reality (AR) tool that lets you point your phone at the sky. It will highlight the "cone" the dish needs to see. Aim for a 0% obstruction grade. Even 5% obstruction can cause annoying drops during video calls.
Our guide on the Starlink App explains this process in detail.
Can I use Starlink in motion?
Yes, but only with specific hardware and plans. You need a "Flat" mounting solution and a Mobile-Priority service plan. This is popular for emergency readiness and heavy-duty touring.
What are the ongoing costs?
While we don't list specific prices as they change, expect a monthly service fee for residential plans. Roaming or mobile plans usually cost more but offer the flexibility to move the dish between locations. There are generally no data caps on standard residential plans, offering unlimited data for your household. For specific advice on your setup, contact us.
Conclusion
Setting up Starlink is a transformative experience for anyone who has struggled with slow internet. However, the hardware is only as good as the mount holding it and the power feeding it.
By choosing Australian-designed infrastructure, you ensure your system can handle the dust, heat, and vibrations of our unique landscape. Invest once, install it right, and enjoy the peace of mind that comes with a rock-solid signal. Whether you are at a cattle station in the Territory or a suburban home in Perth, SpaceTek Australia is here to help you get the most out of your connection.
Leave a comment
This site is protected by hCaptcha and the hCaptcha Privacy Policy and Terms of Service apply.