Why Your Starlink Gen 3 Wall Mount Choice Matters More Than You Think

A Starlink Gen 3 wall mount is the structural hardware solution that fixes your V4 dish to an exterior wall or eave — giving it the elevation and sky clearance it needs to actually perform.
Getting the mount right isn't just about looks. It's the difference between rock-solid connectivity and a dish that wobbles in a gust or loses signal behind your roofline.
Here's what you need to know upfront:
Quick answers for Starlink Gen 3 wall mounting:
- What it does: Secures the Gen 3 (V4) dish to an exterior wall or eave for a stable, permanent install
- Official kit includes: Wall mount, 2x lag screws, silicone sealant, and 40x cable clips
- Key spec: Accommodates up to 4 inches of overhang (eaves, fascia, gable)
- Tools needed: Drill, 6 mm drill bit, 9/16 in hex socket, marker, and level
- Best for: Rural homes, regional properties, trades site offices, and fixed residential installs
- Not ideal for: Deep eaves blocking sky view, weak wall cladding, or extreme wind zones without heavy-duty hardware
- Third-party mounts: Generally compatible with Starlink Gen 3 and won't void your warranty if no physical damage occurs to the dish
Whether you're a rural homeowner finally ditching the NBN wait, a tradie setting up a site office, or a farmer who just needs the internet to work — the wall mount is often the smartest, most accessible way to get your Starlink Gen 3 dish up and performing.
This guide walks you through everything: what to look for, how to install it, and which solutions are purpose-built for Australian conditions.
What Is Starlink Gen 3 and Who Is It Actually For?

The Starlink Gen 3 (often referred to as the V4) is the latest evolution in residential satellite hardware. While earlier versions relied on a motorised "self-aligning" base, the Gen 3 is a kickstand-style dish designed for a fixed, manual orientation. It is a absolute weapon for fixed installs, but it isn't a "throw-it-anywhere" kind of setup.
Compared to its predecessors, the Gen 3 features a wider field of view and improved obstruction handling. This means it can maintain a lock on satellites more effectively, even in areas where the sky isn't perfectly clear. The accompanying router is also a significant step up, being Wi-Fi 6 enabled with two built-in Ethernet ports, making it mesh-ready right out of the box.
We find this hardware is ideal for:
- Rural and Regional Homes: Where high-speed NBN or 5G isn't an option.
- Trades and Site Offices: Providing instant, high-bandwidth connectivity for demountables and ATCO huts.
- Farms and Large Properties: Ensuring sheds, workshops, and main houses stay connected.
- Semi-Mobile Setups: Great for regional travel or caravans where you have a consistent place to set up for a few days.
However, if you are an ultra-frequent mover who needs to set up in seconds, the Starlink Mini might be a better fit. Similarly, if you live in a tight urban canyon with massive buildings blocking every angle of the sky, no amount of mounting magic will fix a lack of "look angle."

Key Features of the Official Starlink Gen 3 Wall Mount Kit
The official starlink wall mount gen 3 is a robust, weather-resistant piece of gear. It is specifically designed to be installed near the top of a gable or fascia. Its primary job is to push the dish out far enough to clear minor obstructions while keeping it low enough for relatively easy access.
Key specifications include:
- Overhang Clearance: It can accommodate a maximum overhang of 4 inches (approx. 102mm). If your eaves are deeper than this, you'll need a custom solution.
- Dimensions: Roughly 18.5 x 4.1 x 1.1 inches, weighing in at 3.5 lbs (1.6 kg).
- Kit Contents: You get the mount itself, two heavy-duty lag screws, silicone sealant to prevent leaks, and a generous 40 wall clips for cable management.
For those living in smaller dwellings, Wall Mounting Starlink A Space Saving Solution For Small Homes explains how this specific setup keeps your property tidy while maximising signal.
Comparing Roof, Ground, and Wall Mount Scenarios
Choosing where to stick your dish is the most important decision you'll make. Each spot has its pros and cons:
- Roof Mounts: Generally offer the best 360-degree visibility. However, they require climbing onto the roof (safety risk!) and involve drilling holes into your primary weather barrier.
- Ground/Pole Mounts: Extremely flexible and easy to maintain, but they require clear space on the ground and are susceptible to lawnmowers, pets, or curious wildlife.
- Wall Mounts: The "Goldilocks" zone. You get the elevation needed to clear fences and sheds, but you stay off the roof. It offers a stable structural fix and makes cable routing into the house much cleaner.
When deciding, you need to measure your eave depth and check your wall material. Is it double-brick, timber cladding, or Colorbond? Each requires a slightly different approach. If you are stuck between choices, check out our guide on Wall Eave Or Pole Which Starlink Mount Is Right For You.
Choosing and Installing the Best Starlink Gen 3 Wall Mount Kit
In Australia, we face unique challenges: brutal UV rays that turn plastic brittle, coastal salt air that eats cheap steel, and "cockie" (cockatoo) attacks on cables. A standard kit might work in a mild climate, but down here, we need something tougher.
When selecting a Gen 3 Starlink mount kit, prioritising clear sky visibility is non-negotiable. Use the Starlink app to check for obstructions before you even pick up a drill. You also need to consider wind stability. The Gen 3 dish has a large surface area; in a high-wind event, a flimsy mount will vibrate, causing your speeds to tank or your connection to drop entirely.
For a deeper dive into the technical side, we recommend reading The Ultimate Guide To Starlink Gen 3 Mounting Kits Which One Is Right For You and our specific tips on Mounting Starlink Gen 3 In Australia Made Easy.
SpaceTek Solutions for Harsh Australian Conditions
At SpaceTek, we don't do "one-size-fits-all" because Australian homes aren't all the same. Our mounts are precision-engineered from high-quality aluminium—not 3D-printed plastic. They are lightweight, rust-resistant, and built to handle the heat.
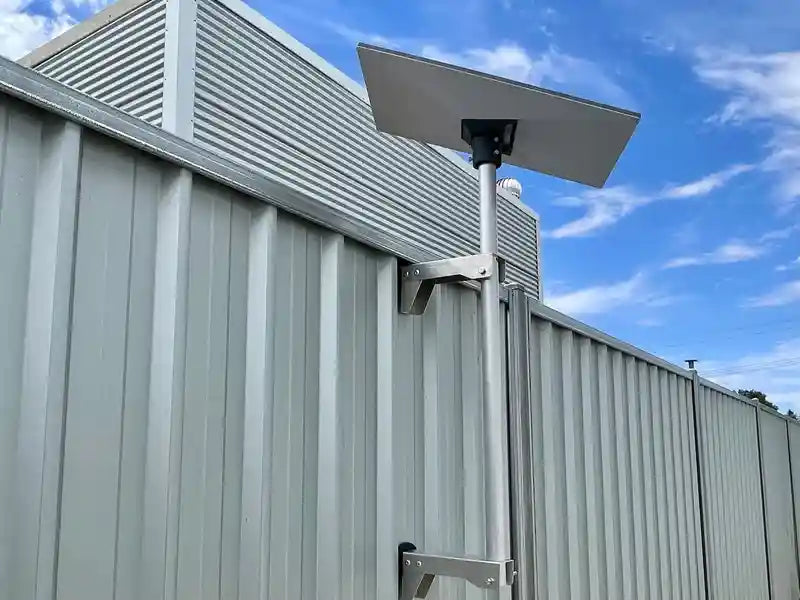
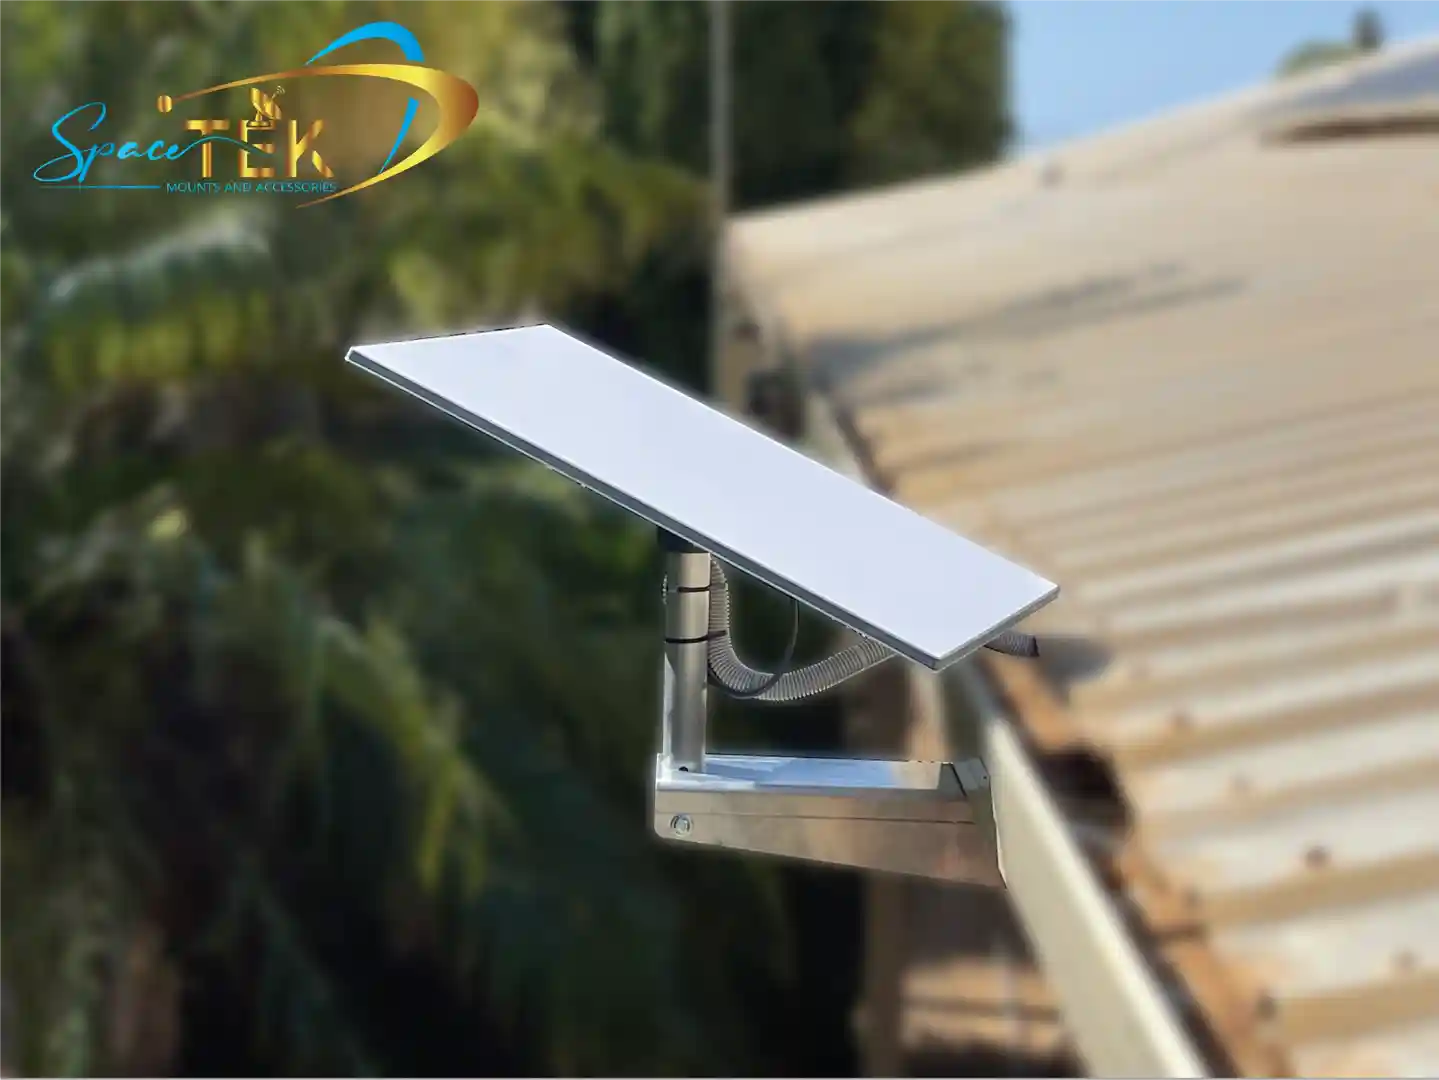
- Standard Wall/Eave Mount (340mm Arm): Perfect for standard residential eaves. It provides a fixed 20-degree mast angle, perfectly aligned with Starlink's performance specs.
- Deep Eave Mount (765mm Arm): Designed for tropical builds or modern homes with deep overhangs. This ensures your dish sits well clear of the gutter line.
- The "Site Hut" Special: We’ve developed a Starlink Gen 3 Mount Kit specifically for ATCO huts, site offices, and Colorbond fences. It uses a compression clamp system, meaning you don't need internal framing to get a rock-solid fix.
- Internal Organisation: Don't let your expensive hardware dangle by its cords. Our Starlink Gen 3 Power Supply Cradle and Moulded Wall Mount Holder keep your router and PSU tidy, safe, and professional-looking.
All our gear is Gen 3 Starlink mounts built for Australian winds, ensuring your signal stays steady when the weather turns nasty.
Step-by-Step Guide to Installing Your Starlink Gen 3 Wall Mount
Ready to get to work? Follow these steps for a professional finish:
- Survey the Site: Use the Starlink app's obstruction tool. Find a spot on the wall that has a completely clear view of the northern sky (in Australia).
- Mark Your Holes: Hold the base plate against the wall. Use a level to ensure it's perfectly vertical. Mark the holes with a pen. If you're mounting to timber or a stud, ensure you are centered on the structural beam.
- Drill Pilot Holes: Use a 6mm (1/4 in) drill bit. If drilling into masonry, use a masonry bit. Pro tip: Drill at a slight downward angle. This prevents water from "running" into the hole.
- Seal and Secure: Squeeze a generous amount of silicone sealant into the holes and around the back of the mount. Screw in the lag screws using a 9/16-inch hex socket until tight.
- Route the Cable: Feed the cable through the mount before clicking the dish into place. Ensure the connection is fully flush and seated.
- Final Alignment: Click the Gen 3 dish into the mast adapter. Use the app to confirm your alignment is optimal.
For more detailed visuals, check out our guide: Hang Tight How To Install Your Starlink Dish Wall Mount.
When to Avoid a Wall Installation
We want you to have the best internet possible, which sometimes means telling you not to use a wall mount. Avoid this setup if:
- Your Eaves are Massive: If your eaves extend 600mm+ and you're using a short-arm mount, the roof will block half the sky.
- Multi-Storey Shadowing: If you are mounting on the first floor of a two-storey house, the upper wall might obstruct the dish.
- Weak Cladding: Old, brittle asbestos sheeting or thin plastic cladding won't hold the weight of the dish under wind load.
- Extreme Wind Zones: If you are in a cyclonic region, a standard wall mount may not be enough. You might need a Starlink Gen 3 Pole Mount Kit with additional stays.
If you're unsure, it's always worth consulting a pro. You can Find a Starlink installer in Australia through our network of trusted partners.
Why SpaceTek is the Best Choice for Starlink Wall Mount Australia
When you search for a starlink wall mount Australia, you'll see plenty of cheap, generic options. But there's a reason SpaceTek is the go-to for commercial installers and remote residents alike.
We don't just sell mounts; we provide complete solutions for the Australian environment. Our aluminium base plates won't rust in the salt spray of the Gold Coast or the humidity of Darwin. We focus on durability, ease of install, and real-world usability. Whether you are a residential user or managing a fleet of off-grid mining camps, our gear is built to hold up in the "Aussie wild."
Explore our full range of Starlink Gen 3 mounting solutions to see the difference quality engineering makes.
Frequently Asked Questions About Gen 3 Mounting
What is the wind rating for Starlink Gen 3 wall mounts?
Most standard mounts are rated for winds up to 80 kph (approx. 50 mph). However, SpaceTek's heavy-duty aluminium designs are engineered to provide superior stability in gusty Australian conditions compared to generic plastic alternatives.
Will a third-party mount void my Starlink warranty?
No. Using a high-quality third-party mount does not void your warranty. As long as the mount doesn't physically damage the dish or the cable connector, your Starlink protection remains intact.
How does the Gen 3 mount differ from the Gen 2?
The Gen 3 (V4) dish does not have a "kickstand" motor like the Gen 2. It requires a mount that can support its flat-panel design and manual orientation. If you are upgrading, read Gen 2 vs Gen 3 what mount upgraders need to know.
What maintenance does a wall mount require?
Very little! We recommend checking the lag screws once a year to ensure they haven't loosened due to house vibration, and occasionally clearing any spider webs or debris from around the dish base to ensure optimal cooling.
Conclusion: Build a Setup That Actually Lasts
Your choice of starlink wall mount gen 3 is the foundation of your home's connectivity. A smart wall-mounted setup offers the perfect balance of performance, safety, and aesthetics—provided you use the right hardware.
Don't settle for a "she'll be right" approach with a flimsy mount. Invest in a solution designed for our sun, our wind, and our homes. Whether you need a standard eave mount or a custom site hut solution, SpaceTek has the gear to get you online and keep you there.
Ready to upgrade your install? Explore the full SpaceTek range today.

Leave a comment
This site is protected by hCaptcha and the hCaptcha Privacy Policy and Terms of Service apply.