Understanding Starlink Gen 3 and Its Unique Mounting Requirements
Australia's vast and challenging landscape has long presented connectivity problems for those living outside major urban centres. Starlink Gen 3 has emerged as a game-changer, delivering high-speed internet to previously underserved regions. However, maximising your Starlink performance requires proper mounting - a critical factor often overlooked in initial setup considerations.
Secure mounting isn't just about stability; it directly impacts signal quality, system longevity, and performance during Australia's extreme weather conditions. Whether you're installing on a remote homestead, coastal property, or mobile setup, choosing the right mount makes all the difference.
For those new to satellite internet technology, proper positioning and mounting represent the foundation of a reliable connection that can withstand everything from cyclonic winds in the north to alpine conditions in the south.
If you're looking for Starlink Gen 3 mount options, here's a quick guide:
Best Starlink Gen 3 Mount Options from SpaceTek Australia:
- Gen 3 Roof Mounts: Ideal for permanent home installation; secure, stable, and weatherproof.
- Gen 3 In-Motion Mounts: Designed for vehicles, caravans, and RVs; robust and road-ready.
- Portable Mounts: Easy-to-install mounts perfect for remote communities and temporary setups.
In this guide, you'll learn everything you need to customise and optimise your Starlink Gen 3 installation—giving you the reliable, high-speed connectivity you need, even far from town.

Starlink's Gen 3 system (also known as V4 or Standard) represents a significant evolution in satellite internet technology. If you've recently upgraded or are considering making the switch, it's important to understand what makes this generation different—especially when it comes to mounting options.
The Gen 3 Starlink dish features a flat, non-motorised design that's more streamlined than previous generations. This new design isn't just about aesthetics; it reflects a fundamental shift in how the system operates and connects to satellites.
"The installation process for Gen 3 dishys is notably more refined than that of Gen 2," reported one Australian user who recently completed their first Gen 3 installation. This streamlined process makes setup easier, but it also means that starlink gen 3 mount australia options need to be specifically designed for this new hardware.
Key Features of Starlink Gen 3
- Flat, non-motorised dish design - Unlike the motorised dishes of earlier generations, the Gen 3 dish is static, requiring precise initial positioning
- Standard network connectors (RJ45) with improved weatherproofing for outdoor durability
- Different mounting connection point - Gen 3 uses a kickstand that can be replaced with a specialised adapter for pole or wall mounting
Compatibility with Previous Generations
One of the most common questions we receive at SpaceTek Australia is whether Gen 3 mounts are compatible with previous Starlink generations. The short answer is no. As one user on a discussion forum noted: "No, none of the mounts are compatible between Gen 2 and Gen 3."
This incompatibility means that if you're upgrading from an earlier Starlink system, you'll need to invest in new mounting hardware specifically designed for Gen 3. While this might seem inconvenient, the specialised design ensures optimal performance and stability for your new system.
Why Custom Mounts Matter for Gen 3
The unique design of the Starlink Gen 3 system requires mounting solutions that are:
- Specifically engineered for the connection points on the Gen 3 dish
- Robust enough to handle Australia's extreme weather conditions
- Properly designed to maintain the correct angle for optimal satellite communication
As a real-world example, consider this feedback from Tegan W, a SpaceTek customer: "I needed a mount for my Starlink and after speaking with Aaron he had everything I needed, but when you buy off the internet you just aren't always sure... when it arrived I was mind blown with the quality and precision fit the dish was inside the mount was perfect."
This testimonial highlights the importance of choosing mounts that are precisely engineered for the Gen 3 system, ensuring a secure fit and optimal performance.
Best Starlink Gen 3 Mounts in Australia
Choosing the best Starlink Gen 3 mount Australia has to offer isn't just about convenience—it's about reliability, safety, and ensuring you stay connected in every corner of our beautiful country. Whether you're setting up permanently at home, heading off-road with your caravan, or working remotely in the outback, having the right mount makes all the difference.
At SpaceTek Australia, we've developed a range of custom-engineered mounts specifically designed for Starlink Gen 3 systems. Our mounts aren't just tough—they're built Aussie-tough, made with precision-machined, rust-resistant aluminium base plates and rugged components that handle the harshest Australian conditions.
Let's explore the best mounting solutions to keep your Starlink Gen 3 dish secure, stable, and performing at its best.
Roof Mounts: Starlink Gen 3 Mount Australia Options
Roof mounts are your go-to solution if you're planning on a permanent home installation. They're strong, secure, and designed to stand up to Australia's challenging environments—from scorching heat to gale-force winds.
Tin Roof Mounts
Our Heavy Duty Galvanised Tin Roof Mount is a popular choice among Aussies. Built specifically for Starlink Gen 3, it features a robust, heavy-duty galvanised steel construction with a 45mm centre pole and two high-load support bars. This mount fits securely onto all common tin roof profiles, ensuring reliable performance no matter how fierce the weather gets.
With this mount, you also get a practical 20-degree tilt angle—perfect for preventing snow build-up in alpine areas like the Snowy Mountains. Installation is straightforward, using heavy-duty 14G Wood Tek screws and galvanised M8 bolts and washers, making your mount rock-solid and reliable for years to come.
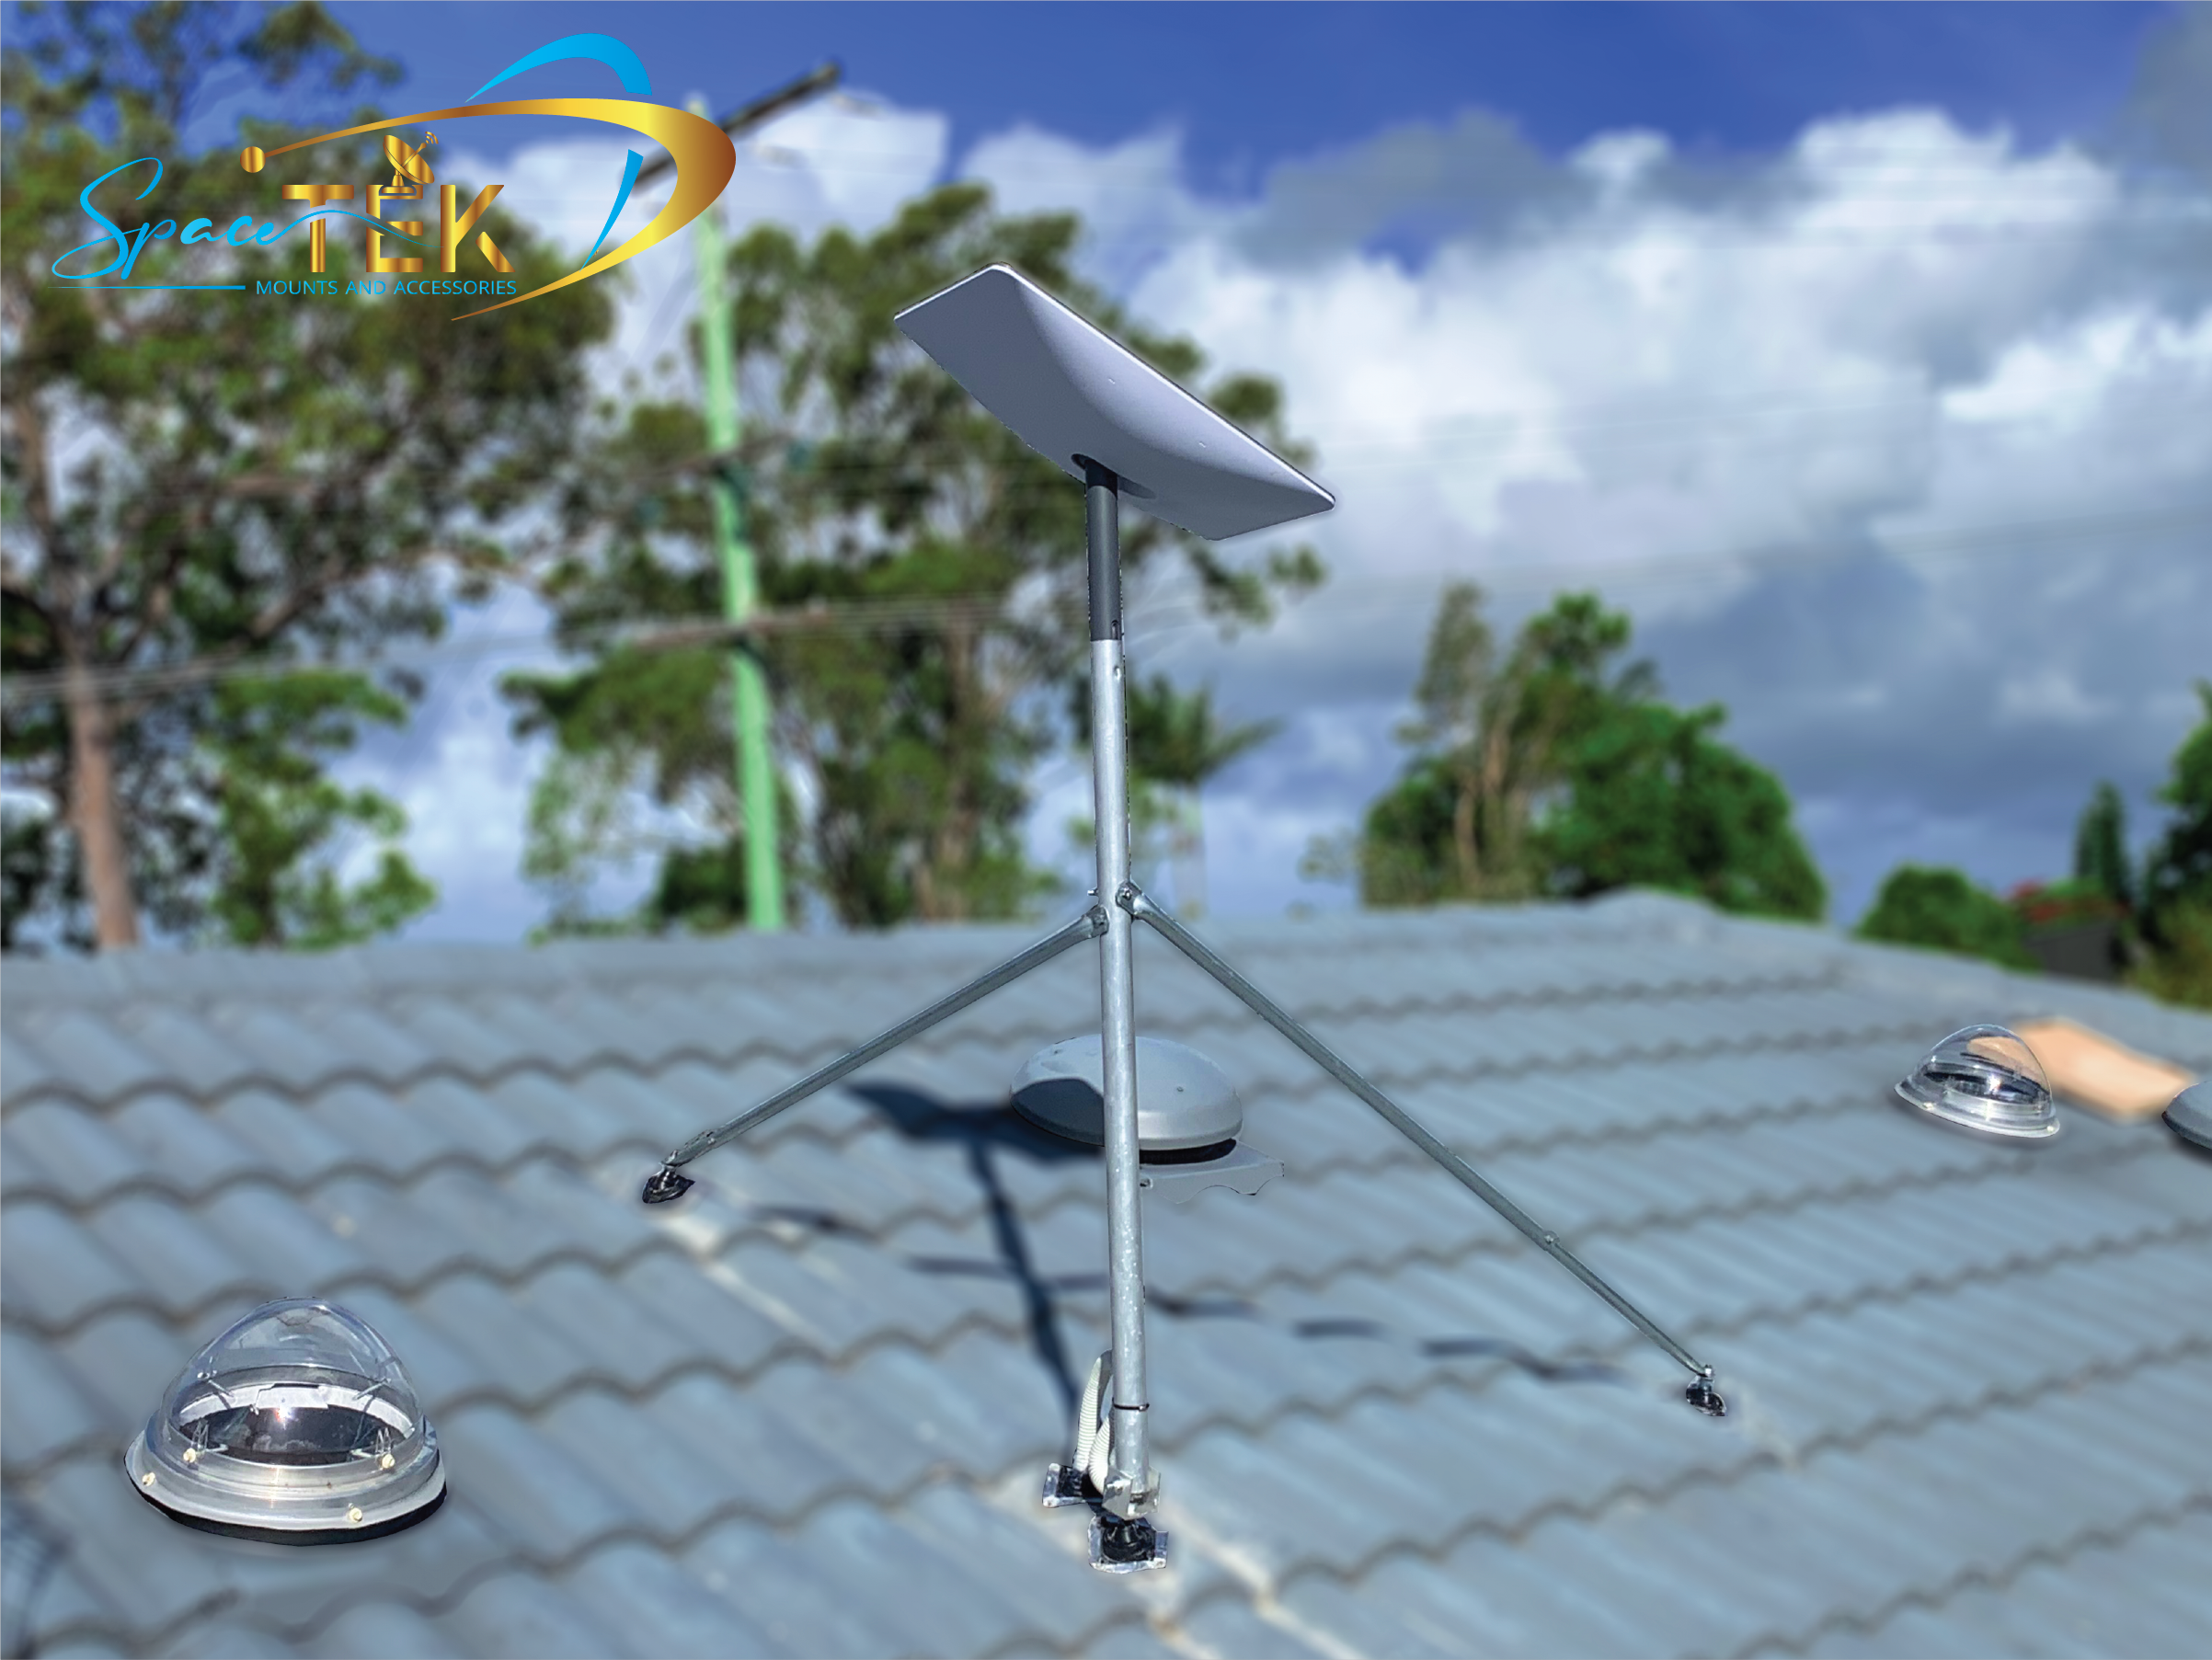
Tile Roof Mounts
Got a tile roof? No worries—we've got the perfect Starlink Gen 3 mount Australia solution for tile roof installations, too. Our specialised Tile Roof Mount Kit integrates securely beneath your roof tiles without compromising the roof's integrity. An adjustable height feature allows you to clear ridges easily, ensuring your dish is perfectly positioned for optimal signal strength.
Our tile mounts also come with custom weatherproof sealing components, ensuring your roof stays watertight and your home stays dry—no matter how much rain Mother Nature throws your way.
High Wind Considerations
If you're in a spot that's prone to high winds (hey there, Tassie and coastal WA!), stability is absolutely crucial. We've engineered mounts specifically rated for high-wind conditions, featuring reinforced connection points and additional stabilising components for peace of mind during storms.
In fact, our high wind-rated mounts are engineer-certified for wind survivability across all Australian wind regions—from mild suburban breezes to wild outback gusts and cyclone-prone areas. As one satisfied customer in a high-wind location shared, "Cohen did a great job installing our Starlink. He was very thorough and excellent at problem-solving since every location is different."
In-Motion Mounts: Starlink Gen 3 Mount Australia for Vehicles
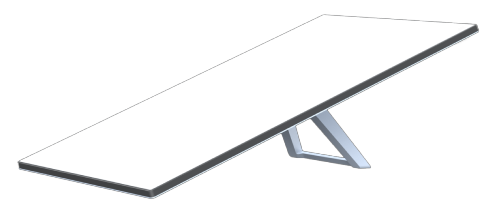
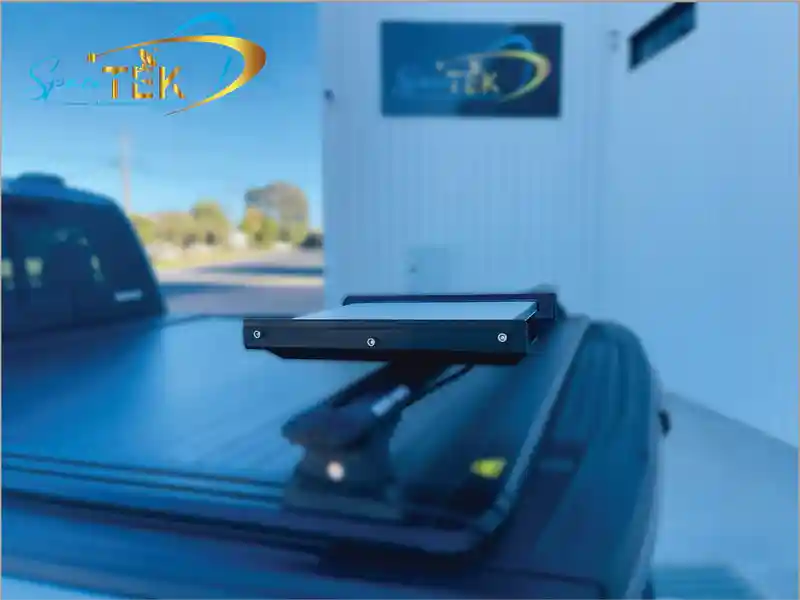
If you love hitting the open road in your caravan or RV, or work regularly on the move, our in-motion mounts are your best mates. SpaceTek’s TRIO Speedmount is a sleek, robust solution specifically designed for vehicle-mounted Starlink dishes, allowing you to maintain stable internet connectivity wherever your trips take you.
Constructed from UV-resistant ASA thermoplastic—the same tough, weatherproof material used in automotive bumpers—our TRIO Speedmount offers durability without sacrificing aerodynamic performance. Its low-profile design (just 47mm high!) minimises wind resistance and keeps your Starlink dish protected with integrated edge protection.
Installation is a breeze, too. Simply slide the four components around your Gen 3 dish, secure them with stainless steel screws, and choose your preferred mounting method—whether through-bolts, magnetic fixtures, suction cups, or adhesive landing pads.
Just a quick note: while these mounts are specifically designed for vehicle use, make sure your setup complies with Starlink’s terms of service regarding in-motion operation.
Portable Mounts for Remote Australia
Travelling to remote communities or working on temporary setups in the Aussie outback? Our portable mounts have got your back. Designed specifically for flexibility and quick deployment, they're perfect when you need reliable internet on-the-go without the fuss of permanent installation.
Whether you're setting up internet access at remote worksites, responding to emergencies, or simply exploring our incredible country, SpaceTek’s portable mounts help you stay connected. Versatile and easy to assemble, they can be positioned securely on the ground, temporarily mounted to a roof, or even attached to your vehicle.
For communities in remote Australia that often lack traditional infrastructure, these portable mounts are game-changers—offering fast, reliable Starlink internet connections exactly when and where they're needed most.
At SpaceTek Australia, we understand that every installation is unique. That's why our mounts are engineered to adapt, endure, and excel—keeping you reliably online wherever your Aussie trips and jobs take you.
How to Install Your Starlink Gen 3 Mount
Installing your new Starlink Gen 3 mount properly is key to getting the best performance from your satellite internet—and avoiding headaches down the road. While the exact steps vary a bit depending on your chosen mount (roof, portable, or vehicle), these general tips will help you get started confidently and safely.
Pre-Installation Planning
A little bit of planning before you climb the ladder can save you time, trouble, and perhaps even a few scraped knuckles. First, download the Starlink Install app which helps you find the perfect spot for your dish. Starlink dishes need a clear, unobstructed view of the sky, so spend a little time choosing an area free from trees, buildings, and power lines.
Next, gather all the tools you'll need for your particular mount. The essentials usually include a power drill, quality screws or bolts, wrenches, levels, and safety gear. Double-check your mounting kit’s instructions for specifics. And here's a tip every seasoned installer will confirm: always check the weather first! You definitely don't want to be wrestling a dish onto your roof during a thunderstorm.
Basic Installation Steps
Most roof mounts follow a similar process. First, you'll remove the kickstand from your Starlink Gen 3 dish. Next, install the specialised pipe adapter that connects your dish securely to the mount hardware.
Once your adapter is set, attach your mount to your chosen surface—roof, wall, or vehicle—making sure it's level and stable. Finally, carefully fix your dish onto the mount via the adapter and tighten securely. Route and secure the cable to prevent damage and strain—this is a great time to consider SpaceTek's cable management products to keep things tidy and protected from Australia's harsh climate.
“The kickstand is removed and replaced with an adapter that accepts the pole—installation instructions are provided via a link to the official guide,” as one Starlink user pointed out.
DIY vs Professional Installation
Thinking of tackling the installation yourself? It’s definitely possible, and plenty of Australians have successfully installed their own Starlink Gen 3 setups. Some benefits include saving a bit of cash, choosing your own installation time, and the satisfaction of a job well done.
However, Starlink users in Australia should know there's a real advantage to professional installation, particularly for permanent or complicated setups. A trained installer brings expertise in finding the optimal signal position, proper weatherproofing, neat cable management, and ensuring compliance with local building codes.
In fact, telecommunications cabling in Australia legally requires installation by a registered cabler as per ACMA and ASIAL standards. As the Australian Communications and Media Authority (ACMA) clearly states: "To work as a cabler in Australia, you must be registered. You must also understand the requirements of your registration. This protects the safety of cablers and customers and the network."
So, if your installation involves running cables through walls, ceilings, or roofs, engaging a professional is not just a good idea—it’s a legal necessity.
Safety Tips
Whether you choose to DIY or hire a professional, prioritising safety is always a must. Make sure you use appropriate safety gear—gloves, eye protection, and a secure harness if working at heights. Never attempt installation in stormy or windy conditions, and always maintain a safe distance from power lines or electrical hazards.
If you’re installing your Starlink Gen 3 mount on a roof or tall structure, having a mate act as a spotter is a great way to ensure safety. Also, secure your tools to prevent accidental drops that could cause injury or damage property.
A secure installation not only gives you peace of mind but also ensures your Starlink dish stays in place during those fierce Aussie storms or high winds—keeping you online and connected when you need it most.
Essential Accessories for Your Starlink Gen 3 Setup
Setting up your new Starlink Gen 3 system is just the first step towards reliable connectivity. To truly maximise your Starlink experience in Australia—especially in those remote regions—you'll want to consider a few key accessories. These extras might seem small, but they make a big difference in keeping your system running smoothly and efficiently, year-round.
Cable Management Solutions
Let's start with cable management. It may not sound exciting, but trust us—it's a game changer. When your Starlink cable is exposed to Australia's harsh conditions, it's vulnerable to UV rays, rain, dirt, and even wildlife (yes, we're looking at you, curious possums). Damaged or frayed cables mean weaker signals, unstable connections, and costly replacements—none of which you want in a remote location.
At SpaceTek Australia, we've designed straightforward, effective solutions to keep your cables protected, neat, and organised. Our weatherproof cable sleeves provide robust protection against harsh elements, while heavy-duty cable ties and cable clips secure your cabling safely away from potential damage.
With a standard Starlink cable length of 22.9 metres (or the optional 50-metre cable for longer installations), proper protection and organisation can make life a whole lot easier. You'll spend less time untangling wires or checking for damage, and more time enjoying a reliable connection. That's a win-win.
Dish Covers
Next up, let's talk about dish covers. Australia might not be known globally as a snow-covered wonderland, but certain regions—particularly the alpine areas—do see significant snowfall. Plus, even without snow, dirt, rain, leaves, and debris can accumulate and interfere with your dish's performance.
That's where a sturdy, weather-resistant dish cover comes into play. These covers shield your Starlink Gen 3 dish from snow build-up, debris, and dirt, ensuring a clear signal and fewer disruptions. You won't have to climb onto the roof to clear debris after every storm (your knees will thank you!).
A clean, protected dish translates into reliable internet, reduced maintenance hassles, and the peace of mind that comes with knowing your investment is well-protected from the elements.
Wi-Fi Optimisation Accessories
Here's something important many users overlook: your Starlink dish can have fantastic signal strength and stability, but if your Wi-Fi isn't reaching all corners of your property, you won't fully benefit from that connection. That's why Wi-Fi optimisation accessories are essential to ensuring reliable internet throughout your entire home or workplace.
At SpaceTek Australia, we provide simple yet effective solutions to get the most out of your Starlink connection. Our router mounting brackets allow you to position your router strategically for improved coverage. For larger properties or multi-level homes, our Wi-Fi extenders and mesh network components ensure every room gets strong, consistent Wi-Fi coverage.
Consider the experience of one of our customers who praised the customisation and optimisation provided by our installer: "They did a great job at our place customising the setup to our needs." Often, this includes finding just the right router placement or adding Wi-Fi extenders to make the most of the Starlink connection.
That the default Starlink router only offers Wi-Fi connectivity. If you’re planning to connect devices via Ethernet for a more stable wired connection, you'll need a Starlink Ethernet adapter—another detail worth considering when you're planning your setup.
By investing just a little into cable management, dish covers, and Wi-Fi optimisation accessories, you'll ensure your Starlink Gen 3 Mount Australia setup stays reliable, tidy, and effective—no matter what Australia's unpredictable environment throws your way.
Frequently Asked Questions about Starlink Gen 3 Mounts in Australia
Are Gen 3 mounts compatible with previous Starlink generations?
Unfortunately, no. Starlink Gen 3 mounts are not interchangeable with earlier models like Gen 2, primarily due to major differences in their dish designs and mounting connection points. As one user put it, "No, none of the mounts are compatible between Gen 2 and Gen 3."
This means if you're upgrading from a previous Starlink generation, you'll need a new Starlink Gen 3 mount designed specifically for the latest dish. While it might feel like an extra cost, this custom design ensures your new Gen 3 dish fits perfectly, stays secure and delivers optimal performance.
What are users saying about different Gen 3 mount options in Australia?
Feedback from Australians who've purchased Starlink Gen 3 mounts from SpaceTek has been extremely positive, highlighting our mounts' reliability, precise engineering and excellent local support.
Take, for example, a review from Tegan W: "I needed a mount for my Starlink, and after speaking with Aaron at SpaceTek, he had exactly what I needed. But when buying online, you're never 100% sure what you'll get. When the mount arrived, I was blown away! The quality was amazing, and the mount fitted the dish perfectly. I highly recommend Aaron's service and the quality of the SpaceTek mounts."
Another satisfied customer, Cliff Hammond from Mirboo North, mentioned, "Cohen is obviously technically proficient, and he does exactly what he promises." John Dixon from Seaspray echoed this sentiment, stating simply, "From my initial contact with Cohen, he delivered exactly as promised."
These genuine experiences show the value of investing in a well-made, custom-engineered Starlink Gen 3 mount Australia solution designed specifically for Australia's rugged conditions.
How do I choose the right mount for my Starlink Gen 3?
Choosing the right mount for your Starlink Gen 3 setup comes down to your specific installation requirements and environmental conditions. First, consider your installation location—will it be on a tin or tile roof, on the ground or even on your vehicle? Roof mounts offer secure, stable solutions for permanent setups, while portable or in-motion mounts are ideal if you need flexibility or mobility.
Next, think about the permanence of your installation. If you're travelling around rural Australia or frequently moving your setup, portable and in-motion mounts make the most sense. For permanent home installations, go with a sturdy roof mount custom for your roofing material and local conditions.
Environmental factors also play a role. If you live in an area with high winds or extreme weather, investing in a rugged, wind-rated mount with reinforced connection points and additional stabilisation is smart. Your mount choice should also factor in how easy it is to access the dish for maintenance, especially if your roof is hard to reach.
Lastly, consider your budget. While a quality mount is an investment, choosing one designed specifically for your needs and built from durable materials will save you money in the long run. A quality mount from SpaceTek will reduce ongoing maintenance costs and prevent unexpected replacements.
One helpful tip from an experienced user: "If you're thinking ahead about future upgrades, consider an aftermarket J-mount with a pipe adapter to ensure compatibility with potential future Starlink generations." This kind of forward-thinking can pay off down the track.
What speeds can I expect from Starlink Gen 3 in Australia?
Starlink Gen 3 dishes typically deliver impressive download speeds of around 100Mbps to 200Mbps in Australia, with upload speeds often ranging from 5Mbps to 20Mbps. These speeds are particularly exciting for remote or rural users who previously relied on slower, less stable internet solutions.
However, it's important to keep in mind that actual speeds can vary. Factors such as dish placement, clear line-of-sight, local network congestion, weather conditions and even your specific geographic location within Australia can affect your real-world results.
That's why it's crucial to ensure optimal dish positioning and secure mounting. A properly installed and securely mounted Starlink Gen 3 dish ensures stable satellite connectivity, helping you enjoy consistent, fast internet speeds even in Australia's remotest corners.

Connectivity Without Compromise
As we've explored in this guide, finding the right mounting solution for your Starlink Gen 3 system is critical—especially in Australia's challenging environment. At SpaceTek Australia, our mission is straightforward: we provide carefully engineered, robust mounting solutions made specifically for Aussie conditions and the unique design of Starlink Gen 3 dishes.
Our mounts aren't just sturdy; they're built from rust-resistant materials to handle everything from scorching Outback sun and relentless coastal winds to heavy rains. Wherever you are—out bush, by the beach, or somewhere in between—our mounts deliver the rock-solid stability your Starlink system needs for reliable, high-speed internet.
This reliability isn't just a convenience; for many Australians, it's life-changing. In remote regions, where internet infrastructure is limited or doesn't exist, a properly set-up Starlink system can open doors to better education, improved healthcare access, vital business opportunities, and stronger social connections. Starlink for Remote Australia isn't just a phrase—it's a necessity.
Jenny Smith from Port Albert summed it up perfectly: "I cannot rate Cohen highly enough. We have been experiencing difficulties with NBN reception for some time." Jenny's sentiment echoes across many remote communities in Australia, where Starlink has replaced frustration with seamless connectivity.
Whether you're looking for a permanent Starlink installation on your home, need reliable internet on your caravan trips, or require a flexible solution for a remote worksite, SpaceTek has you covered. Every single mount we create is engineered with precision, built thoughtfully, and proven in real-life Australian scenarios. We understand that the right mount isn't just an accessory—it's fundamental to the quality and consistency of your internet service.
So why settle for anything less? With SpaceTek Australia, you'll never have to compromise on connectivity again.
Learn more about Starlink Mounting Hardware
Ready to find your ideal Starlink Gen 3 mount solution in Australia? Contact the friendly experts at SpaceTek Australia today—we'll help you find the perfect match for your unique needs, and ensure you're perfectly set up for years to come.
Leave a comment
This site is protected by hCaptcha and the hCaptcha Privacy Policy and Terms of Service apply.