The Hidden Factor Behind Starlink Performance

Starlink pole mounts are specialised hardware solutions that elevate your dish above obstructions and lock it into a rigid, vibration-resistant position. Without a stable mount, even the most advanced Starlink dish can underperform — wind movement, poor alignment, and vibration all degrade your signal.
Here is a quick summary of what you need to know:
- What they do: Raise the Starlink dish above trees, rooflines, and other obstructions to maintain clear line-of-sight to satellites
- Why stability matters: Even minor dish movement from wind or a low-quality mount causes signal loss, packet drops, and speed drops
- Who needs one: Anyone installing Starlink at a home, farm, RV and caravan, boat, or commercial vehicle
- Compatible dishes: Starlink Gen 2, Gen 3 (V4), Mini, and High Performance antennas all have specific pole mount requirements
- Pole diameter range: Most pipe adapters fit poles from 31 mm (1.25 in) up to 63.5 mm (2.5 in) — metal poles only, not PVC or plastic
- Mount types available: Ground pole, roof pole, pipe adapter, adjustable kit, RV clamp, non-penetrating, and marine mounts
- Key buying factors: Material quality, weather resistance, adjustability, and compatibility with your specific Starlink generation
For Australians in rural and remote areas, the mount is not an afterthought — it is the foundation of your entire connection.
Harsh UV, coastal salt air, high winds, and extreme heat all accelerate the failure of cheap or poorly engineered mounts. Choosing the right pole mount from the start means fewer outages, less maintenance, and a connection you can actually rely on.
Why Mounting Quality Directly Impacts Starlink pole mounts Performance
When we talk about satellite internet, we are dealing with high-frequency signals travelling thousands of kilometres. For this connection to remain stable, the dish must maintain a precise orientation. This is where Starlink pole mounts transition from being a simple accessory to a critical piece of engineering.
Signal Alignment and Stability
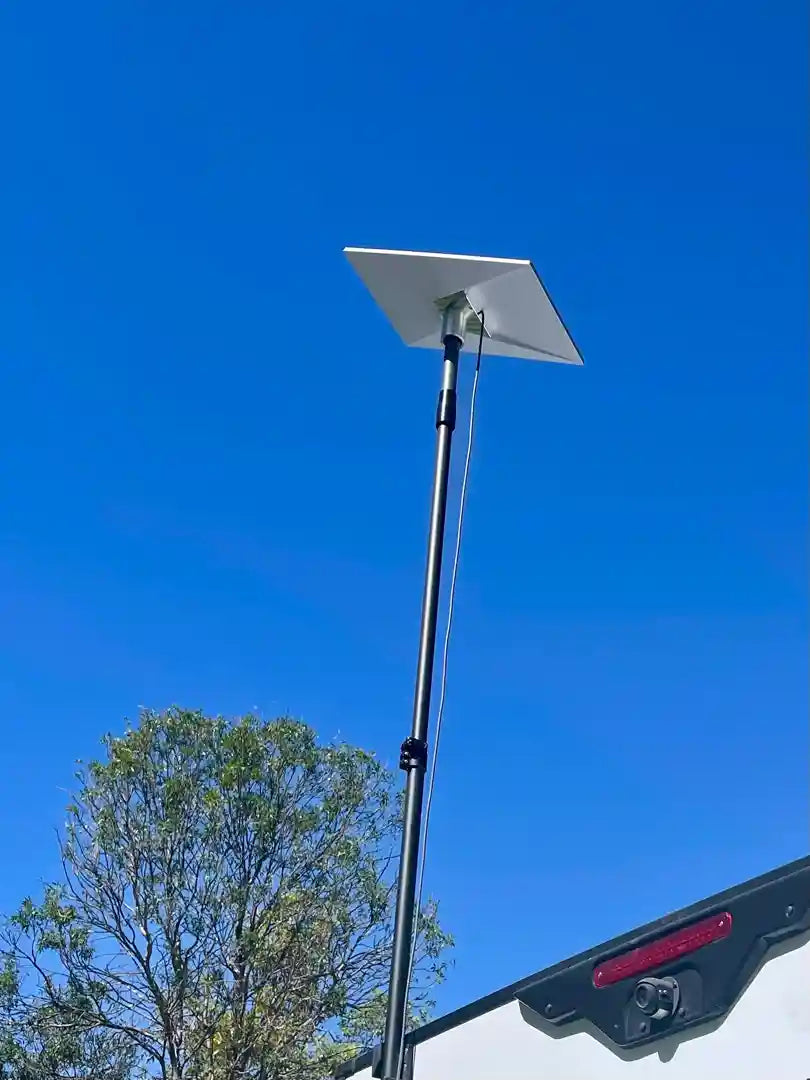
The primary enemy of a high-speed connection is micro-movement. While the Starlink software can compensate for some movement, constant swaying caused by a flimsy mount leads to packet loss. We focus on precision machining to ensure that the interface between the dish and the pole is seamless. A secure fit reduces the "wobble" that occurs during high-wind events, which is essential for maintaining the signal-to-noise ratio required for low-latency gaming and video conferencing. How A Starlink Pipe Adapter Solves The Alignment Problem highlights how a dedicated adapter creates a mechanical lock that generic brackets simply cannot match.
Material Integrity: Aluminium vs. Carbon Fibre
In the Australian environment, material choice is everything. We avoid 3D-printed plastics because they degrade rapidly under our intense UV levels. Instead, we utilise high-quality aluminium and carbon fibre.
- Aluminium: Provides a lightweight yet incredibly strong frame that naturally resists corrosion, especially in coastal areas.
- Carbon Fibre: Used in our telescopic poles, this material offers an unmatched strength-to-weight ratio, allowing for high elevation without the "whipping" effect seen in thin-walled steel pipes.
Research into wind loads on satellite structures confirms that the more rigid the mounting platform, the more consistent the data throughput. By using vibration-dampening designs, we ensure that the mechanical stress of the wind is absorbed by the mount, not the dish's internal motors. You can learn more about these benefits in our guide on The Case For A Starlink Dish Pole Mount.

Comparing Roof and Pole Options
Choosing between a roof-mounted bracket and a standalone pole often comes down to your specific property layout. While a roof mount is compact, Starlink pole mounts allow you to move the dish away from the house to clear large gum trees or neighbouring structures. For a detailed breakdown of which choice suits your home, see our comparison on Roof Vs Pole Mounts Which One S Best For Your Starlink Setup.
Matching Mounts to Specific Use Cases
Every installation environment presents unique challenges. We have engineered specific solutions to ensure that whether you are on the move or fixed in place, your hardware stays secure.
Fixed Residential and Commercial Deployments
For permanent setups, stability and height are the priorities. A ground pole mount, often standing up to 7 feet tall, allows for the dish to be placed in the optimal "clear sky" zone. For commercial sites, we often use heavy-duty fascia or bargeboard mounts that anchor directly into the structural timber of the building, providing a permanent, high-strength solution. Starlink Roof Pole Mount Guide provides further insight into these permanent installations.
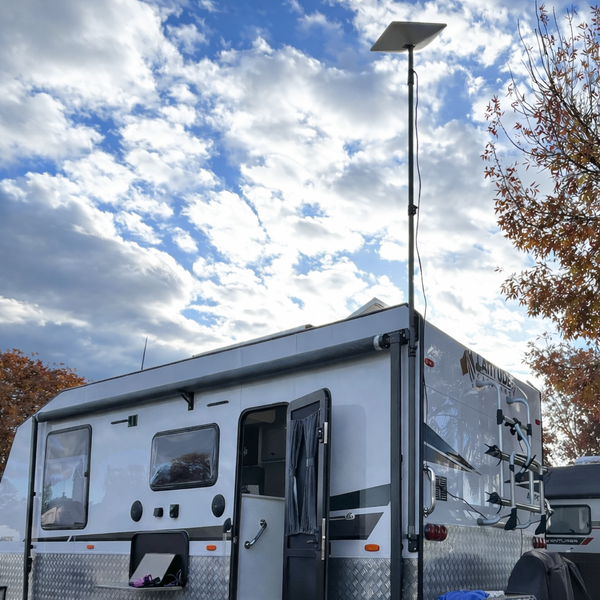
RV, Caravan, and Mobile Platforms
Mobility requires a different approach. We design mounts that can be quickly deployed and stowed.
- Ladder Mounts: Attach securely to the rear ladder of a caravan.
- Draw Bar Clamps: Perfect for mounting the pole to the front of a trailer.
- Hitch Receiver Mounts: Utilise the vehicle's tow bar for a ground-level, ultra-stable base.
For those using the Starlink Mini, portability is key. Our Mount Up With Spacetek The Best Pole Options For Your Starlink Mini guide covers how to keep your mobile setup lightweight without sacrificing stability. You can also explore how to Reach New Heights Installing Your Starlink Mini On A Pole for those tricky camping spots with heavy canopy cover.
Marine Vessels
Marine environments are arguably the most demanding. Constant motion, salt spray, and high winds mean that a standard mount will fail within months. Our marine-grade mounts use 304 or 316 stainless steel and treated aluminium to prevent galvanic corrosion, ensuring your connection stays live even in 55-knot gusts.
Device Compatibility for Starlink pole mounts
Not all Starlink dishes are created equal, and their mounting interfaces have evolved significantly over the generations. It is vital to match your mount to your specific hardware version.
Gen 2 Actuated (The "Dishy McFlatface")
The Gen 2 dish features a circular mast with a "click-in" button mechanism. Most Starlink pole mounts for this version require a pipe adapter that fits poles with a diameter of 31 mm to 63.5 mm. Our Starlink Gen 2 Pipe Adapter Guide details how to ensure a snug fit that prevents the dish from rotating in the wind.
Gen 3 V4 (The Kickstand Model)
The latest Gen 3 dish moved away from the internal motor and mast, opting for a kickstand design. To mount this on a pole, you must remove the kickstand and use a specialised adapter.
- Tilt Angle: Most Gen 3 adapters feature a fixed 20-degree tilt to optimise signal and encourage water and debris shedding.
- Weight: The Gen 3 adjustable pole mount kit typically weighs around 3.8 lbs (1.7 kg), requiring a sturdy support pole.
- Compatibility: For a deeper dive into what fits, check our Will It Fit Your Gen 3 Pole Adapter Compatibility Guide and the Starlink Gen 3 Pole Mount Kit Guide.
Starlink Mini and High Performance
The Starlink Mini uses a much smaller, more compact mounting footprint, often requiring a clamp-style pole mount. Conversely, the Flat High Performance and Enterprise models are much heavier and have a larger surface area, meaning they are subject to much higher wind loads. These require heavy-duty pipe adapters that fit poles between 38 mm and 60 mm and must be mounted on metal pipes only — never PVC.
Environmental Stress: Why Cheap Mounts Fail in Australia
Australia’s climate is a "torture test" for outdoor hardware. We have seen many generic, imported mounts fail because they weren't designed for our specific conditions.
- UV Degradation: The Australian sun will make cheap plastics brittle in a single summer. Our mounts use UV-stabilised coatings and metal alloys that do not perish.
- Coastal Corrosion: If you live within 50km of the ocean, salt air will eat through standard steel. We use hot-dip galvanised finishes and marine-grade aluminium to prevent rust.
- Heat Expansion: Metal expands in the heat. Poorly designed mounts can "seize" or, conversely, become loose when temperatures hit 40°C+. Our precision tolerances account for this thermal expansion.
- Wind Loading: A Starlink dish acts like a sail. In a storm, a mount must withstand hundreds of kilograms of force. We engineer our mounts to handle wind speeds up to 280 km/h for certain models.
Installation Quality: DIY vs Professional Setup
While Starlink is marketed as a "self-install" product, the quality of that installation determines your long-term satisfaction.
Essential Tools and Requirements
If you are tackling a DIY installation of Starlink pole mounts, ensure you have the following:
- Metal Pole: Always use a metal pole (steel or aluminium). PVC is too flexible and will degrade.
- Pole Diameter: Most adapters require a diameter between 1.25 and 2.5 inches.
- Tools: A socket wrench set, hex keys (Allen keys), and a spirit level to ensure the pole is perfectly vertical.
- Anchoring: For ground poles, you will need a shovel and concrete mix to create a stable base.
Step-by-Step Installation
- Site Survey: Use the Starlink app to check for obstructions. Even a single branch can cause dropouts.
- Secure the Base: Whether it’s a roof bracket or a ground hole, ensure the foundation is rock-solid.
- Attach the Adapter: Slide your pipe adapter onto the pole and tighten the bolts evenly.
- Click in the Dish: Route your cable through the pole (if supported) and click the dish into the adapter.
- Cable Management: Use UV-rated cable ties to secure the cable, ensuring there is a "drip loop" before the cable enters your building.
For more detailed instructions, see our guides on How To Install A Starlink Pole Mount In 5 Simple Steps and Diy Starlink Pole Mount Step By Step Instructions.
The Mount Is the Foundation of Your Connection
At SpaceTek Australia, we believe that your Starlink dish is only as good as the mount holding it. You can spend thousands on hardware and monthly subscriptions, but if your dish is swaying in the breeze or buried behind a gutter line, you are not getting the performance you paid for.
By choosing a high-quality, Australian-engineered Starlink pole mount, you are investing in the stability, longevity, and speed of your internet connection. Whether you are setting up a permanent home office in the bush or taking your connection on a lap of the map, our custom kits are designed to withstand the harshest AU climates. Don't settle for a generic bracket that might fail when you need it most. Build your connection on a foundation of quality.
FAQs: Optimising Your Starlink Setup
What are the best Starlink pole mounts for Australian conditions?
The best mounts for Australia are constructed from rust-resistant aluminium or hot-dip galvanised steel to combat coastal salt air and high UV levels. You should look for precision-machined components rather than 3D-printed parts, as these offer the structural integrity needed for our extreme heat and wind. For more details, check our Starlink Pole Mount Adapter Guide.
How do pole mounts improve signal quality by elevating the antenna?
Pole mounts improve signal quality by raising the dish above "signal shadows" created by trees, roof peaks, and fences, ensuring a 110-degree clear view of the sky. This elevation maximises the signal-to-noise ratio and prevents the packet loss associated with minor obstructions. You can learn more about this in Adapter Essentials Using A Pole Adapter For Your Starlink Dish.
What are the installation requirements and tools needed?
You will typically need a metal pole with a diameter between 1.25 and 2.5 inches, a socket wrench, and the hex keys provided with your adapter kit. For ground-based installations, concrete is required to set the pole, while roof installs require appropriate structural screws and sealant. Explore our full range of Starlink mounting accessories for more options.
Can I use a PVC pipe for my Starlink pole mount?
No, you should never use PVC or plastic pipes for mounting a Starlink dish as they lack the necessary rigidity and will warp or crack under UV exposure. Always use a metal pole to ensure the dish remains stable and the internal motors are not stressed by excessive swaying.
Does the Gen 3 dish require a different pole mount than the Gen 2?
Yes, the Gen 3 (V4) dish has a different mechanical interface and requires a specific adapter that replaces its integrated kickstand. While Gen 2 dishes use a "plug-in" mast, the Gen 3 requires a mount that can support its flat-panel design and provide a fixed or adjustable tilt.
How do I stop my Starlink pole from vibrating in high winds?
To stop vibration, use a mount with a thicker wall diameter and ensure all bolts are tightened to the manufacturer's specifications. For high-elevation installs, adding stay bars or using a carbon fibre pole can significantly reduce the resonant frequency and "whipping" motion caused by the wind.
Leave a comment
This site is protected by hCaptcha and the hCaptcha Privacy Policy and Terms of Service apply.