Finding the Right Perch for Your Starlink Dish
Got your Starlink dish but not sure where to mount it? This isn't just about appearances—it's about ensuring you get the reliable internet connection you're paying for, especially if you're in a remote part of Australia where every megabit counts.
The position of your Starlink dish is absolutely critical to your internet performance. A poorly placed dish is like trying to have a conversation while someone's standing between you and the person you're talking to—frustrating and ineffective.
In the vast expanses of rural Australia, where traditional internet has always been more of a wish than a reality, Starlink has been nothing short of revolutionary. But to truly harness this technology, your dish needs a clear view of the sky while being tough enough to handle everything from scorching summer heat to wild cyclonic winds.
Whether you're setting up on a remote cattle station, a quiet bush block, or a busy mining site, choosing between roof and pole mounting options requires thinking through your specific situation carefully.
It's worth noting that the standard kit that comes with your Starlink is primarily designed for ground-level testing—not for a permanent, liftd installation. For a long-term solution that delivers consistent performance through all seasons, investing in a proper mount is essential.
Starlink mounting options come in several flavours, each suited to different scenarios:
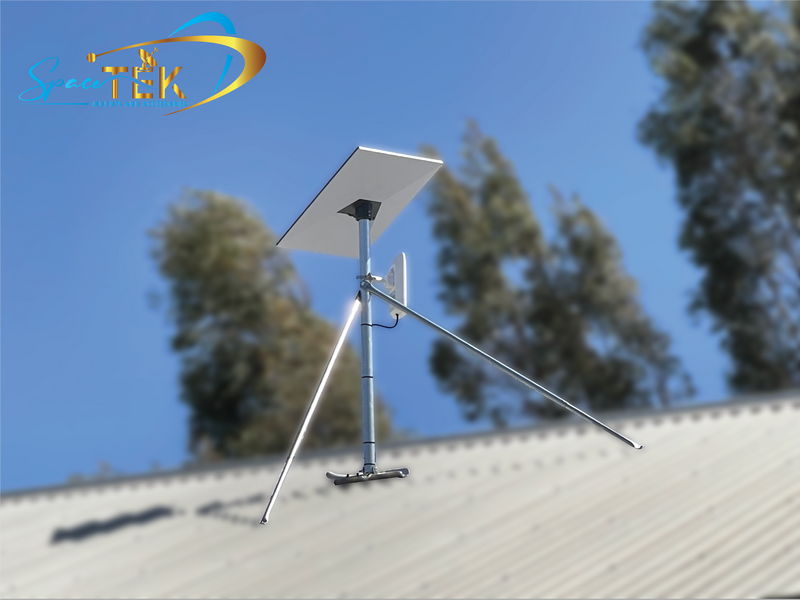
Roof Mounts give you that liftd position with a clear sky view. These include wall mounts that attach to the side of your home, pivot mounts that allow for adjustments, and ridgeline mounts that sit atop your roof.
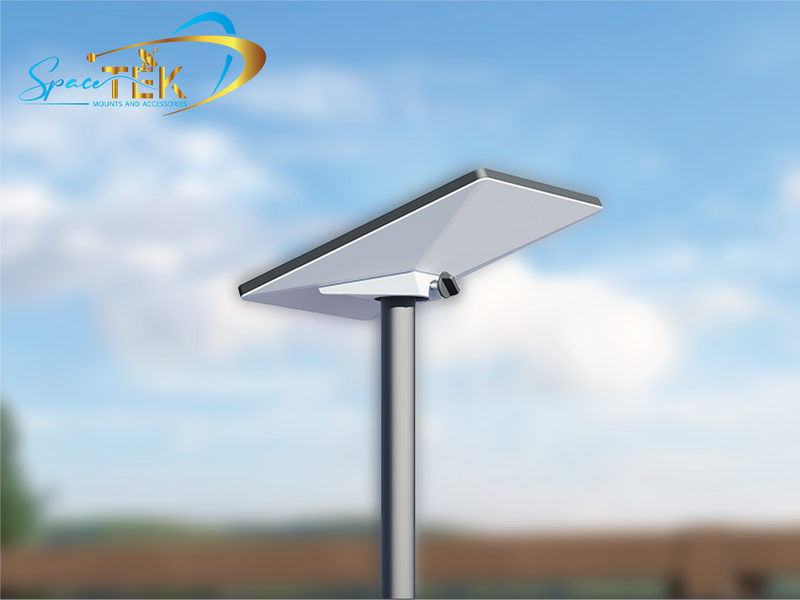
Pole Mounts offer flexible placement in open areas, with options like pipe adapters for existing structures or ground pole mounts for a fresh installation.
For those not ready to commit, Portable Options like tripods or ground mounts provide temporary solutions for testing or occasional use.
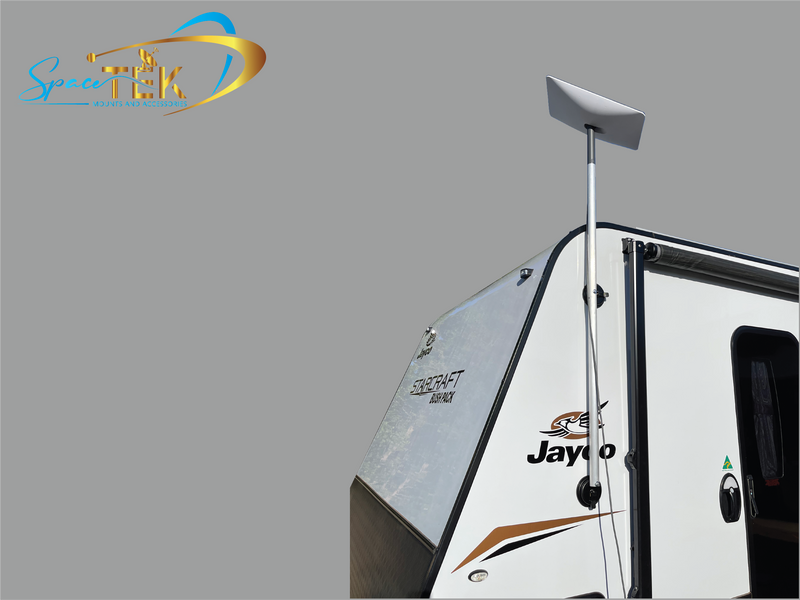
If you're always on the move, Vehicle Mounts designed for RVs and mobile setups keep you connected on the road.
And for special situations, Specialty Mounts provide non-penetrating options for metal roofs and custom scenarios.
In this guide, we'll help you steer the roof vs. pole mount decision for your Starlink setup, with special attention to Australian conditions and requirements. Because when you're in the outback or bush, reliable internet isn't just convenient—it's essential.
Why Your Starlink Mount Choice Matters
Let's be honest – that little dish on your roof isn't just another gadget. It's your lifeline to the digital world, especially if you're in the Australian outback where traditional internet has always been more dream than reality. The way you mount your Starlink dish might seem like a minor detail, but it's actually the foundation of your entire internet experience.
Signal Strength and Reliability
Unlike old-school satellite internet that points at a fixed spot in the sky, your Starlink dish needs to chat with multiple satellites as they zoom overhead. This means having a clear, unobstructed view of the sky isn't just nice to have – it's essential.
The standard base that comes with your Starlink kit is fine for testing things out or a temporary setup, but for a permanent installation that'll keep you connected through everything Australia throws at it, you'll need something more substantial.
Whether you're surrounded by gum trees in the bush or dealing with buildings in town, finding that perfect mounting spot can be the difference between seamless video calls and the dreaded buffering wheel. A proper mount lifts your dish to catch those satellite signals without interference, keeping your connection rock-solid.
Weather Resilience in Australian Conditions
Let's talk about our weather for a moment. In Australia, we don't do things by halves:
Our northern regions face cyclonic winds that can reach beyond 200 km/h – enough to turn an insecure dish into an expensive frisbee.
Summer brings scorching temperatures regularly climbing past 40°C, testing the durability of every outdoor component.
If you're near the coast, that salty air will eat through inferior metals faster than you can say "corrosion."
And when the skies open up during the wet season, those torrential downpours will find any weakness in your mounting system.
SpaceTek Australia's mounts are built specifically with these harsh Australian conditions in mind. We use materials that stand up to corrosion and designs that remain stable even when the wind's howling like a dingo.
Common Issues That Good Mounts Solve
A quality mount isn't just about keeping your dish in place – it's about solving problems before they start:
Connection drop-outs can plague poorly mounted dishes that shift position during wind gusts. Our heavy-duty mounts stay put, keeping your signal steady even in challenging conditions.
Increased latency often comes from slight misalignments that develop over time. When you're gaming or on a work call, those extra milliseconds matter – a stable mount keeps your ping times consistent.
Wind sway in cheaper mounts causes frustrating signal fluctuations. Our reinforced designs minimise movement, so your Netflix doesn't pause just because a breeze picked up.
Cable wear happens when routing isn't properly managed. Our mounts include thoughtful cable management features that protect your investment from premature aging and potential water damage.
Long-Term Maintenance Considerations
Nobody wants to spend their weekends up on a ladder adjusting equipment. The right mount dramatically reduces your maintenance headaches by preventing:
Frequent readjustments after every big blow Water leaking into your roof (a problem that can cost thousands to fix) Premature corrosion that forces early replacement Difficult access when it comes time for cleaning or servicing
Safety First
This might be the most important point of all – safety isn't optional. An improperly secured Starlink dish can become a dangerous projectile in strong winds. And if you've made dodgy roof penetrations, you're risking leaks and structural damage to your home.
Professional-grade mounting solutions from SpaceTek Australia address these safety concerns from day one, giving you peace of mind along with your high-speed internet.
When you're investing in technology that keeps you connected to the world, doesn't it make sense to give it the foundation it deserves? After all, your Starlink is only as reliable as what it's mounted on.
Roof Mounts: What You Need to Know
Looking to get your Starlink dish up high where it can see the sky? Roof mounting might be just the ticket. Let's chat about why so many Aussies choose this option and what you need to consider before climbing up that ladder.
Roof mounting offers some brilliant advantages, especially if you're short on yard space. The liftd position gives your dish a commanding view of the sky, helping it maintain those crucial connections with passing satellites. Plus, it keeps your setup neat and tidy – no dish taking up precious garden space or creating trip hazards for the kids or pets.
Many of my customers appreciate the added security that comes with roof mounting. When your dish is up high, it's far less likely to encounter accidental damage or unwanted attention. There's also something to be said for the cleaner aesthetic – a dish tucked away on your roof tends to blend into the home's silhouette better than one standing in your yard.
Before you commit to a roof mount, though, let's talk about what matters for a successful installation.
Important Considerations for Roof Mounting
Your roof material makes a world of difference in how you'll approach this job. Out here in rural Australia, metal roofs are incredibly common, and they require special care. You'll want non-penetrating clamps or purpose-designed brackets that won't damage your roofing material or void your warranty.
If you've got tiles, you'll need to be extra careful during installation to prevent cracking. And for those with Colorbond® or other sheet metal roofing, you'll need mounting solutions that preserve that protective coating – after all, that's what keeps the Aussie elements at bay.
Water is always looking for a way in, so proper sealing and flashing are non-negotiable. Quality roof mounts include flashing components and waterproof seals that direct water away from any mounting points. Trust me, the last thing you want is to fix a leaky roof during our notorious summer storms.
Mind the slope as well. The standard Starlink Ridgeline Mount works well on roofs with slopes less than 45 degrees and can handle winds up to 80 kph. If your roof is steeper than that (not uncommon in some areas), you might need a more specialised solution.
And let's not forget about corrosion control. Our harsh Australian climate – especially near the coast – can eat through inferior metals at an alarming rate. That's why SpaceTek Australia's roof mounts use marine-grade stainless steel and other corrosion-resistant materials specifically chosen to withstand everything from coastal salt spray to Outback heat.
Starlink Mounting Options on Roofs
When it comes to starlink mounting options for your roof, you've got several choices depending on your specific situation:
The Short Wall Mount gives you about 5cm of clearance, making it perfect for shallow overhangs. It's a simple solution if you're mounting near the top of a gable or along the fascia.
For homes with significant eaves, the Long Wall Mount is your friend. It extends up to 30cm, giving you much more flexibility in positioning your dish while clearing those wider overhangs. You can check out the Installation Guide for Roof Mount for detailed instructions.
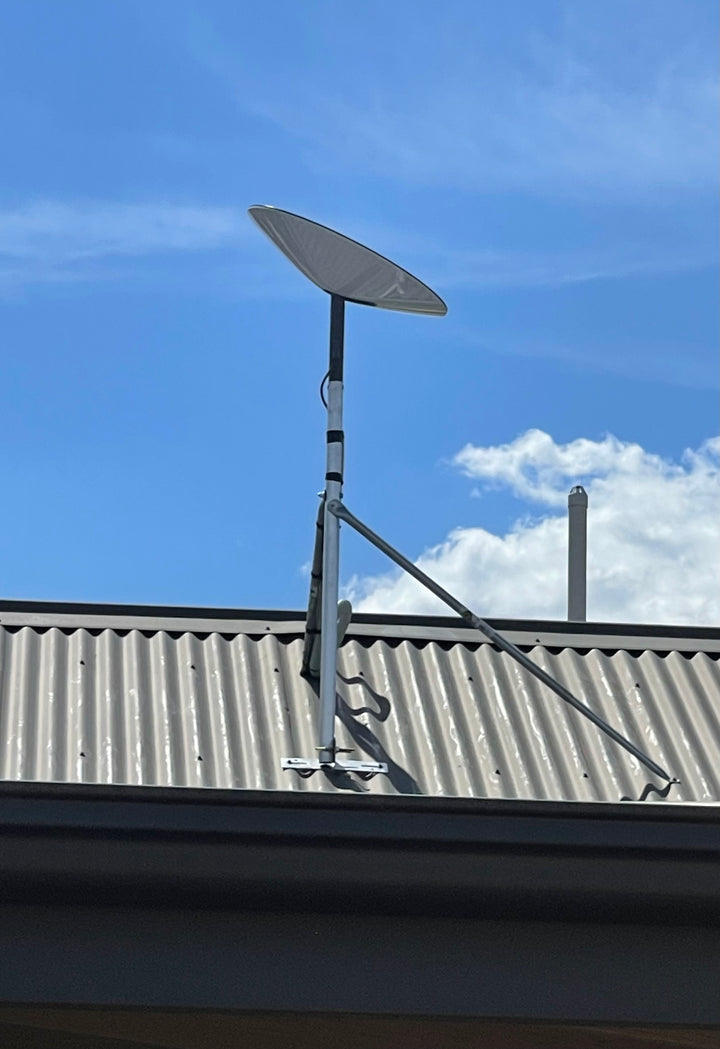
The Ridgeline Mount is brilliant if you're worried about drilling into your roof. It uses ballast weights instead of penetrations, eliminating any risk of leaks. Just remember it's rated for winds up to 80 kph, so if you're in a cyclone-prone area, you might want something more robust.
For slanted, shingled roofs, the Pivot Mount with Flashing Kit includes a swiveling mechanism for perfect alignment, along with proper flashing to keep water out.
Best Practice for Metal Roofs
Metal roofs dominate the Australian landscape, especially once you get beyond the cities. If that's what you're working with, here's what you need to know:
Non-penetrating clamp systems are the gold standard for metal roofs. These clever devices grip your roof's standing seams or corrugated profiles without punching holes, preserving your warranty and preventing potential leaks. They distribute weight evenly across the roof structure and can be removed without damage if needed.
Always use rust-resistant fasteners and materials when installing on metal. Marine-grade stainless steel is worth every cent in our climate. Avoid mixing metals that could cause galvanic corrosion, and include isolation materials between the mount and roof where needed.
Many professional installers swear by S-5 style brackets for metal roofs. These specialised clamps grip the seam without penetration while providing excellent holding strength. They're smart enough to allow for thermal expansion and contraction and come in varieties to match different metal roof profiles.
A word of caution: using wood or concrete ballast directly on metal roofs is asking for trouble. The moisture trapped underneath and potential chemical reactions can damage your roof over time. SpaceTek Australia's metal roof mounting solutions avoid these problematic approaches, using purpose-designed clamps and brackets that keep your roof in top condition for years to come.
Want to learn more about protecting your investment? Check out our guide on why invest in a Starlink roof mount kit for additional insights on maximising performance while protecting your home.
Pole Mounts: What You Need to Know
Fancy a bit more flexibility with your Starlink setup? Pole mounting might be just the ticket, especially if your property presents unique challenges that a roof mount simply can't solve.
Advantages of Pole Mounting
When it comes to getting the perfect Starlink signal, sometimes you need to think beyond the roof. Pole mounts give you incredible placement flexibility – you can pop them virtually anywhere on your property to find that sweet spot with clear sky views.
Height is another brilliant advantage. With a pole mount, you're not stuck with the height of your roof. Need to clear those pesky gum trees blocking your signal? No worries – poles can be built to custom heights, letting you soar above obstacles that might otherwise turn your Netflix binge into a buffering nightmare.
For those concerned about their roof's integrity, pole mounts are a godsend. No need to drill holes in your beautiful Colorbond or risk creating leaks during the wet season. Your roof stays completely intact while your internet connection remains rock solid.
When it comes time for a clean or quick adjustment, ground-based poles make maintenance a breeze. Rather than climbing up on your roof (and risking life and limb), you can often reach your dish with a simple step ladder – much safer on a scorching summer day.
And if you're the type who might need to relocate your Starlink service down the track – perhaps moving to another part of your property or a different home altogether – pole mounts typically offer better future adaptability. They're generally easier to move or repurpose than their roof-mounted cousins.
Important Considerations for Pole Mounting
Before you grab your shovel and start digging, there are a few things to consider when going the pole mount route.
First up, installation is a bit more involved than simply plonking your dish on the ground. You'll typically need to dig a decent hole (usually about 60cm deep by 45cm wide for standard setups), pour some concrete for a stable foundation, set and level your pole before the concrete sets, and then figure out how to run the cable either underground or along the pole to your building. It's not rocket science, but it does require a bit of elbow grease.
The stability of your pole mount depends heavily on your local conditions. Different soil types across Australia's vast landscape will affect how secure your mount is – sandy coastal soil will need a different approach than hard-packed clay in central regions. You'll also need to consider your area's wind conditions and expected maximum gusts, especially if you're in cyclone territory up north. Getting the concrete foundation right and choosing the appropriate pole diameter and material strength are crucial for longevity.
For rural Aussies, proper electrical grounding isn't just a good idea – it's essential. Pole mounts, particularly tall metal ones, need to be properly grounded to protect against our spectacular lightning storms, comply with electrical codes, and prevent equipment damage. In the bush, a lightning strike can be the difference between staying connected and being isolated for days.
For those on remote Australian properties, pole mounts offer some unique advantages. They can be positioned strategically away from buildings for optimal signal, potentially combined with solar power for truly off-grid installations, and allow for strategic placement across large properties where the homestead might not be the best location for signal strength.
Starlink Mounting Options on Poles
When it comes to starlink mounting options for poles, you've got several solid choices:
The Pipe Adapter Mount is brilliantly simple – it's compatible with metal pipes ranging from 31mm (1.25") to 63.5mm (2.5") in diameter and doesn't require drilling. This makes it perfect for attaching to existing structures around your property, whether it's a fence post or that old TV antenna pole you never got around to removing.
For a more purpose-built solution, the Ground Pole Mount provides up to 127cm of clearance from the ground. Yes, it requires digging and concrete for permanent installation, but the stability it offers in most Australian conditions is well worth the effort, especially in windier regions.
SpaceTek Australia also offers custom DIY Galvanised Mast Solutions that let you mount to standard galvanised pipe available from any Bunnings or rural supply store. These adapters are perfect for creating custom-height installations without breaking the bank – a real bonus for remote properties where getting specialised equipment delivered can cost a fortune.
If you're keen to see a step-by-step guide on installing a pole mount, SpaceTek Australia has put together a comprehensive walkthrough at How to Install a Starlink Pole Mount in 5 Simple Steps.
With the right pole mount, your Starlink dish will stand tall against whatever the Australian elements throw at it – from scorching summer heat to wild winter storms – all while keeping you connected to the world beyond the bush.
Starlink Mounting Options: Roof vs Pole Face-Off
When deciding between roof and pole mounts for your Starlink dish, several key factors come into play. Let's compare them directly to help you make the best choice for your specific situation.
Line-of-Sight Comparison
Roof Mounts:
- Typically provide good elevation above ground-level obstacles
- May still face obstructions from nearby tall trees or buildings
- Limited to the roof's position relative to obstructions
- Work well in suburban areas with moderate tree coverage
Pole Mounts:
- Can be strategically placed anywhere on your property
- Height can be customized to clear specific obstacles
- Ideal for properties with problematic tree lines or buildings
- Better for finding the perfect spot identified by the Starlink app
Winner depends on: Your property's specific layout and obstruction pattern. Use the Starlink app's obstruction checker to compare potential locations.
Clutter & Aesthetics
Roof Mounts:
- Keep the dish off the ground and out of the way
- Often less visually intrusive from ground level
- No yard space sacrificed
- Cables can be routed through the roof (with proper sealing)
Pole Mounts:
- May be more visible in your yard
- Require ground space and may interfere with landscaping
- Cables need proper trenching or protection if run along the ground
- Can sometimes be positioned in less conspicuous locations
Winner depends on: Your aesthetic preferences and available space.
Installation Difficulty
Roof Mounts:
- Require roof access and comfort working at height
- May need special tools and weatherproofing knowledge
- More challenging for DIY installation
- Potential for roof damage if installed incorrectly
Pole Mounts:
- Require digging and concrete work
- Generally more physically demanding
- Easier to access during installation
- Lower risk of damaging your home's structure
Winner depends on: Your DIY skills and comfort level with different types of work.
Cost Factors
Roof Mounts:
- Generally less expensive for the mounting hardware
- May require additional waterproofing materials
- Professional installation often recommended, adding cost
- Lower long-term maintenance costs if properly installed
Pole Mounts:
- Higher material costs (pole, concrete, underground cable protection)
- May require more labor for digging and concrete work
- Easier to self-install, potentially saving on professional fees
- May require occasional straightening or reinforcement
Winner depends on: Your budget priorities and whether you plan to install yourself.
Weather Exposure
Roof Mounts:
- Typically more exposed to wind forces
- May experience higher temperatures due to roof heat
- Protected somewhat by the building structure in extreme weather
- More difficult to access for pre-storm preparation
Pole Mounts:
- Can be built to withstand specific wind loads
- Better air circulation may reduce heat exposure
- More exposed to direct weather impacts
- Easier to access for securing before storms
Winner depends on: Your local climate conditions and extreme weather risks.
Choosing for Remote Communities
For remote Australian communities, reliable internet is not just a convenience—it's essential for education, healthcare, business, and emergency services. Here are special considerations for these locations:
Power Backup Considerations:
- Roof mounts may be easier to integrate with building-based backup power
- Pole mounts can be paired with solar arrays for completely off-grid solutions
- Consider power redundancy for critical communications
Lightning Protection:
- Pole mounts require comprehensive grounding systems
- Roof mounts should be integrated with the building's lightning protection
- Remote areas may experience more frequent lightning strikes
Cyclone Wind Resistance:
- In cyclone-prone regions of northern Australia, wind ratings become critical
- SpaceTek Australia's heavy-duty mounts are designed for these conditions
- Consider quick-removal options for extreme weather events
Remote Community Benefits:
- Starlink has been transformative for remote Indigenous communities
- Proper mounting ensures consistent connectivity for telehealth and distance education
- Community buildings may benefit from liftd pole mounts for shared access
Decision Checklist
Use this checklist to determine which mounting option is best for your situation:
Consider Roof Mount If:
- Your roof has a clear view of the northern sky
- You have limited ground space
- Your roof is easily accessible and in good condition
- You prefer a less visible installation
- You're in an area with moderate weather conditions
Consider Pole Mount If:
- You have trees or buildings blocking roof sight lines
- You have ample yard space
- Your soil type allows for secure anchoring
- You might need to relocate the dish in the future
- You're in an area with extreme weather conditions
- You're comfortable with (or can hire help for) concrete work
Other Factors to Consider:
- Property trees: Current and future growth patterns
- Roof pitch: Steeper than 45° may limit roof mounting options
- Soil type: Sandy or loose soil may require deeper pole foundations
- Future moves: Will you need to relocate the system?
- Budget: Total cost including installation and long-term maintenance
FAQs Inside the Face-Off
Q: How do I use the Starlink obstruction tool to find the best mounting location? A: The Starlink app includes an augmented reality feature that uses your phone's camera to scan the sky and identify potential obstructions. Before committing to any mount location, use this tool to verify you have sufficient clear sky view.
Q: What are the grounding requirements for Starlink installations? A: All Starlink installations should be properly grounded according to local electrical codes. Pole mounts in particular require proper grounding rods and connections to protect against lightning strikes.
Q: What's the best way to route and protect the Starlink cable? A: For roof mounts, use proper roof penetration techniques and weatherproof cable entry points. For pole mounts, consider underground conduit to protect the cable from UV damage, wildlife, and physical hazards.
Q: Is it safe to install Starlink mounts myself? A: While DIY installation is possible, working at heights (for roof mounts) or with concrete (for pole mounts) carries risks. If you're uncomfortable with any aspect of the installation, we recommend hiring a professional.
Q: How do non-penetrating roof mounts stay in place during high winds? A: Non-penetrating mounts use a combination of weight (ballast) and friction to remain stable. The Starlink Ridgeline Mount, for example, uses ballast weights and is rated for winds up to 80 kph (50 mph).
Conclusion – Starlink Accessories Built for Remote Australia
When it comes to choosing between roof and pole mounts for your Starlink dish, there's no one-size-fits-all answer. The best solution depends entirely on your unique property, needs, and the conditions you face in your corner of Australia.
Our vast continent presents incredible diversity – from the dense bushland of Tasmania to the wide-open spaces of the Kimberley. What works perfectly for a suburban home in Adelaide might be completely unsuitable for a remote cattle station in the Northern Territory.
At SpaceTek Australia, we've developed mounting solutions with these uniquely Australian challenges in mind:
Our rust-proof hardware stands strong against coastal salt spray and tropical humidity that would quickly corrode standard equipment. Whether you're near Broome's salty shores or dealing with Far North Queensland's wet season, our mounts won't let you down.
Our high wind-rated designs give you peace of mind during cyclone season or when those fierce southerlies blow through. Your Starlink dish stays exactly where it should be, keeping you connected when you need it most.
The harsh Aussie sun breaks down ordinary materials, but our UV-resistant components are built to withstand years under our intense sunlight without degrading or becoming brittle.
No matter which way you're leaning, we offer flexible options for both roof and pole installations to suit your specific situation.
Looking ahead to 2025, Starlink's service will only get better with more satellites and improved technology. Getting your dish properly mounted now means you'll be perfectly positioned to benefit from these future improvements without needing to fiddle with your setup later.
If you've opted for a roof mount because of its clean, out-of-the-way installation and space efficiency – brilliant choice. If a pole mount makes more sense for your property because you need flexible positioning or height to clear those gum trees – you've made the right call too.
Just remember, the standard mount that comes in your Starlink kit is primarily designed for temporary use or testing. For a permanent setup – especially if you're in a remote location where calling out a technician isn't a quick or affordable option – investing in a quality mounting solution from SpaceTek Australia will pay for itself many times over in reliability and performance.
Our team understands the unique challenges of connecting remote Australia. We've seen it all – from homesteads that haven't had reliable internet in decades to Indigenous communities changing their access to education and healthcare through stable connectivity. We're passionate about providing mounting solutions that ensure you stay connected, no matter where you are or what Mother Nature throws at you.
For personalised advice on finding the perfect perch for your Starlink dish, reach out to our team at SpaceTek Australia today. We're here to help you steer the options and get the most from your satellite internet investment.
Leave a comment
This site is protected by hCaptcha and the hCaptcha Privacy Policy and Terms of Service apply.