Why Your Starlink Gen 3 Router Deserves a Proper Home
The Starlink dish gets most of the attention, but your Wi‑Fi lives and dies by the router. A purpose‑built Starlink Gen 3 Router Mount gives the router a stable, well‑ventilated home, improving performance, protecting the hardware, and tidying up cables so your setup just works.
Here's the short version:
- Purpose: Keeps your router stable, organised, and positioned for better Wi‑Fi performance.
- Installation: Simple DIY process with basic tools, compatible with Starlink self‑install kits.
- Materials: Durable ABS for indoor use, plus high‑quality metals like aluminium for tougher environments. Some designs incorporate carbon fibre elements for strength without adding weight.
- Key features: Cable retention, snap‑in design, airflow for heat dissipation, and space‑saving.
Routers need room to breathe. When they're wedged behind a TV, buried under cables, or sitting on a warm shelf, heat builds up. That heat can lead to throttling, drop‑outs, or shortened component life. A dedicated mount opens up the airways around the Gen 3 router and helps keep temperatures in check.
Placement also matters. Elevating the router and giving it clear lines of sight through open rooms improves how efficiently Wi‑Fi signals travel. It's not magic—it's physics—and it can be the difference between smooth streaming and a flaky connection in the back room. According to ACMA's guide on improving Wi-Fi performance, proper router placement and avoiding interference from physical obstacles are crucial factors in optimising your home network.
Australia adds its own challenges: dust, heat, humidity, and the occasional bump from kids, pets, or weekend chores. A sturdy mount reduces accidental knocks and cable strain, while corrosion‑resistant materials help your gear handle coastal air and outback dust alike. At SpaceTek, we design mounting solutions for Australian conditions—reliable, weather‑resistant hardware, with practical cable management and a secure, snap‑in fit that holds up over time.
If you're new to Starlink or looking to optimise your setup, our Beginner's Guide is a handy place to start: Beginner's Guide to Starlink Gen 3.
Choosing the Right Starlink Gen 3 Router Mount for Your Needs
Your Starlink dish captures the signal from space, but your router distributes it across your home or office. Where and how you mount the router has a direct impact on reliability, speed, and day‑to‑day usability.
Why a dedicated mount makes a difference
A dedicated mount raises your router above clutter and positions it for better Wi‑Fi coverage. Signals that would otherwise be absorbed by furniture or blocked by appliances have a clearer path to your devices. Heat is another silent performance killer—good airflow helps prevent thermal throttling during hot Australian afternoons.
A secure mount also protects against everyday knocks, accidental unplugging, and cable strain. Add tidy cable routing and you’ve got a clean, low‑maintenance setup that looks as good as it performs. For foundational tips, check out our Beginner’s Guide to Starlink Gen 3.
Mount types to suit your installation
- Screw‑in wall mounts: The most secure option for permanent installs in homes or offices. They anchor to studs or wall plugs and keep the router rock‑solid.
- Adhesive mounts: Use industrial‑grade adhesive for a drill‑free setup—ideal for renters or surfaces where drilling isn’t an option. Always follow cure‑time guidance for a lasting hold, especially in warmer climates.
- Mobile mounts (RVs, boats, caravans): Built for vibration and movement. These mounts clamp or fasten the router securely so it won’t slide, rattle, or take a hit on corrugations or chop. For mobile setups, see our Starlink Gen 3 V4 Standard Mobility Mount: Features, Benefits & Setup Guide.

What to look for in a quality Starlink Gen 3 Router Mount
- Materials that last: ABS plastic is robust and impact‑resistant for most indoor installs. For challenging environments and mobile rigs, aluminium offers high strength and natural corrosion resistance. In some designs, carbon fibre components provide rigidity with minimal weight—great where weight matters.
- Weather resistance: Especially important near coastal air or in dusty sheds. Look for finishes and fasteners designed to resist rust and UV exposure.
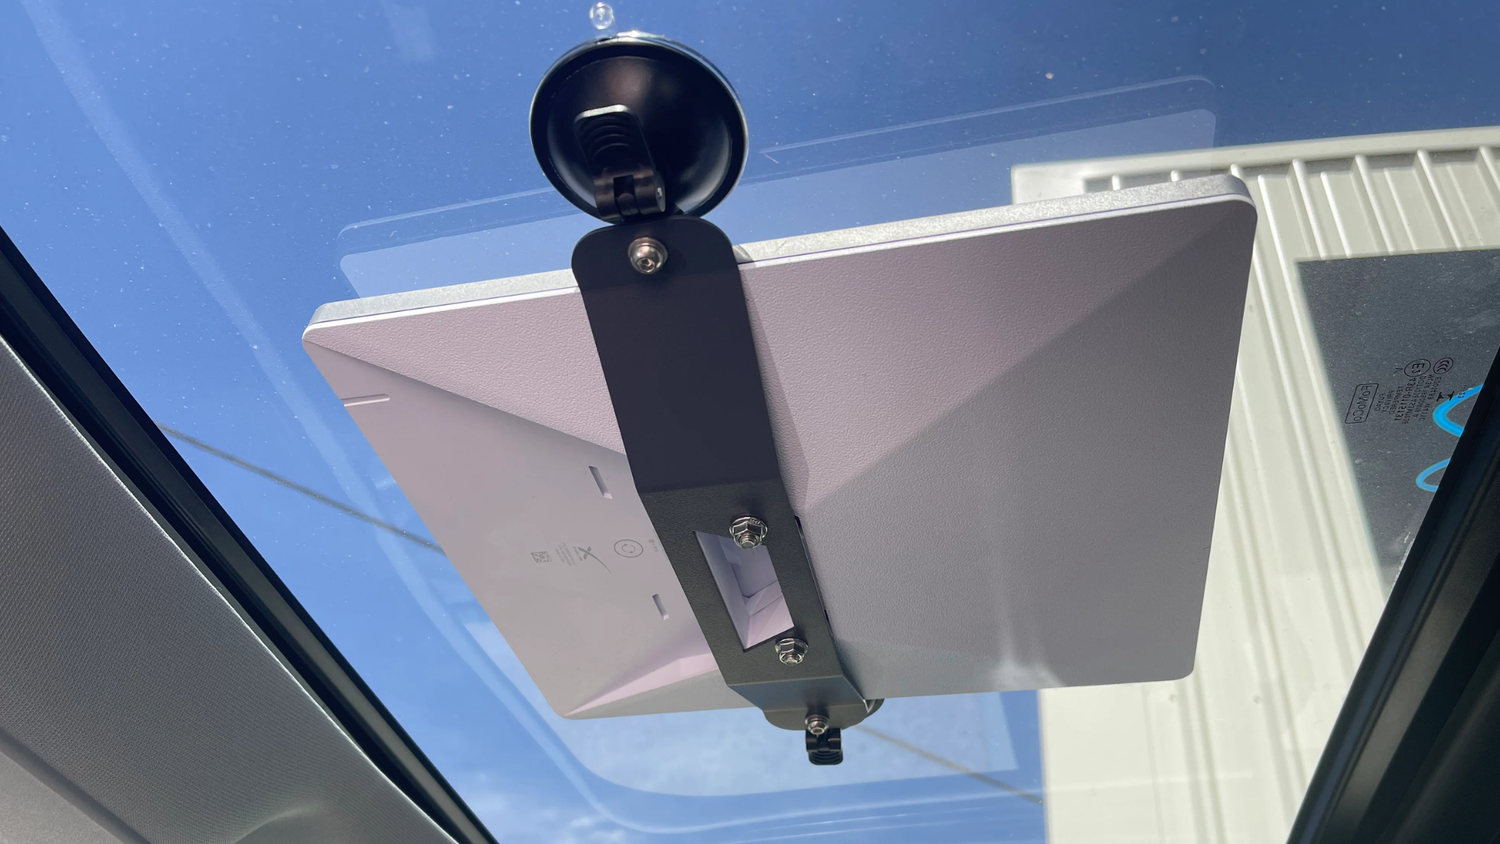
- Secure fit and cable management: A precise, snap‑in fit reduces movement and damage. Built‑in cable retention prevents accidental disconnections and makes servicing simpler.
- Clean integration: The best mounts are compatible with Starlink self‑install kits and take into account the Starlink Standard Power Supply, with cable paths that keep everything neat and stress‑free.
For a broader view of add‑ons that pair well with a clean install, explore The Ultimate Guide to Starlink Gen 3 Compatible Accessories.
Simple installation steps
Most SpaceTek Starlink Gen 3 Router Mounts are a straightforward DIY job with basic tools.
- Choose a location with good airflow and central coverage. Avoid enclosed cupboards and hot spots (like above ovens or in direct sun).
- Hold the mount in place, mark holes, and drill pilot holes. Use appropriate anchors if mounting to plaster or masonry.
- Fasten the mount securely with the supplied screws/anchors. Check for level and tightness.
- Slide the router into the mount until it clicks using the snap‑in design.
- Route and secure cables through the retention features, leaving gentle service loops to reduce strain.
If you’re using a no‑drill adhesive mount, clean and dry the surface thoroughly, apply firm pressure, and allow the adhesive to cure as specified before loading the router. For extra setup tips tailored to local conditions, see Mounting Starlink Gen 3 in Australia Made Easy.
Reliability that starts at the dish
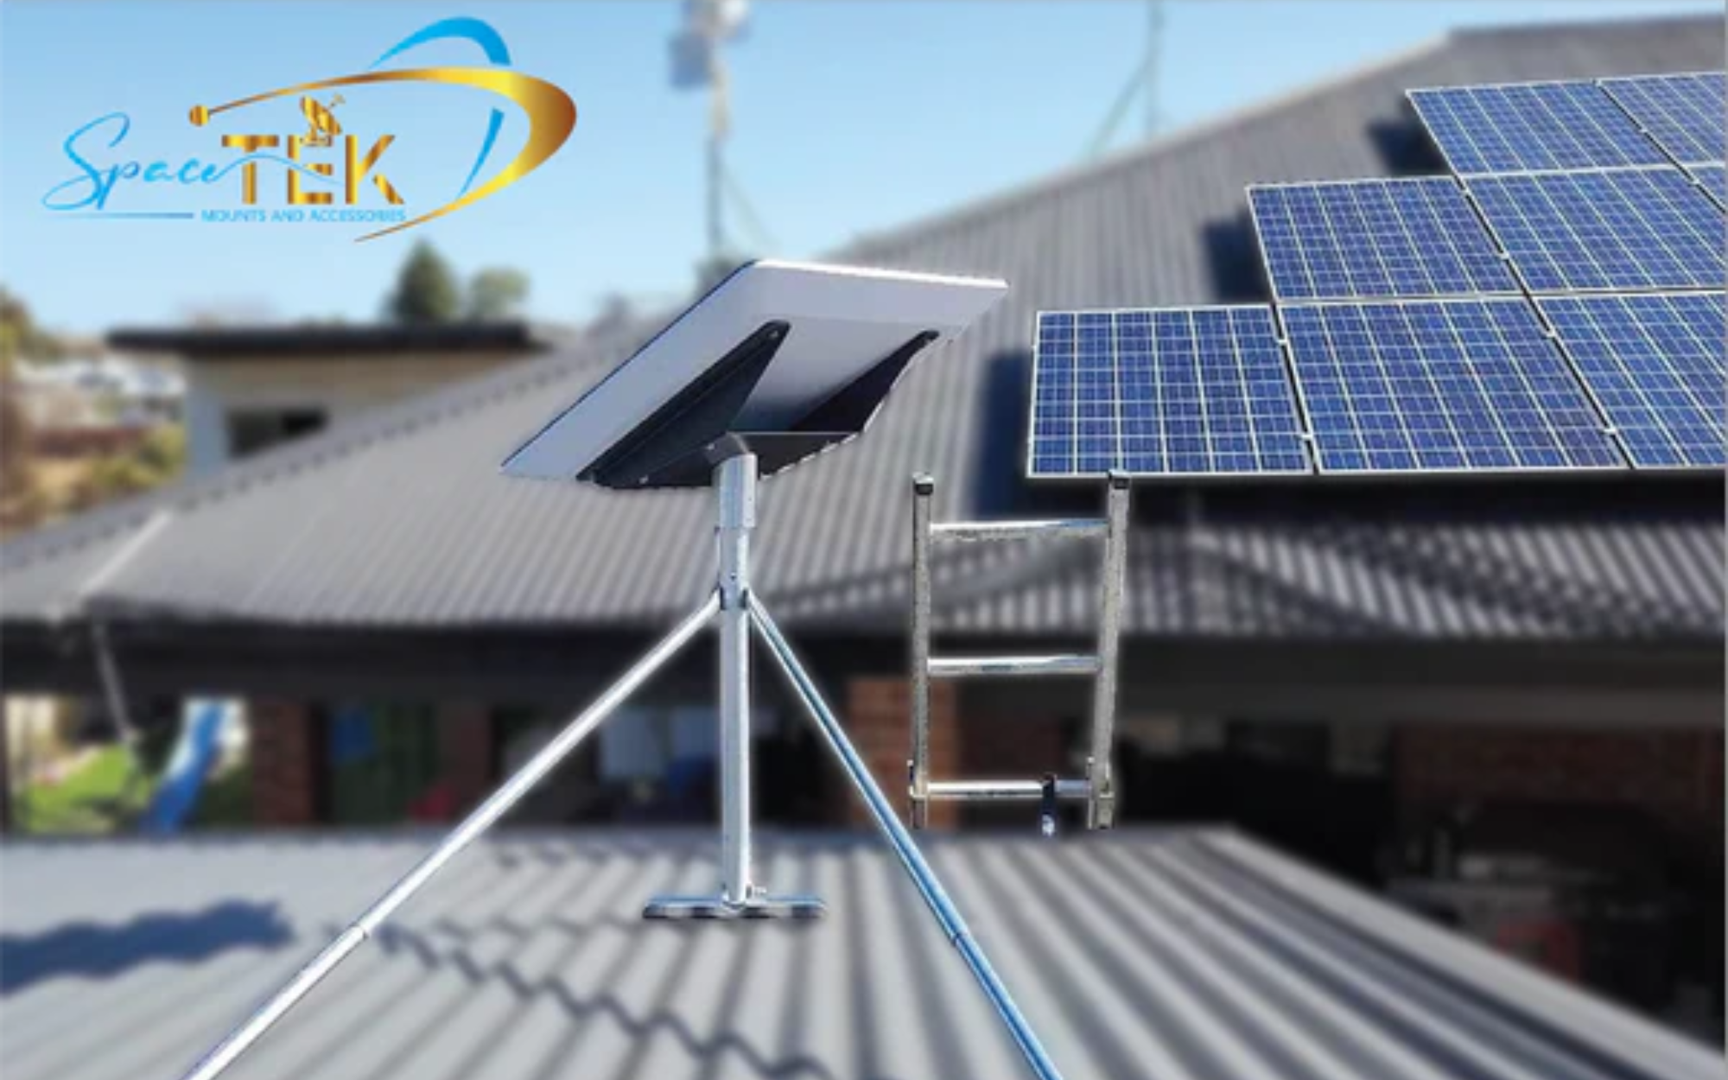
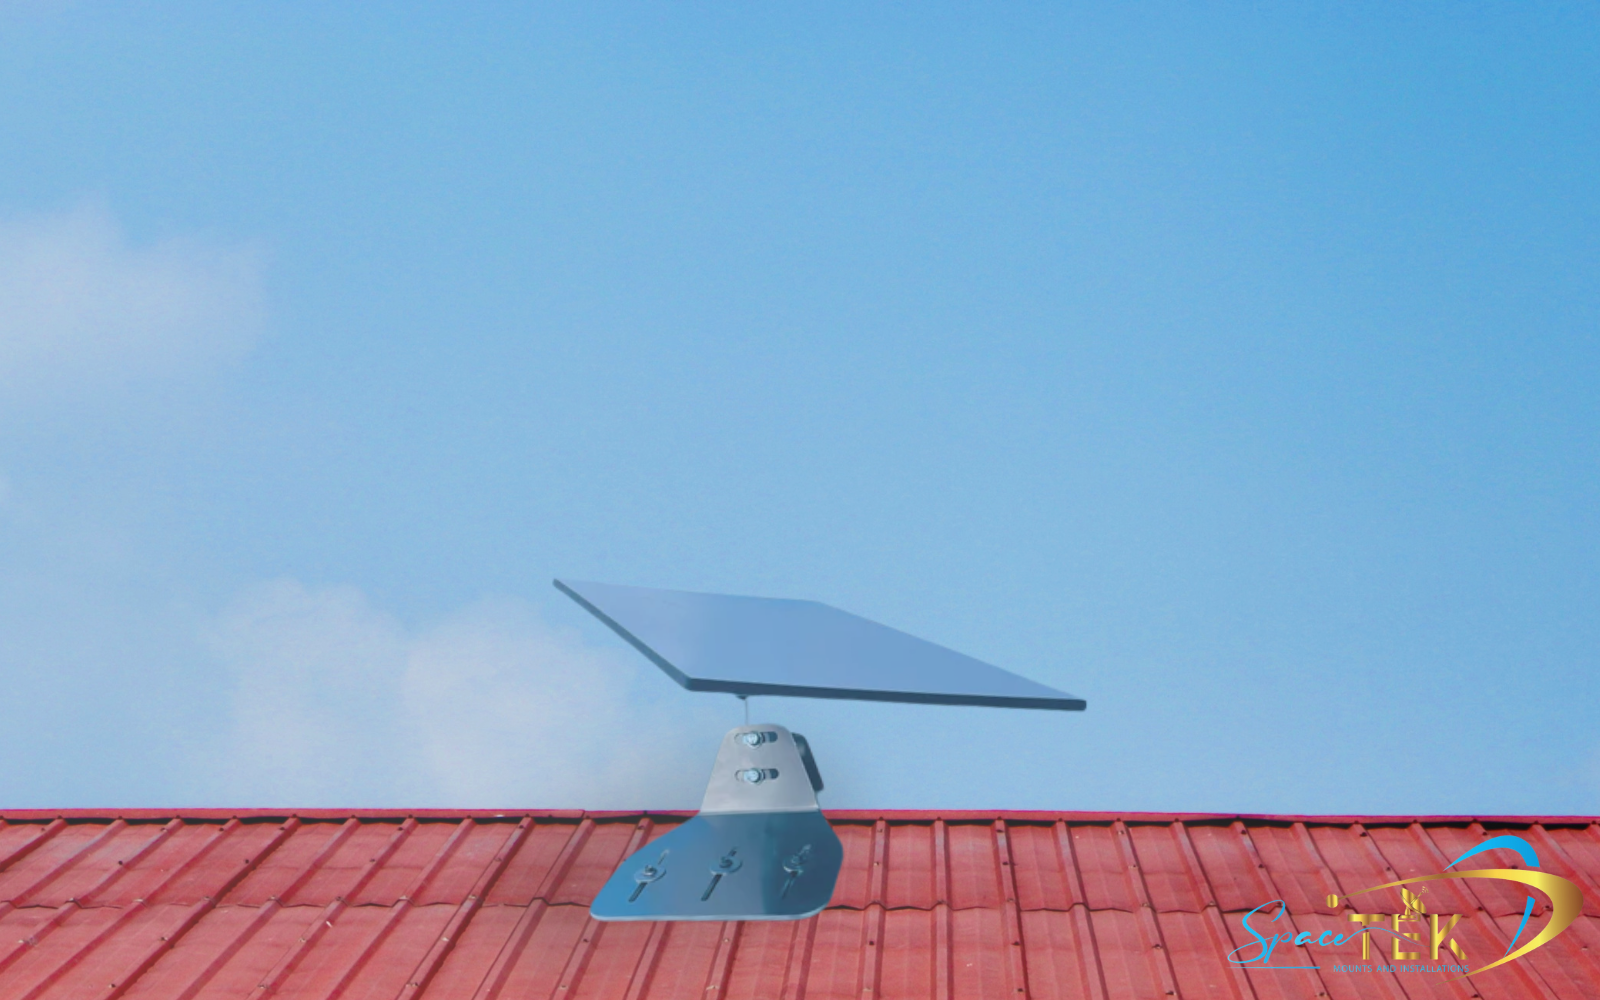
A rock‑solid router mount is only one piece of the puzzle. Your dish mount needs clear sky view and a rigid, weather‑resistant base. If your roof or eave solution is the weak link, the whole system suffers. Our guide covers what to consider: Raise the Roof: A Guide to Starlink Gen 3 Roof Mount Kits.
Finalising Your Setup and Getting Connected
A properly installed Starlink Gen 3 Router Mount gets your Wi‑Fi off to a strong start, but your broader network layout and power choices will decide how consistently it performs.
Build out the ecosystem around your router
- Dish mounts: These give your Starlink dish a secure base and a clear line of sight. Reliability begins at the roofline, and weather‑resistant aluminium hardware helps it stay that way. Learn more in our guide to Starlink Gen 3 Roof Mount Kits.
- Mesh extenders: If you’ve got a large home, shed, or annex, mesh fills in weak spots without juggling multiple networks. See how to plan coverage in Maximising Coverage with Mesh Extenders.
- Power solutions: For RVs and boats, a direct 12/24V DC solution is far more efficient than running an inverter, preserving battery life and reducing heat. Weather‑resistant, corrosion‑proof mounting and tidy cable runs are key when space is tight.
SpaceTek Solutions for Your Starlink Version
Different Starlink hardware generations have unique dimensions, cable routing, and power needs. SpaceTek designs and manufactures specific mounts and accessories to suit each version, ensuring a reliable, weather-resistant fit that works seamlessly with your setup.
-
For Starlink Mini Systems
- Mounting Considerations: The Mini’s compact and portable nature calls for specific solutions. Prioritise low-profile wall or under-shelf mounts from SpaceTek that won’t rattle in transit. Pair them with efficient 12/24V power options for off-grid use.
- Materials and Durability: For mobile applications, SpaceTek’s aluminium and carbon fibre components are excellent where strength-to-weight matters, complete with corrosion-resistant fasteners for coastal trips.
- Where to Start: For tailored recommendations on SpaceTek mounts for your Mini, get in touch with our team.
-
For Starlink Gen 2 Systems
- Mounting Considerations: The Gen 2 router and power hardware differ from Gen 3. Look for SpaceTek’s version-specific cradles and cable retention features designed to perfectly match the connectors and power brick shape.
- Materials and Durability: SpaceTek’s indoor ABS mounts are ideal for most homes; choose our aluminium options where humidity or outdoor-adjacent installs are involved.
- Where to Start: If you’re using a Gen 2 system, our team can advise on the correct SpaceTek mounting solutions—contact us for guidance.
-
For Starlink Gen 3 Systems
- Mounting Considerations: The latest router form factor benefits from a SpaceTek snap-in, secure mount with well-planned airflow and cable management. Our designs ensure compatibility with the standard power supply and cabling.
- Recommended SpaceTek Options: Explore our dedicated range of Australian-made mounts here: Gen 3/V4 Mounts and Accessories.
- Extra reading: Our overview of add-ons includes cable tools, mesh, and mounting hardware: The Ultimate Guide to Starlink Gen 3 Compatible Accessories.
-
RV, caravans, and portability
- What to consider: Hardware must handle vibration, weather, and tight spaces. Secure mounts prevent sliding and cable strain over corrugations; rust‑resistant fasteners and weatherproof finishes are a must.
- Recommended options: See our road‑tested guidance in the Starlink Gen 3 V4 Standard Mobility Mount: Features, Benefits & Setup Guide.
- Power and management: Consider 12/24V DC feeds, compact cable runs, and lightweight materials like aluminium or carbon fibre where payload limits matter.
Quick placement checklist
- Central, elevated position for the router where practical (avoid metal cabinets and thick concrete walls).
- Clear airflow around the router—don’t block vents.
- Gentle cable bends with strain relief at the router and power supply.
- If mounting near a window or external wall, consider sun exposure and ambient heat.
- Use stainless or coated fasteners in coastal or humid areas to prevent corrosion.
Your Guide to the Best Starlink Gen 3 Router Mount in Australia
A Starlink Gen 3 Router Mount is more than a tidy add‑on—it’s a practical upgrade for reliability, coverage, and hardware longevity. By lifting, securing, and cooling the router, you reduce drop‑outs, avoid accidental damage, and free up space. Pair it with a rigid, weather‑resistant dish mount and sensible power choices, and you’ve got a setup built for Australian conditions from the roof down.
SpaceTek focuses on reliability, weather resistance, and high‑quality materials—aluminium for strength and corrosion resistance, carbon fibre where weight matters, and impact‑resistant ABS for neat indoor installs. Our mounts are compatible with Starlink self‑install kits and designed to be user‑friendly for DIYers while standing up to heat, dust, and coastal air.
Correct installation is the foundation of performance and longevity. A well‑placed, securely mounted router with tidy, strain‑free cabling will serve you better for longer—and make troubleshooting far simpler if you ever need it.
For specific recommendations for your version of Starlink—or if you want help choosing a robust, rust‑resistant mounting solution that suits your home, shed, or mobile rig—please get in touch. Our team is here to help you build a secure, user‑friendly setup with the most reliable Starlink mounts in Australia, engineered for Australian conditions.
We invite you to explore our current range of mounts and accessories: Gen 3/V4 Mounts and Accessories. If you’re planning a new install or upgrading an existing one, feel free to contact us for expert, no‑pressure advice tailored to your space and use case.
Leave a comment
This site is protected by hCaptcha and the hCaptcha Privacy Policy and Terms of Service apply.