
Looking for a reliable way to mount your Starlink Gen 3? The solution lies in the innovative starlink gen 3 roof mount kit. These kits are specially designed to provide a secure, weather-resistant installation for your Starlink terminals, ensuring stable internet connectivity even in the most difficult conditions. Whether you're mounting on a tile, tin, or any other roof type, these kits offer flexibility and robustness to suit your needs.
The starlink gen 3 roof mount kit is an essential tool for those living in areas where terrestrial internet options are limited. These kits provide the means to set up your Starlink dish securely and with ease. Whether you are in a remote rural area or a busy urban center, these kits simplify the installation process, remove the need for professional installers, and help you harness the power of high-speed satellite internet with confidence.
Consider the unique mounting options available:
- Tile Roof Mount Kit: Custom for tile roofs, easy installation ensures a damage-free setup.
- Tin Roof Mount Kit: Designed for corrugated iron roofs, requiring no drilling.
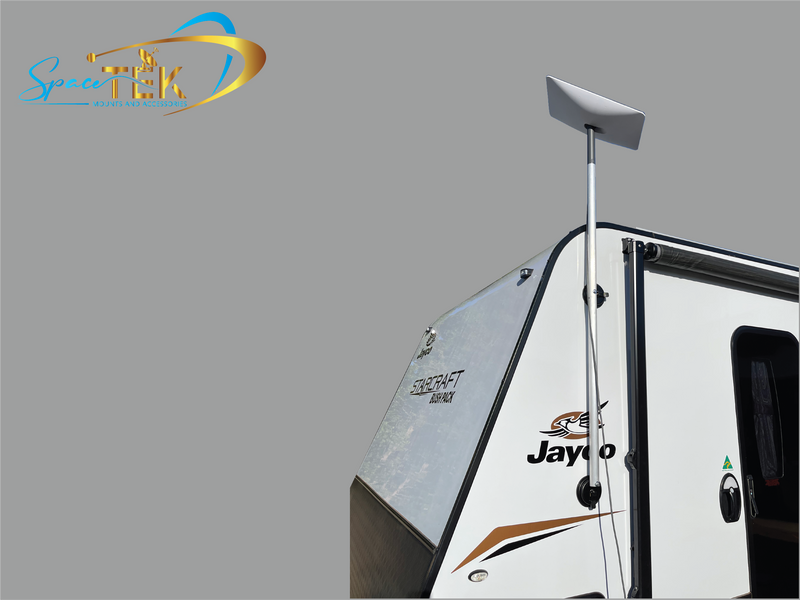
- Wall & Eave Mount Kit: Perfect for versatile installations, ideal for travelers.
- Ridge Cap Mount: Great for residential 25-30 degree tin roofs, optimizing signal.
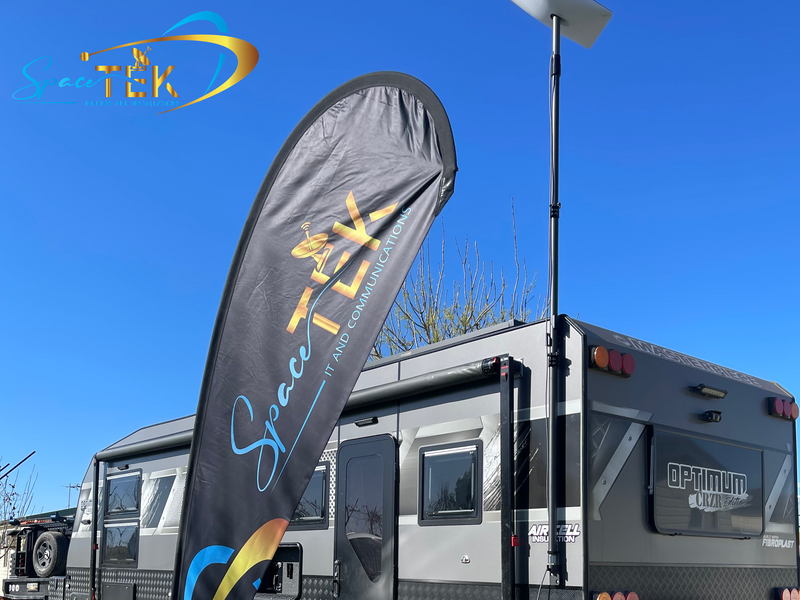
- Carbon Fibre Telescopic RV Mount: Lightweight and adjustable, perfect for RVs.
Understanding the benefits of each option is key to choosing the right setup for your Starlink Gen 3 terminal, ensuring optimal operation and connectivity in any weather.

Understanding Starlink Gen 3 Roof Mount Kits
When it comes to setting up your Starlink Gen 3 terminal, choosing the right roof mount kit is crucial. These kits are designed to ensure your satellite dish remains stable and performs optimally, regardless of the weather conditions.
Mounting Options
The starlink gen 3 roof mount kit offers several mounting options to accommodate different roof types and user needs:
Tile Roof Mount Kit: This kit is specifically designed for tile roofs. It provides a snug fit without damaging the tiles, thanks to its precise installation method that involves drilling three 12mm holes using a ceramic drill. This ensures a secure and stable attachment.
Tin Roof Mount Kit: Ideal for corrugated iron roofs, this kit requires no drilling. It includes a precision-engineered adapter for the Gen 3 (V4) rectangle dish, ensuring easy installation and optimal performance. This is perfect for maintaining the warranty of your Starlink equipment.
Wall & Eave Mount Kit: This versatile option allows for installations on walls or eaves. It's perfect for travelers who need flexibility, as it offers easy access from ground level, making it simple to take your terminal on the go.
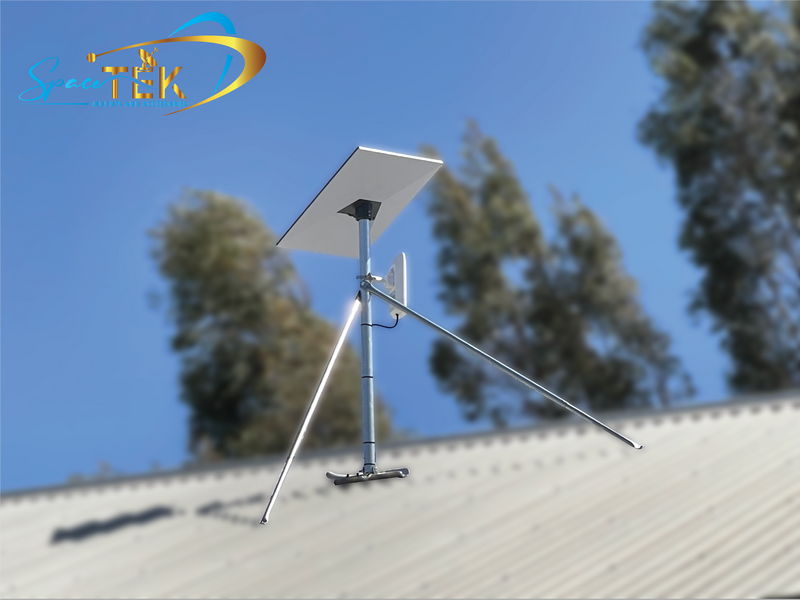
Ridge Cap Mount: Custom for residential tin roofs with a 25-30 degree pitch, this mount offers improved signal positioning by elevating the dish above low-lying obstructions.
Carbon Fibre Telescopic RV Mount: Lightweight and adjustable, this mount is designed for RVs and vans. It features a telescopic design that allows for height adjustments, ensuring optimal signal reception wherever you are.
Weather-Resistant Design
A key feature of these mounting kits is their ability to withstand harsh weather conditions. Made from durable materials, they are built to endure extreme temperatures, heavy rain, and strong winds. This ensures your Starlink terminal stays securely in place and continues to provide reliable internet connectivity.
Durable Construction: For example, the Tile Roof Mount Kit is built from weather-resistant materials that protect against wind and rain, making it suitable for both residential and remote installations.
Rust-Resistant Finish: Many kits, like the Wall & Eave Mount Kit, include powder-coated finishes to prevent corrosion, ensuring long-term reliability.
Installation Methods
Installing a Starlink Gen 3 roof mount kit is straightforward, even for those with minimal DIY experience. Each kit comes with all the necessary hardware and easy-to-follow instructions.
User-Friendly Design: The installation process is designed to be simple, allowing you to set up your Starlink terminal quickly. For instance, the Tile Roof Mount Kit includes all components needed for a hassle-free setup.
No Drilling Required: Some kits, like the Tin Roof Mount Kit, do not require drilling, preserving the integrity of your roof and making the installation process even easier.
By understanding these mounting options, weather-resistant features, and installation methods, you can confidently choose the right starlink gen 3 roof mount kit for your needs. This ensures your Starlink terminal operates at its best, providing stable and high-speed internet connectivity, no matter the weather or location.
Types of Starlink Gen 3 Roof Mount Kits
When setting up your Starlink Gen 3, selecting the right roof mount kit is key to ensuring a stable and robust installation. Here's a closer look at the different types of kits available:
Tin Roof Starlink Mount Kit
Perfect for corrugated iron roofs, the Tin Roof Starlink Mount Kit requires no drilling, making it easy to install without compromising the integrity of your roof. This kit includes a Gen 3 V4 Adapter, precision-engineered to ensure a snug fit for the rectangle dish. It's designed to maintain your Starlink warranty by avoiding modifications.
Wall & Eave Mount Kit

The Wall & Eave Mount Kit is ideal for those seeking versatile installation options. This kit allows you to mount your Starlink terminal on walls or eaves, providing flexibility in different environments. It features a powder-coated finish for improved durability and weather resistance, making it a great choice for travelers who need a reliable setup that can be easily accessed and removed.
Ridge Cap Mount

Designed for residential tin roofs, the Ridge Cap Mount provides an adjustable setup that ensures optimal signal positioning. This mount lifts your Starlink terminal above low-lying obstructions, like trees or buildings, enhancing your connection's reliability. It's custom to fit roofs with a 25-30 degree pitch, offering flexibility for various installations.
Carbon Fibre Telescopic RV Mount

For those on the move, the Carbon Fibre Telescopic RV Mount is a game-changer. Its telescopic design allows for height adjustments, ensuring optimal signal reception. Lightweight and easy to transport, this mount is perfect for van and RV owners who need a portable and robust solution. The carbon fibre construction ensures durability without adding unnecessary weight.
Tile Roof Mount Kit

The Tile Roof Mount Kit is specifically crafted for tile roof compatibility. This kit offers a weather-resistant and easy installation process, ensuring your Starlink terminal is securely mounted without damaging your tiles. It includes all necessary components for a straightforward setup, making it accessible for both DIY enthusiasts and professionals.
Each of these kits is designed to meet specific needs and environments, ensuring that your Starlink Gen 3 terminal is securely mounted and optimally positioned for the best possible performance. Whether you're at home or on the road, there's a mounting solution custom for you.
How to Install a Starlink Gen 3 Roof Mount Kit
Installing a Starlink Gen 3 Roof Mount Kit is a straightforward process that ensures your satellite dish is securely positioned for optimal performance. Here's a step-by-step guide to help you set it up:
Step 1: Gather Your Tools and Equipment
Before you begin, make sure you have all the necessary tools and components. For most installations, you'll need:
- A ladder for roof access
- A 1/2” socketed driver and wrench
- The specific Starlink roof mount kit components
- Safety gear, such as gloves and goggles
Step 2: Choose the Right Location
Select a spot on your roof that offers a clear view of the sky, free from obstructions like trees or buildings. This is crucial for maintaining a strong and stable internet connection.
Step 3: Assemble the Mount Kit
Tin Roof Kit: Simply place the tripod mount on your corrugated iron roof. This kit requires no drilling, preserving your roof's integrity. Attach the Gen 3 V4 Adapter to the dish and secure it on the mount.
Wall & Eave Kit: Position the mount on your chosen wall or eave. Use the powder-coated cast alloy adapter to attach your Starlink terminal securely. Ensure the mount is level and tightly fastened.
Ridge Cap Kit: Adjust the mount to fit your roof's pitch (25-30 degrees). Secure the Gen 3 V4 Adapter to the terminal, then attach it to the ridge cap mount. This setup lifts the dish, improving signal reception.
Carbon Fibre Telescopic RV Mount: Extend the telescopic pole to the desired height. Attach the top and bottom brackets to your RV or van, ensuring stability. Secure the dish using the flat adapter for optimal signal focus.
Tile Roof Kit: Drill three 12mm holes into the tiles using a ceramic drill. Insert the mounting hardware and secure the dish with the provided components, ensuring a snug fit.
Step 4: Fine-Tune the Position
Use the Starlink app to adjust the dish's position for the best signal reception. In Australia, aim the dish towards the South-Southwest. Fine-tuning may involve slight adjustments to the angle or height.
Step 5: Secure the Installation
Once the dish is aligned correctly, tighten all screws and fasteners. Ensure the mount is stable and the dish is firmly in place. Double-check all connections to prevent movement during harsh weather conditions.
Step 6: Test the Connection
After installation, test the internet connection to confirm everything is working correctly. The Starlink app can help you verify signal strength and stability.
By following these steps, you'll have your Starlink Gen 3 roof mount kit installed quickly and efficiently, ensuring reliable connectivity. Whether you're stationary or on the move, these kits provide the stability and performance you need.
Frequently Asked Questions about Starlink Gen 3 Roof Mount Kits
Does Starlink Gen 3 come with a mount?
No, the Starlink Gen 3 does not come with a mount included. However, there are several universal mounting options available to suit different needs and environments. These mounts are designed to provide a secure and stable installation for your satellite dish, ensuring optimal performance. Whether you're installing on a tin roof, wall, eave, or even on an RV, there's a specific Starlink Gen 3 Roof Mount Kit custom for each scenario. This flexibility allows you to choose the best installation option based on your location and the type of surface you're working with.
Can Starlink Gen 3 be flat mounted?
Yes, the Starlink Gen 3 can be flat mounted, thanks to its innovative design. The dish features a practical "kickstand" that allows for easy placement on flat surfaces. However, when mounting on a vehicle or a roof, additional support is recommended. The Starlink Gen 3 Roof Mount Kit provides secure installation options that prevent movement and ensure stable signal reception, even in adverse weather conditions. This is crucial for maintaining a reliable internet connection, especially in areas prone to high winds or heavy rain.
Is Starlink Gen 3 better than Gen 2?
Yes, Starlink Gen 3 offers several improvements over Gen 2, making it a better choice for many users. One of the key improvements is improved coverage, thanks to its advanced wired mesh technology. This allows for a more stable and reliable internet connection, even in remote or challenging environments. The Gen 3 dish also features a sleek, low-profile design, which not only improves its aesthetic appeal but also reduces wind resistance, further improving performance. These advancements make the Starlink Gen 3 an excellent option for those seeking improved connectivity and reliability.
By understanding the features and benefits of the Starlink Gen 3 Roof Mount Kits, you can make an informed decision about which setup is best for your needs. Whether you're installing on a residential roof or taking your connectivity on the road, these kits offer the stability and performance required for seamless internet access.
Make the Most of Your Starlink Setup—Order Your Gen 3 Mount Now!
At SpaceTek Australia, we understand the importance of reliable connectivity, especially when you're relying on satellite internet. That's why we offer high-quality Starlink Gen 3 Roof Mount Kits designed to meet the diverse needs of our customers. Our mounts are built to withstand harsh Australian conditions, ensuring your Starlink dish remains securely in place, delivering optimal performance regardless of the weather.
Our commitment to quality is evident in the materials we use. Our mounts are made from rust-resistant metals and precision-engineered components, providing a long-lasting solution for your Starlink installation. Whether you're mounting on a tin roof, wall, eave, or even on an RV, our kits offer the strength and durability needed for a stable installation.
We also prioritise ease of installation. Our mounts are compatible with Starlink's self-installer kits, making the setup process straightforward and hassle-free. This means you can quickly get your Starlink Gen 3 dish up and running, enjoying fast and reliable internet connectivity in no time.
For those seeking a seamless Starlink experience, choosing SpaceTek Australia's mounting solutions is the way to go. Our products are custom to improve your satellite internet setup so you can stay connected, no matter where you are!
Explore our range of Starlink Gen 3 mounts and accessories here and open up the full potential of your Starlink investment.
Leave a comment
This site is protected by hCaptcha and the hCaptcha Privacy Policy and Terms of Service apply.