Extending Your Starlink Coverage in Remote Australia
The Starlink mesh wifi router extender for gen 3 is the solution for Australians struggling with poor WiFi coverage in rural and remote locations. If you're looking to extend your Starlink Gen 3 coverage, here's what you need to know:
- Maximum Coverage: Extends WiFi up to 297 m² (3,200 ft²) per node
- Device Support: Connects up to 235 devices simultaneously
- Optimal Setup: Place nodes no more than 1–2 rooms apart
- Node Limit: Best performance with 3 or fewer mesh nodes
- Compatibility: Works with Gen 2 and Gen 3 Starlink routers (not compatible with Gen 1)
Living in remote Australia often means dealing with vast spaces and challenging internet coverage. Whether you're running a station in the Outback or living in a rural community, reliable internet has become essential for work, education, and staying connected with loved ones.
The Starlink Gen 3 system has revolutionised internet access across Australia’s remote regions, but even the most powerful single router has its limits. Large homes, sheds, workshops, and outdoor areas often suffer from WiFi dead zones where the signal simply can’t reach.
That’s where the Starlink mesh wifi router extender comes in. Using advanced WiFi 6 technology with tri-band 4×4 MU-MIMO radios, these mesh extenders create a seamless network that eliminates dead zones and maintains strong signal strength throughout your property.
In the Australian Outback, internet isn't just a convenience—it's a lifeline. A proper mesh setup ensures you stay connected no matter where you are on your property, from the main homestead to the furthest shed.
For optimal performance, the connection between each mesh node needs to be strong. Unlike traditional WiFi extenders that can degrade your signal, these mesh nodes work together as a system, but they must be placed strategically—no more than one to two rooms apart.

Starlink mesh wifi router extender for gen 3 glossary:
Understanding the Starlink Gen 3 Mesh Router
The Starlink Gen 3 Mesh Router represents a significant leap forward in satellite internet technology, especially for Australians in remote areas who need reliable connectivity across larger properties.
At its core, the Gen 3 router features WiFi 6 (802.11ax) technology, which provides faster speeds, greater capacity, and better performance in environments with many connected devices. This is particularly valuable for rural Australian homes where multiple family members might be simultaneously streaming, video conferencing, or managing farm operations online.
The router's tri-band capability is a game-changer for mesh networking. Unlike dual-band routers, the additional band creates a dedicated backhaul channel for communication between mesh nodes, ensuring that your network maintains high speeds even when extended across multiple nodes.
The 4×4 MU-MIMO (Multi-User, Multiple-Input, Multiple-Output) technology allows the router to communicate with multiple devices simultaneously rather than sequentially, dramatically improving performance when several people are using the network at once.
For the harsh Australian climate, the IP56 rating provides excellent protection against dust and water jets from any direction—critical for rural properties where dust storms and sudden downpours are common. This router can operate in temperatures ranging from -30°C to +50°C (-22°F to +122°F), making it suitable for everything from alpine regions to the scorching Outback.
Perhaps most impressive is the router's capacity to support up to 235 connected devices simultaneously. This makes it ideal not just for homes but for rural businesses, stations with multiple smart farming devices, and remote community centres where many users might connect at once.
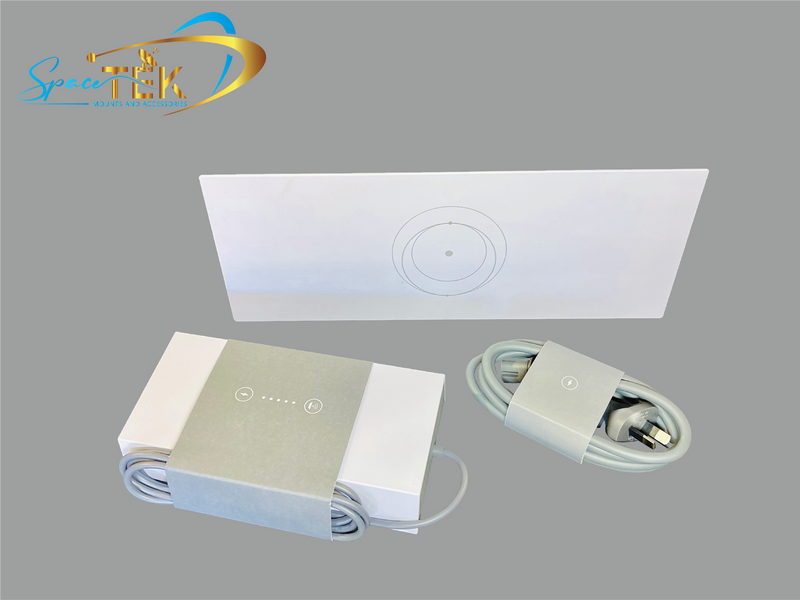
What's Inside the Box?
When you purchase a Starlink mesh wifi router extender for Gen 3 from SpaceTek Australia, here's what you'll receive:
- Router Unit: The sleek, white Gen 3 router with its distinctive wedge shape
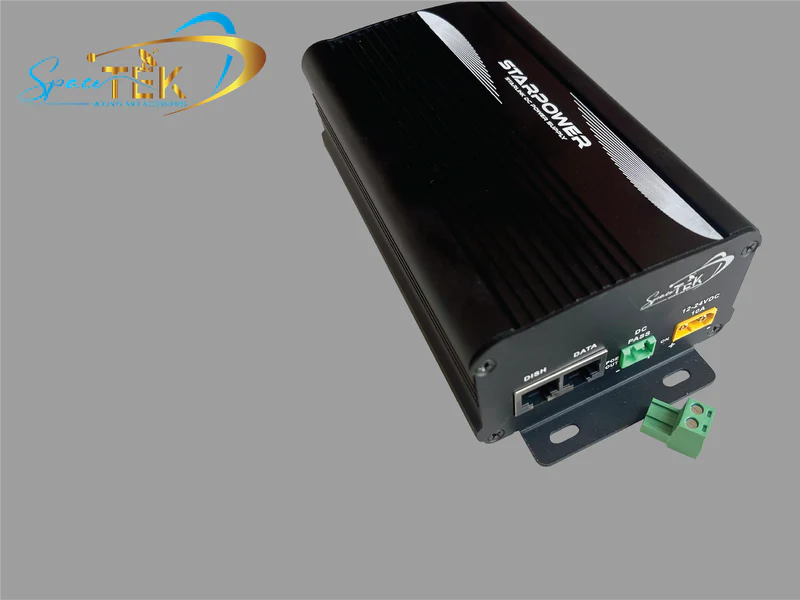
- 57V Power Pack: A dedicated power supply designed specifically for the Gen 3 system
- RJ45 Cover: A protective cover for the Ethernet ports to shield them from dust and moisture
- Power Cable: A 1.5m (4.92 ft) power cable
- Ethernet Cable: A matching 1.5m (4.92 ft) Ethernet cable for wired connections
The router itself features two Ethernet ports, allowing you to connect devices directly for more stable connections—perfect for home offices in remote locations where reliability is paramount. The unit comes ready for immediate setup with your existing Starlink system, with a straightforward pairing process through the Starlink app.
How It Differs from Gen 1 & Gen 2
The evolution from Gen 1 to Gen 3 Starlink routers represents significant improvements in several key areas:
WiFi Standards: While Gen 1 supported older WiFi 5 (802.11ac), the Gen 3 router implements WiFi 6 (802.11ax), offering up to 4x faster speeds at distance. In practical terms, users have reported speeds of 203 Mbps at 50 feet with Gen 3, compared to just 47 Mbps with Gen 1 at the same distance.
MIMO Capability: Gen 2 routers supported 3×3 MIMO, but Gen 3 upgrades to 4×4 MU-MIMO with OFDMA (Orthogonal Frequency Division Multiple Access), allowing more efficient data transmission to multiple devices simultaneously.
Tri-Band Technology: The standout feature of Gen 3 is its tri-band capability, which adds a dedicated backhaul channel for mesh communications. This means that unlike Gen 2, which had to share bandwidth between client devices and mesh communication, Gen 3 can maintain full speed even when operating as part of a mesh network.
Device Capacity: Gen 3 supports up to 235 connected devices, a substantial increase from earlier models, making it more suitable for tech-heavy households or small businesses in remote areas.
Environmental Protection: The IP56 rating represents an upgrade in water and dust resistance, crucial for Australia's variable climate conditions from coastal humidity to inland dust.
Mesh Compatibility: Unlike Gen 1, which doesn't support mesh networking at all, Gen 3 is fully mesh-capable and can work with both Gen 2 and other Gen 3 routers in a mesh configuration.
For Australians in remote areas, these improvements translate to more reliable connections across larger properties, better performance during adverse weather conditions, and the ability to support more connected devices for modern digital farming and remote work applications.
Why Choose a Starlink Mesh WiFi Router Extender for Gen 3
The decision to implement a Starlink mesh wifi router extender for Gen 3 becomes clear when you consider the unique challenges of internet connectivity in remote Australia. Traditional WiFi extenders often create separate networks that require reconnection as you move around your property, but Starlink's mesh system creates a single, seamless network that follows you wherever you go.
For properties spanning large areas or homes with thick walls typical of rural Australian construction, a single router—even one as powerful as the Starlink Gen 3—simply cannot provide consistent coverage everywhere. The mesh system overcomes this limitation by creating a network of interconnected nodes that work together to blanket your entire property with strong WiFi signal.
Australian homes and properties often present unique challenges for WiFi coverage. Whether it's a sprawling single-level homestead, a wool shed located 50 metres from the main house, or a multi-building station with staff quarters, the mesh system can be configured to provide reliable internet access everywhere it's needed.
For remote communities, the Starlink mesh wifi router extender for Gen 3 can be transformative. Schools, health clinics, and community centres can all benefit from consistent, high-speed internet access that extends to every corner of their facilities.
Benefits Over Single-Router Set-ups
The advantages of a mesh network over a single router setup are particularly pronounced in the Australian context:
Speed Retention at Distance: Single routers lose signal strength rapidly with distance, especially through walls or across outdoor spaces. With strategically placed mesh nodes, you'll maintain near-full speeds even at the far reaches of your property. Tests have shown that Gen 3 mesh nodes can deliver up to 203 Mbps at 50 feet, compared to just 47 Mbps with a single router at the same distance.
Dead Zone Elimination: Those frustrating spots where WiFi simply doesn't reach—perhaps the back verandah, the home office, or the workshop—can be completely eliminated with properly placed mesh nodes.
Seamless Roaming: Unlike traditional range extenders that create separate networks requiring manual reconnection, mesh systems maintain a single network name (SSID). This means your devices automatically connect to the strongest signal as you move around your property, without any interruption to your connection.
Multi-Room and Multi-Building Coverage: For properties with detached structures like workshops, granny flats, or equipment sheds, mesh nodes can extend your network across separate buildings (though optimal placement is crucial).
Consistent Performance Under Load: When multiple family members are streaming, gaming, or video conferencing simultaneously, the mesh system distributes the load more effectively than a single router, preventing bottlenecks and maintaining speed for everyone.
More info about Why you may need a Starlink Mesh WiFi Router Extender
Compatible & Incompatible Gear
Understanding compatibility is essential when planning your Starlink mesh network:
Compatible Systems:
- Starlink Gen 3 routers can pair with other Gen 3 routers
- Gen 3 routers can also pair with Gen 2 routers
- Gen 3 routers work with both Standard and High Performance Starlink dishes
Incompatible Systems:
- Gen 1 (round dish) routers do not support mesh networking
- Third-party mesh systems cannot integrate directly with the Starlink mesh ecosystem
- While Gen 3 routers can function as mesh nodes with Gen 2 systems, the included 57V power pack can only power Gen 3 terminals
For those upgrading from older systems, note that Gen 3 routers can be used as the primary router with Gen 1 dishes, but will require an Ethernet adapter for connection. When using a Gen 3 router with a Gen 2 system in bypass mode, you'll need to factory reset when exiting bypass to avoid configuration conflicts.
Planning Your Mesh Network Layout
Getting your Starlink mesh wifi router extender for Gen 3 placement right is absolutely crucial, especially if you're setting up in the Australian outback where distances are vast and building materials can be particularly challenging for WiFi signals.
The golden rule for success is what I like to call the "one to two room" principle. For your mesh network to perform at its best, each node should be positioned no more than one to two rooms away from either your main router or another mesh node. This ensures the nodes can communicate strongly with each other, which is essential for maintaining those speeds you're paying for.
When mapping out your network, keep these strategies in mind:
Central Placement is key. Try to position your primary router in the heart of your home whenever possible. For those classic sprawling Australian homesteads, this might mean placing it in a central hallway rather than tucked away at one end of the house.
Line of Sight makes a world of difference. While your mesh nodes can certainly communicate through walls, having a direct line of sight between them significantly boosts performance. It's worth considering this when deciding where each node will live.
Elevation Matters more than most people realise. Placing your nodes at mid-height in a room, rather than on the floor or hidden away in a corner, dramatically improves signal distribution. If you've got a multi-level home, try to position nodes on different floors to ensure you're covered vertically as well.
For the ultimate performance, especially across larger properties, consider the Wired Backhaul Option. Using Ethernet cables to connect some or all of your mesh nodes creates what's called a "wired backhaul" configuration. This provides faster and more reliable communication between nodes than wireless alone – perfect for those who need rock-solid reliability.
Don't forget to use the WiFi Scanner tool in the Starlink app. It shows signal strength using an intuitive colour code (green for strong, yellow for moderate, red for weak), making it easy to identify the perfect spots for your nodes before you commit to final installation.
Mapping Large Aussie Homes & Sheds
Australian properties present unique challenges that need thoughtful planning:
For Single-Storey Homes, which are common in rural Australia, try to position nodes along a central corridor to provide even coverage throughout. Be aware that corrugated iron roofing and thick brick walls (common in older Australian homes) can significantly block WiFi signals.
In Multi-Storey Homes, you'll want at least one node on each level, ideally near the stairs or central to the floor plan. WiFi signals typically struggle more to penetrate vertically between floors than they do horizontally.
For those Rural Outbuildings like sheds, workshops, or granny flats within 30-40 metres of the main house, a strategically placed mesh node can extend your coverage beautifully. If you're dealing with buildings further away, consider a wired backhaul solution using outdoor-rated Ethernet cable buried in conduit for protection.
On Large Properties with multiple buildings spread far apart, you might need to create "zones" of coverage, each with its own primary router and mesh nodes. While these can't form a single unified mesh network if they're too far apart, they can provide separate coverage areas that meet your needs.
Best Practices for Remote Australia
The unique environmental challenges of the Australian outback require special consideration when deploying your mesh network:
Heat Management is crucial when temperatures regularly soar above 40°C in many parts of Australia. Ensure your router and mesh nodes have plenty of ventilation. Avoid placing them in direct sunlight or in enclosed spaces that trap heat, which can significantly reduce their lifespan.
Dust Protection is essential against Australia's infamous red dust, which can infiltrate electronics and cause failures. Position your nodes away from windows that are frequently opened, and consider giving them a gentle clean with compressed air every few months.
In Cyclone-Prone Regions of northern Australia, make sure all mounting solutions are sturdy and secure. SpaceTek Australia's mounting solutions are specifically designed with these harsh Australian conditions in mind, offering superior stability even in high winds.
Bush Interference can be a significant issue, as trees and dense vegetation can block WiFi signals. If your rural property has substantial bush, you may need additional mesh nodes or particularly careful positioning to maintain coverage around natural obstacles.
For Solar-Powered Sheds or outbuildings without mains power, SpaceTek Australia can advise on solar power solutions compatible with Starlink mesh nodes, allowing you to extend your network to off-grid locations around your property without running expensive power cables.
By taking the time to plan your mesh network layout properly, considering Australia's unique environmental factors, you'll create a robust system that delivers reliable internet to every corner of your property – no matter how remote you might be.
Step-by-Step: Setting Up a Starlink Mesh WiFi Router Extender for Gen 3
Setting up your Starlink mesh wifi router extender for Gen 3 doesn't require an engineering degree – most Aussies can have it up and running in less time than it takes to brew a cuppa. Let's walk through the process together, so you can enjoy seamless internet coverage across your property.
Quick Start Checklist
Before diving in, make sure you've got everything sorted:
Is your main Starlink router online and happy? Give it a quick check before adding new nodes. Have you identified those annoying dead spots where your WiFi signal goes to die? Perhaps it's the back verandah or the study where you need reliable connection for video calls. You'll also need power outlets near your planned mesh node locations – no point having the perfect spot if there's nowhere to plug in!
It's also wise to download the latest version of the Starlink app before you begin. And if you're planning to use wired backhaul for ultimate performance, go ahead and run those Ethernet cables first to save yourself a crawl under the house later.
Pairing Additional Nodes in the Starlink App
Unpacking and powering up your new mesh node is the first step in expanding your digital footprint. Take your new Gen 3 mesh router out of the box, connect the power cable, and plug it into a wall socket in your chosen location. The LED indicator will start flashing white, which is your signal that it's ready to pair.
Make sure your smartphone or tablet is connected to your existing Starlink WiFi network, then open the Starlink app. After a minute or two, you should see a notification pop up saying "New Mesh Node(s)" has been detected. Simply tap "Pair" or "Pair All" if you're setting up multiple nodes, and the app will guide you through the rest of the process.
The LED light on your mesh node is your best mate during setup – it'll tell you exactly what's happening. Flashing white means it's connecting, solid white means success (though it'll turn off after an hour to save power), yellow suggests a poor connection (you might want to shuffle it closer to the main router), and red means it failed to connect (definitely time to relocate it).
Once everything's paired up, check the Network section in the Starlink app. You should see your new mesh node appearing on the network map, along with information about the connection quality between nodes. For those with Gen 2 routers adding a Gen 3 mesh node, make sure your Gen 2 router has the latest firmware before you start.
If you're using a Gen 3 router as your primary router in bypass mode, you'll need to purchase and install a Starlink Ethernet adapter, connect the Gen 3 router via cable, and enable bypass mode in the Starlink app.
Verifying Coverage & Speed
After your mesh network is up and running, it's time to check if it's actually doing what you paid for – providing reliable internet everywhere you need it.
The WiFi Scanner tool in the Starlink app is brilliant for this. Open the app, head to the WiFi Scanner, and take a walkabout through your property. Pay special attention to those spots that were previously as reliable as a paper umbrella in a cyclone. You want to see green signal indicators throughout your home or buildings. If you're seeing yellow or red areas, you might need to shuffle your nodes around a bit.
Next, run some speed tests using apps like Speedtest by Ookla or the built-in Starlink speed test. Do this in multiple locations, especially in areas that previously had reception so poor you couldn't send a text message. You should see significant improvements in these previously weak spots.
If certain areas are still showing weak signals, try adjusting the height of your mesh nodes. It's amazing how much difference lifting a node from floor level to table height can make to your coverage. Sometimes, moving a node just a few metres can dramatically improve your signal.
That Australian homes often present unique challenges for WiFi signals. Those iconic Aussie building materials – brick, concrete, and corrugated metal – can be absolute WiFi killers. You might need to experiment a bit with node placement to achieve optimal coverage, especially in older farmhouses or homesteads with thick walls.
With a bit of patience and strategic placement, your Starlink mesh wifi router extender for Gen 3 will create a blanket of connectivity across your property, keeping you connected no matter where you roam.
Troubleshooting & Optimising Performance
Let's face it – even with the best planning, technology sometimes has a mind of its own. Your Starlink mesh wifi router extender for Gen 3 might need a bit of tweaking to reach its full potential, especially in Australia's diverse environments. Here's how to solve common hiccups and fine-tune your system for top performance.
When your mesh node shows a yellow or red LED, it's usually telling you it's too far from the main router. One-to-two room rule we discussed earlier? It's not just a suggestion – it's the key to maintaining strong connections between nodes. Sometimes moving a node just a few metres closer to the main router can make all the difference between patchy coverage and seamless internet.
Power issues are another common culprit when nodes refuse to cooperate. If you're not seeing any LED activity and the node isn't appearing in your app, try the basics first – check your connections and test a different power outlet. You'd be surprised how often this simple step solves the problem. If you have multiple nodes, you can even swap power supplies to identify if that's the issue.
For those with larger setups, be wary of the "daisy-chain effect." When nodes connect in a line rather than directly to the main router, each hop adds a bit of latency. Instead, try to create a "star" pattern where each node connects directly to the main router when possible. This reduces the number of hops your data needs to make, keeping your speeds snappy throughout your property.
If the Starlink app isn't detecting your new node, ensure your phone is actually connected to your Starlink network (it happens to the best of us!). Sometimes a simple app restart does the trick, or you might need to power cycle both your main router and the stubborn mesh node.
For persistent coverage issues, the WiFi Scanner tool in your Starlink app is your best mate. It helps identify weak spots so you can reposition nodes for better coverage. In Australian homes with thick brick walls or corrugated iron roofing, signal penetration can be more challenging than in standard timber-framed buildings.
Common Issues & Fixes
When all else fails, the trusty factory reset can work wonders. To reset a troublesome mesh node:
- Unplug the power cable
- Plug and unplug the router six times in quick succession (keep it snappy – no more than 3 seconds between actions)
- Wait for the router to restart, then attempt pairing again
It's worth noting that Starlink recommends limiting your mesh network to three nodes maximum. While it might be tempting to add more for better coverage, having more than three nodes can actually decrease overall performance due to increased network management overhead. Quality over quantity is definitely the way to go here.
For those experiencing inconsistent coverage across their property, don't forget that node height matters. Raising a node from floor level to table height can significantly improve its range, particularly in single-level Australian homes where furniture and appliances can block signals.
How can I improve my WiFi connectivity?
Advanced Tweaks for 2025
Looking ahead to 2025, several advanced configurations can future-proof your Starlink mesh network and keep it running at its best.
While the Starlink app doesn't currently offer manual channel selection, future updates may enable this feature. When available, channel steering will allow you to select less congested WiFi channels, improving performance in areas with many neighbouring networks – particularly useful in rural communities where everyone uses Starlink!
Consider splitting your bands by creating separate network names for your 2.4 GHz and 5 GHz networks. This lets you connect older devices or IoT sensors to the more reliable (but slower) 2.4 GHz band while keeping your main devices on the faster 5 GHz band. It's a simple change that can make a big difference in network management.
For the ultimate performance boost, especially in larger Australian properties, wired Ethernet backhaul is worth the effort. Running Ethernet cables between your router and mesh nodes creates a rock-solid connection that significantly improves speed and reliability. SpaceTek Australia can advise on outdoor-rated cables for connecting separate buildings – perfect for extending coverage to the shed or granny flat.
As cyber threats continue to evolve, using strong, unique passwords for your WiFi network becomes increasingly important. Consider updating your password regularly and using a password manager to keep track. A secure network is just as important as a fast one.
Lastly, make sure your system is set to receive automatic firmware updates. Starlink regularly updates router firmware to improve performance and security. These updates will continue to improve your mesh network's capabilities through 2025 and beyond, often adding new features and optimisations without you having to lift a finger.
By applying these troubleshooting tips and optimisations, your Starlink mesh wifi router extender for Gen 3 will deliver the reliable, high-speed internet that remote Australian properties deserve, no matter what challenges our unique landscape presents.
Frequently Asked Questions about Starlink Gen 3 Mesh
How many mesh nodes can I run without losing speed?
When setting up your Starlink mesh wifi router extender for Gen 3 network, less is often more. Starlink officially recommends using a maximum of three mesh nodes (including your main router) for the best performance. While it's technically possible to add more nodes, doing so can actually work against you – each additional node beyond three creates more network management overhead, potentially slowing down your entire system.
For most Aussie homes and smaller properties, three strategically placed nodes will provide excellent coverage without compromising on speed. If you're managing a sprawling property with multiple buildings, consider creating separate mesh networks for different areas rather than trying to stretch a single network beyond its capabilities.
The key to maintaining consistent speeds throughout your network is proper node placement. Aim for a "star" configuration where all nodes connect directly to the main router rather than "daisy-chaining" through other nodes. This minimises latency and helps maintain higher speeds across your entire network.
Is a Gen 3 mesh extender compatible with my older Gen 2 router?
Yes! The good news for Starlink users looking to upgrade gradually is that the Starlink mesh wifi router extender for Gen 3 works perfectly with Gen 2 routers. This backwards compatibility means you can improve your existing system without replacing everything at once – a real bonus for budget-conscious households.
When pairing a Gen 3 mesh node with your Gen 2 router, follow these simple steps for the best results:
First, make sure your Gen 2 router has the latest firmware installed. For initial pairing, place the Gen 3 node in the same room with clear line of sight to your Gen 2 router. Follow the standard pairing procedure through the Starlink app, and once successfully paired, you can move the Gen 3 node to its permanent position.
While your Gen 3 mesh node will work with your older router, keep in mind that some advanced features might be limited by your main router's capabilities. You'll definitely see improved coverage, but to fully benefit from WiFi 6 and tri-band technology, you might want to consider upgrading your main router to Gen 3 in the future.
Can I mix Starlink mesh with third-party Wi-Fi systems?
Yes, you can replace the Starlink router with a third-party router by connecting it behind the Starlink router and enabling bypass mode in the Starlink app. However, your Starlink mesh wifi router extender for Gen 3 is designed to work optimally within Starlink's ecosystem. Hence, here are some important notes to remember:
- Gen 2 Starlink routers require an ethernet adapter (available in the Starlink shop)
- Enterprise, High Performance, or Flat High Performance kits with included power supplies allow direct replacement with third-party systems
- Some Starlink app features may not function properly with third-party routers
- Performance and compatibility with non-Starlink networking equipment cannot be guaranteed
For detailed instructions on bypass mode configuration, visit Starlink's support documentation.
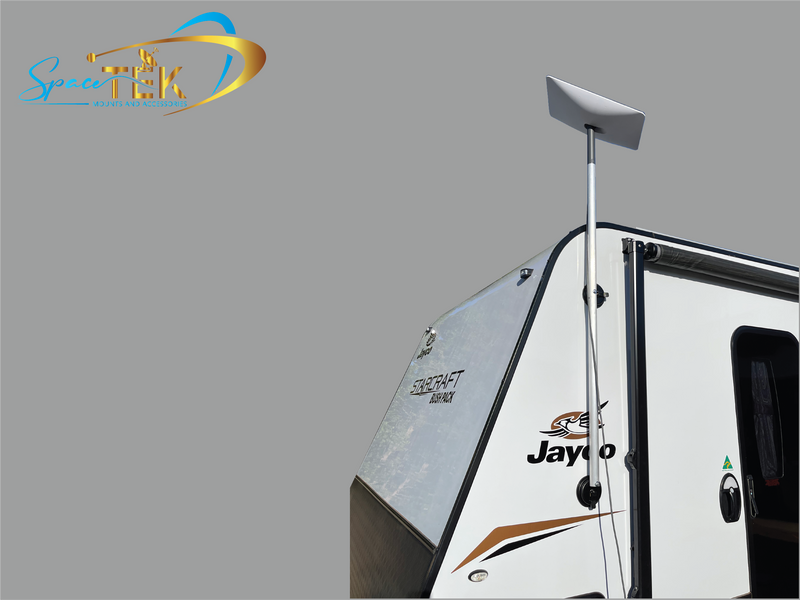
Reliable Internet Starts with the Right Accessories
For Australians in remote locations, having the right accessories is just as important as choosing the right internet service. SpaceTek Australia specializes in Starlink-compatible mounting solutions and accessories designed specifically for the unique challenges of the Australian environment.
Our rust-resistant hardware is engineered to withstand everything from coastal salt spray to outback dust storms. Unlike standard mounts, SpaceTek Australia's products use marine-grade stainless steel and high-quality, UV-resistant materials that won't deteriorate under the harsh Australian sun.
For those extending their Starlink coverage with mesh nodes, proper mounting is essential. SpaceTek Australia offers custom mounting solutions that:
- Lift your Starlink dish above obstructions for optimal satellite visibility
- Provide stable platforms for mesh routers to maximize signal strength
- Include cable management solutions to protect connections from weather and wildlife
- Feature adjustable designs that allow for fine-tuning placement for the best coverage
In remote Australian conditions, the difference between standard hardware and purpose-built accessories can be the difference between a system that fails after one wet season and one that provides reliable service for years.
Our team understands the unique challenges faced by remote Australian communities and properties. Whether you're setting up Starlink on a station in the Northern Territory, a coastal home in Far North Queensland, or a small business in outback Western Australia, SpaceTek Australia has mounting solutions designed for your specific needs.
The Starlink mesh wifi router extender for Gen 3 provides the technology to extend your coverage, and SpaceTek Australia provides the hardware to ensure that technology performs at its best in even the most challenging Australian conditions.
In conclusion, the Starlink mesh wifi router extender for Gen 3 represents a significant advancement in bringing reliable internet to remote Australia. By understanding the system's capabilities, planning your network layout carefully, and following best practices for installation and troubleshooting, you can create a robust network that serves your entire property.
Combined with SpaceTek Australia's purpose-built mounting solutions, your Starlink system can provide years of reliable service even in the harshest Australian conditions. From the tropical north to the arid interior, Australians everywhere can now enjoy internet connectivity that rivals urban areas, breaking down the digital divide that has historically separated remote communities from the rest of the country.
As we look toward 2025 and beyond, this technology will continue to evolve, bringing even greater capabilities to remote Australia and ensuring that no matter where you live, you can stay connected to the wider world.
Leave a comment
This site is protected by hCaptcha and the hCaptcha Privacy Policy and Terms of Service apply.