Transform Your Rural Connectivity with Professional Starlink Setup
Starlink satellite dish installation has revolutionised internet access across remote Australia, bringing high-speed connectivity to areas where traditional broadband simply can't reach. Whether you're running a cattle station in the Kimberley or working from home in rural Tasmania, getting your Starlink dish properly installed is the key to reliable internet.
Quick Starlink Installation Overview:
- Unbox and assemble - Standard kit includes dish, router, and 75-foot cable
- Find clear sky view - Use Starlink app to scan for 100° unobstructed view
- Mount securely - Choose from kickstand, wall mount, or pole mount options
- Route cables safely - Drill 3/4" hole and weatherproof entry point
- Power up and align - Dish automatically finds satellites within minutes
- Configure network - Set up Wi-Fi through the Starlink app
The installation process typically takes under 30 minutes for temporary setups, though permanent installations requiring roof mounting or pole systems may take several hours. Most Aussie users can handle the DIY installation themselves, but challenging environments like cyclone-prone areas or steep roofs may benefit from professional mounting solutions.
I'm Aaron Wroblewski, founder of SpaceTek Australia, and I've spent over 25 years helping Australians stay connected through satellite technology and remote communications systems. My experience with Starlink satellite dish installation across diverse Australian conditions—from coastal corrosion to outback extremes—has shown me exactly what works and what doesn't when it comes to reliable satellite mounting.
Understanding Starlink and Why It's a Game-Changer
Starlink satellite dish installation has fundamentally changed the internet landscape for remote Australia, and it all comes down to one difference: where the satellites actually live in space.
Traditional satellite internet services position their satellites in geostationary orbit—a whopping 35,000 kilometres above Earth. That's roughly the distance from Perth to Sydney and back again, four times over. Starlink's satellites, on the other hand, orbit at just 550 kilometres altitude in what's called Low Earth Orbit (LEO). This might sound like a technical detail, but it's the difference between frustrating dial-up-like delays and genuinely usable high-speed internet.
When you click a link or join a video call, your signal needs to travel all the way up to the satellite and back down again. With traditional satellite internet, that's a 70,000-kilometre round trip through space, resulting in delays of 600+ milliseconds. That's why video calls feel awkward and online gaming becomes impossible with old-school satellite internet.
Starlink's shorter journey means latency drops to just 30-40 milliseconds—comparable to what you'd get with NBN fibre in the city. Suddenly, video conferencing with clients in Melbourne becomes seamless, even from a cattle station in the Northern Territory.
The speed improvements are equally impressive. Starlink delivers download speeds between 50-200 Mbps consistently across Australia, with many users reporting the higher end of this range during off-peak hours. Recent research on Starlink hardware shows the system continues to improve as more satellites join the constellation.
For Starlink in Australia, this performance leap means remote communities can finally access the same digital opportunities as their urban counterparts. Whether you're running an online business from rural Queensland or helping kids with distance education in the Pilbara, the connection quality makes all the difference.
Starlink vs Traditional Satellite Internet
The orbit height difference creates a ripple effect of improvements that go well beyond just speed and latency.
Weather resilience improves dramatically with LEO satellites. Traditional geostationary satellites require your signal to punch through 35,000 kilometres of atmosphere—including whatever storms, clouds, or atmospheric disturbances happen to be in the way. Heavy rain or thick cloud cover can knock out your connection entirely.
Starlink's lower orbit means less atmosphere to traverse, and the constellation approach provides built-in redundancy. If one satellite's signal gets disrupted by weather, others are already positioned to maintain your connection. The dish even includes built-in heating elements to melt snow and ice—particularly useful for those frosty mornings in the Snowy Mountains or Tasmania's highlands.
Perhaps the biggest game-changer is the self-aligning capability. Traditional satellite dishes require precise pointing to within fractions of a degree. Get it slightly wrong, and you'll have no internet at all. Professional installers often charge hundreds of dollars just for the alignment process.
Starlink dishes automatically find and track satellites as they move across the sky. Simply plug in "Dishy McFlatface" (yes, that's SpaceX's official nickname), and within minutes it'll be locked onto the constellation and delivering high-speed internet. This makes Starlink for Remote Australia genuinely accessible to anyone comfortable with basic DIY tasks.
The latency impact transforms what's possible online. Video calls become natural conversations rather than awkward delays. Cloud-based software responds instantly. Online gaming becomes viable for the first time in many remote areas. For Starlink for Remote Communities, this opens up educational, business, and social opportunities that simply weren't possible before.
Pre-Installation Checklist & Choosing the Perfect Spot for Starlink satellite dish installation
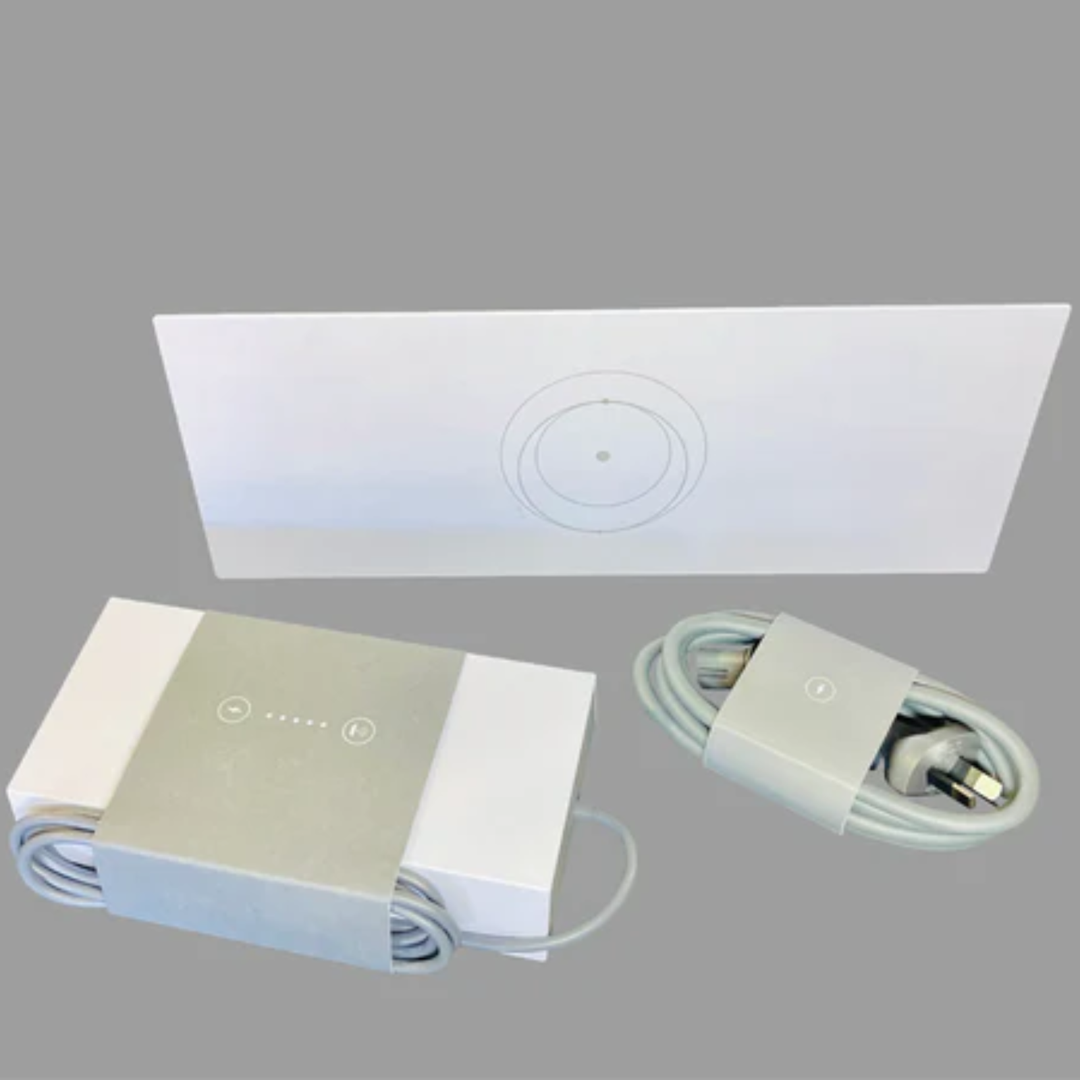
Before beginning your Starlink satellite dish installation, you'll need to verify your kit contents and prepare your installation site. The standard Starlink kit includes the satellite dish (affectionately nicknamed "Dishy McFlatface"), a Wi-Fi router, approximately 75 feet of outdoor-rated cable, a power supply, and basic mounting hardware.
The most critical aspect of site selection is ensuring a 100-degree unobstructed view of the sky. This isn't just a recommendation—any obstruction level greater than 0.2% in the Starlink app can negatively affect performance, and obstructions exceeding 0.27% will cause noticeable service interruptions. Use the Starlink app's obstruction tool to scan your intended mounting location before committing to installation.
For Australian conditions, consider seasonal changes in vegetation and weather patterns. That perfect clear view in winter might be blocked by growing tree canopies in summer. Similarly, consider the impact of severe weather events like cyclones, which may require more robust mounting solutions than the standard kit provides.
Starlink satellite dish installation site selection in Australia
Australia's diverse climate zones present unique challenges for satellite dish installation. In tropical regions like Queensland's far north, you'll need to account for cyclone-rated mounting systems and potential storm damage. The standard Starlink mounting hardware may not meet local building codes for high-wind areas.
Coastal installations face additional challenges from salt corrosion. Standard mounting hardware can deteriorate rapidly in marine environments, making rust-resistant materials essential for long-term reliability. At SpaceTek Australia, we've developed mounting solutions specifically designed for Australian coastal conditions, using marine-grade materials that withstand salt spray and extreme weather.
Outback installations often deal with extreme temperature variations and dust storms. While Starlink dishes are designed to operate in harsh conditions, proper mounting becomes crucial for maintaining alignment during thermal expansion and contraction cycles. The dish's built-in heating system helps with cold weather operation, but proper ventilation prevents overheating in extreme heat.
For more detailed guidance on site selection, check out our Starlink Installation Guide which covers Australian-specific considerations.
Tools & Accessories You Might Need
Beyond the standard kit, successful permanent installation typically requires additional tools and materials. Essential items include a ladder for roof access, a drill with a 3/4-inch (19.05mm) bit for cable routing, and appropriate safety equipment including a harness for rooftop work.
For permanent mounting, you'll likely need additional hardware beyond what's included in the standard kit. Wall mounting requires appropriate fasteners for your specific wall material—masonry anchors for brick or concrete, or heavy-duty screws for timber framing. Pole mounting requires a suitable pole (typically 1.5-inch diameter) and proper foundation preparation.
Weatherproofing materials are crucial for Australian conditions. You'll need exterior-grade sealant, cable grommets, and potentially conduit for cable protection. In areas prone to severe weather, consider surge protection devices to protect your investment from lightning strikes and power fluctuations.
At SpaceTek Australia, we provide comprehensive mounting solutions designed specifically for Australian conditions. Our rust-resistant mounting hardware ensures long-term reliability in harsh environments. For detailed information about mounting options, visit our Starlink Mounting Hardware guide.
Step-by-Step Starlink satellite dish installation Guide
Getting your Starlink satellite dish installation right from the start makes all the difference between frustrating dropouts and rock-solid internet. I've guided hundreds of Aussie families through this process, and there's a certain satisfaction in watching that first speed test come back with numbers that would make your old ADSL connection weep.
The beauty of Starlink lies in its simplicity—no need for a technician to spend hours adjusting angles with mysterious equipment. Your dish is smart enough to find the satellites on its own, but it still needs you to give it the best possible foundation to work from.
Start with what I call the "test drive" approach. Before you commit to drilling holes or climbing onto roofs, set up the dish temporarily using the kickstand that comes in the box. This lets you verify everything works perfectly at your chosen spot before making it permanent. Trust me, it's much easier to move a dish sitting on the ground than one you've already bolted to your roof.
Unboxing "Dishy McFlatface" & Initial Power-Up
Opening your Starlink kit feels a bit like Christmas morning, doesn't it? Inside that surprisingly compact box, you'll find the dish itself—officially called the User Terminal, but everyone knows it as "Dishy McFlatface." The router, 75-foot cable, and power supply round out the essentials.
Don't expect a thick manual—Starlink keeps things refreshingly simple with just a QR code pointing you to their app. The dish connects to the router through that hefty outdoor cable, and both connectors are built to handle whatever the Australian weather throws at them.
When you first power up the system, don't panic if the dish starts moving around like it's doing some sort of satellite dance. That's exactly what it should be doing—automatically downloading firmware updates and hunting for the best satellites overhead. The whole process can take up to 12 hours to fully optimise, though you'll usually see your first internet connection within minutes.
The router's LED tells you what's happening: solid white means you're good to go, while other colours indicate the system is still working through its setup routine. The Starlink app gives you all the technical details if you're curious about signal strength and performance metrics.
Mounting Options for Every Surface
Choosing the right mount depends entirely on your property and how permanent you want the installation to be. The kickstand that comes with the kit works brilliantly for temporary setups or if you've got a nice flat area with perfect sky view. Many of my customers in flatter regions stick with this simple approach for months without issues.
For more permanent installations, wall mounting works well when you've got a suitable wall facing the right direction. The key is ensuring your wall can handle both the dish's weight and any wind loading—Australian weather can be unforgiving.
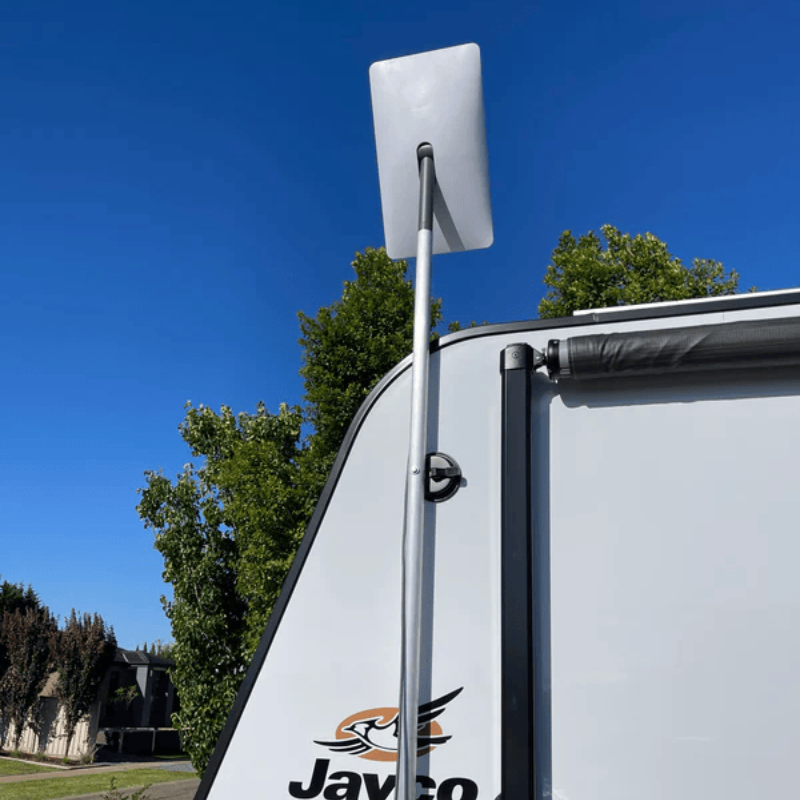
Ground-level pole mounting often provides the clearest sky view, especially if you're dealing with surrounding trees or buildings. A properly installed pole mount gives you flexibility to position the dish exactly where it needs to be, away from obstructions. Our DIY Starlink Pole Mount guide walks you through the entire process with Australian conditions in mind.
Roof mounting requires the most planning but often delivers the best long-term results. Different roof types need different approaches—tile roofs, metal roofing, and flat roofs each have their own mounting considerations. Whatever you choose, make sure it meets local building codes and won't compromise your roof's weather sealing.
For specific roof mounting guidance, Starlink's Wedge Mount Install Guide provides detailed instructions for sloped roof installations.
Weatherproof Cable Routing & Entry Sealing
Getting that cable from your dish to your router without letting the weather in requires some careful planning. You'll need to drill a 3/4-inch hole through your wall—that's exactly the right size for the pre-fitted connector on the Starlink cable.
Before the cable enters your building, create what we call a drip loop—a deliberate downward curve in the cable that encourages water to drip off rather than follow the cable inside. It's a simple trick that prevents a world of water damage headaches.
Proper sealing makes the difference between a professional installation and a future problem. Install a quality grommet in your entry hole, then seal around it with exterior-grade silicone sealant. In cyclone-prone areas, consider running the cable through protective conduit for extra security.
That the Starlink cable has a maximum effective length of 150 feet. Beyond that, you'll start seeing signal degradation. Plan your cable route to minimise length while maintaining proper weatherproofing. The cable isn't designed for direct burial, so use conduit for any underground sections.
The official Starlink Cable Routing Kit Guide provides comprehensive weatherproofing instructions that cover various entry methods and sealing techniques.
Optimising Performance & Future-Proofing for Remote Australia, 2025
As Starlink continues expanding its constellation and improving service quality, optimising your installation for future performance becomes increasingly important. The system's capability continues evolving through regular firmware updates, but your physical installation foundation determines how well you can take advantage of these improvements.
For large properties or multi-building installations, consider mesh networking solutions to extend coverage beyond the standard router's range. The Starlink router provides strong Wi-Fi coverage for most small to medium homes, but larger installations may benefit from additional access points or mesh nodes strategically positioned throughout the coverage area.
Power management becomes crucial for remote installations. Consider uninterruptible power supply (UPS) systems to maintain connectivity during power fluctuations or brief outages. Starlink dishes consume approximately 50-75 watts during normal operation, making battery backup systems practical for short-term power protection.
Improve your Starlink satellite dish installation in 2025
Looking ahead to 2025, several upgrade paths can improve your existing Starlink installation. Regular firmware updates continue improving performance and adding new features. Enable automatic updates to ensure your system benefits from the latest improvements without manual intervention.
Monitor your system's performance statistics through the Starlink app to identify potential issues before they affect service quality. The app provides detailed information about signal strength, obstruction levels, and connection quality that can help optimise dish positioning or identify maintenance needs.
At SpaceTek Australia, we're continuously developing new mounting solutions and accessories to help Australian users get the most from their Starlink systems. Our upgrade kits allow existing installations to benefit from improved mounting hardware without complete system replacement.
Consider surge protection devices to protect your investment from lightning strikes and power surges. Australian weather conditions can be particularly harsh on electronic equipment, making surge protection a worthwhile investment for long-term system reliability.
Troubleshooting Common Issues
Most Starlink installation issues stem from obstructions or improper mounting. The Starlink app's obstruction map provides real-time feedback about signal blockages. Even temporary obstructions like growing vegetation can significantly impact performance over time.
Connection drops often result from loose cable connections or dish movement due to wind or thermal expansion. Ensure all cable connections are fully seated and secure. For permanent installations, verify that mounting hardware remains tight and hasn't loosened due to weather or thermal cycling.
Wind-induced dish movement can cause intermittent connectivity issues. This is particularly common with temporary kickstand installations or inadequately secured permanent mounts. Proper mounting hardware designed for your specific installation environment eliminates most wind-related issues.
For guidance on avoiding common obstruction problems, check out our Tips to Steer Around Dish Obstructions guide, which provides practical solutions for challenging installation sites.
Lightning protection becomes important in storm-prone areas. While Starlink equipment includes basic surge protection, additional protection devices can provide extra security for your investment. Proper grounding of mounting hardware also helps protect against lightning strikes.
Frequently Asked Questions about Starlink Dish Setup
How big a hole do I drill for the Starlink cable?
You'll need to drill a 3/4-inch (19.05mm) diameter hole to accommodate the pre-fitted connector on the Starlink cable. This size allows the connector to pass through while providing space for proper sealing around the cable entry point. Always deburr the hole edges to prevent cable damage and install a proper grommet for weatherproofing.
Can I extend the dish more than 75 ft from my house?
Yes, Starlink cables can be extended up to 150 feet total length using official extension cables. However, the cable cannot be extended beyond 150 feet without signal degradation due to power requirements. The standard kit includes approximately 75 feet of cable, allowing for a 75-foot extension if needed.
For longer runs, consider positioning the router closer to the dish and using Wi-Fi extenders or mesh systems to provide coverage throughout your building. This approach often provides better performance than extremely long cable runs.
Do I need professional installation in cyclone zones?
While Starlink is designed for DIY installation, cyclone-prone areas may require mounting solutions that exceed the capabilities of the standard kit. Local building codes often mandate specific wind ratings for permanent installations, particularly in cyclone zones.
Professional installation becomes advisable when local conditions exceed the standard mounting hardware's specifications or when installation requires specialised equipment like liftd work platforms or crane access. At SpaceTek Australia, we provide cyclone-rated mounting solutions designed to meet Australian building standards.
Reliable Internet Starts with the Right Accessories
Getting your Starlink satellite dish installation right the first time makes all the difference between frustrating dropouts and rock-solid connectivity. After helping thousands of Australians connect to Starlink across everything from beachfront properties to remote mining camps, I've learned that the biggest difference between a good installation and a great one comes down to using the right mounting hardware.
The harsh reality is that Australia throws everything at your satellite equipment. Coastal salt spray will eat through standard mounting hardware faster than you'd believe, while the outback's extreme temperature swings can loosen bolts and crack inferior materials. That cyclone season up north? It'll test every component of your installation.
At SpaceTek Australia, we've designed our mounting solutions specifically for these challenging Australian conditions. Our rust-resistant mounting hardware isn't just marketing speak—it's the difference between a system that lasts two years and one that's still performing flawlessly after a decade of punishment.
The standard Starlink kit does a decent job for basic installations, but when you're dealing with Starlink for Remote Australia, you need equipment that won't let you down. Our mounting systems handle cyclone-force winds, resist corrosion from salt air, and maintain their integrity through temperature extremes that would leave standard hardware as a pile of rust and broken dreams.
Proper mounting hardware pays for itself through reliability and longevity. When your nearest service technician is hundreds of kilometres away, equipment failure isn't just inconvenient—it can be genuinely problematic. That's why we've engineered our mounts to Australian building standards, ensuring your Starlink satellite dish installation will weather whatever nature throws at it.
Whether you're bringing high-speed internet to remote communities, enabling reliable connectivity for Starlink in Australia's most challenging locations, or simply ensuring your family stays connected, the foundation of success lies in proper installation with quality components.
Our team understands that every installation is unique. From cattle stations dealing with livestock interference to coastal homes battling salt corrosion, we've developed solutions for Australia's diverse challenges. Contact our experienced team at SpaceTek Australia for personalised advice on the mounting solutions that'll work best for your specific situation.
Your Starlink system represents a significant investment in connectivity—protect that investment with mounting hardware designed to last. With proper installation using quality Australian-made accessories, your satellite internet will provide years of reliable service, keeping you connected to the world no matter where you call home across this vast continent.

Leave a comment
This site is protected by hCaptcha and the hCaptcha Privacy Policy and Terms of Service apply.