When Your Starlink Drops Out: What to Do First

A starlink troubleshooting guide gives you a clear, step-by-step process to diagnose and fix the most common Starlink issues — without waiting on support.
Here are the five steps that resolve around 85% of all Starlink problems, prioritising physical stability:
- Verify mount stability — ensure the dish is perfectly still and hasn't shifted due to wind or loose hardware.
- Inspect all cables for kinks, damage, or loose connections at both the dish and router end.
- Check the Starlink app for outage alerts, obstruction warnings, and signal data.
- Power cycle your system — unplug the router for at least 60 seconds, then wait up to 15 minutes to reconnect.
- Factory reset your router as a last resort before contacting Starlink support.
Most users can resolve their issue by securing their mount or checking cables. Physical instability and obstructions alone account for a massive portion of signal issues — and they are almost always fixable without professional help.
That said, in Australia, the problem often runs deeper than a quick reboot. Harsh sun, coastal salt air, and extreme temperature swings put real pressure on your Starlink hardware — especially your mounting setup. A loose or corroded mount can cause signal drops that look like software or service issues but are actually physical. This is why we always recommend a high-quality, Australian-made mount as the first line of defence.
This guide walks you through every layer of the problem, from physical hardware inspection right through to app diagnostics and advanced fixes.
Mastering the starlink troubleshooting guide for Australian Users
When your internet cuts out in the middle of a Zoom call or a streaming session, the frustration is real. However, statistics show that you can fix approximately 95% of Starlink issues without professional assistance. The key is a systematic approach that starts with physical stability. Before assuming your hardware is faulty or checking the app, ensure your mount is rock-solid. A dish that vibrates or sways even slightly in the wind will cause frequent micro-dropouts.

Diagnosing Connectivity with the starlink troubleshooting guide
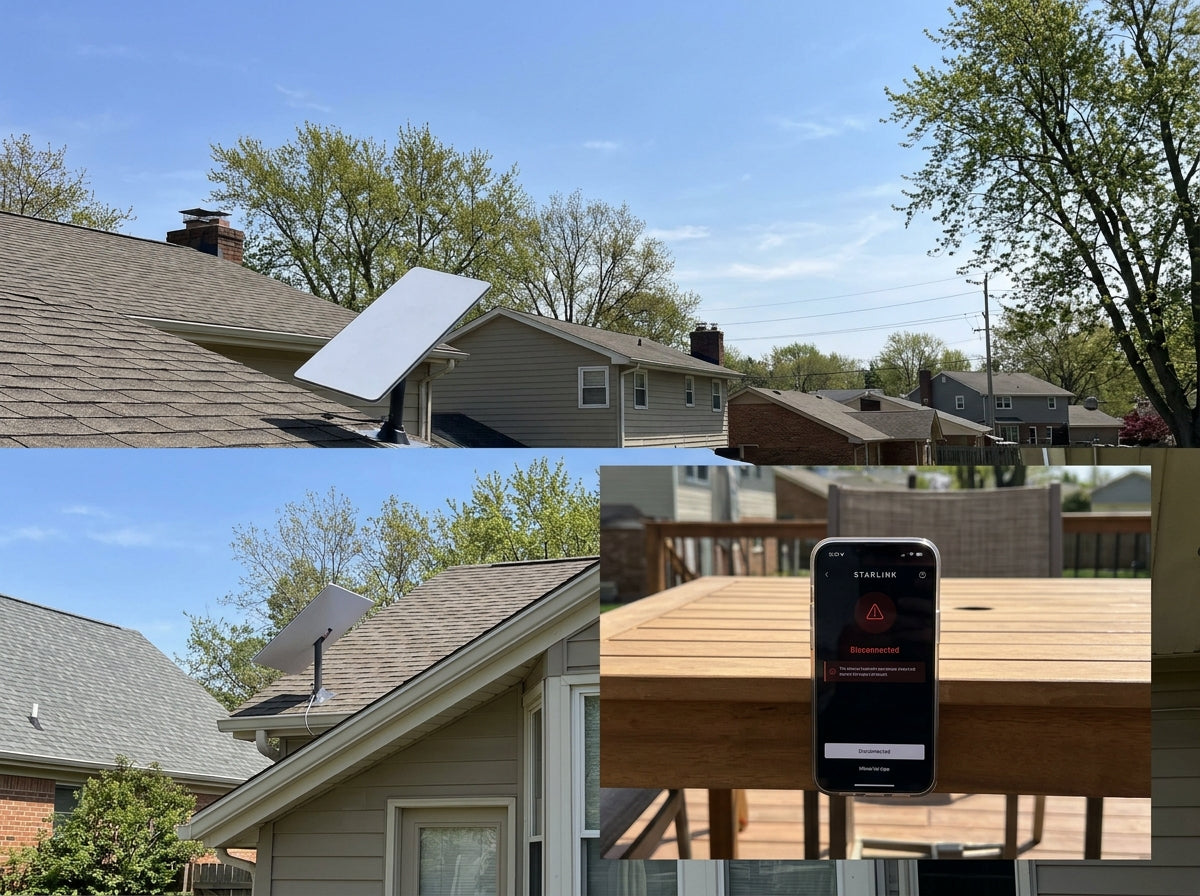
The first question to answer is: Is the dish physically stable? If your mount is loose, no amount of software rebooting will fix the connection. Once stability is confirmed, check if the problem is local or a widespread service outage. If your app shows 'Disconnected' or 'Offline', check for external factors. We recommend visiting Down Detector or the unofficial Starlink Status site to see if other users in your region are reporting similar issues.
If there are no reported outages, the most effective "quick fix" is a power cycle. Power cycling for 20 minutes fixes 60% of Starlink issues because it allows the internal capacitors to fully discharge and forces the dish to re-acquire its GPS position and satellite schedule. Simply unplug the power from the wall, wait, and plug it back in. That after a power cycle or reset, Starlink typically takes up to 15 minutes to reconnect as it scans the sky.
For more detailed steps on these initial checks, you can read our guide on how to troubleshoot your Starlink internet problems easily. If your system was working fine last week but stopped suddenly, it could be a simple setup error. You can find more info about why Starlink won't connect to help narrow down the cause.
Resolving Obstructions and Signal Loss
Obstructions cause 40% of all Starlink support tickets and are the primary reason for 'No Signal' or 'Searching' messages. Because Starlink satellites are in Low Earth Orbit (LEO) and move at 17,000 mph, your dish needs a massive 110-degree field of view to maintain a handoff between satellites. Even a single tree branch or the corner of a gutter can cause a "micro-dropout" every few minutes.
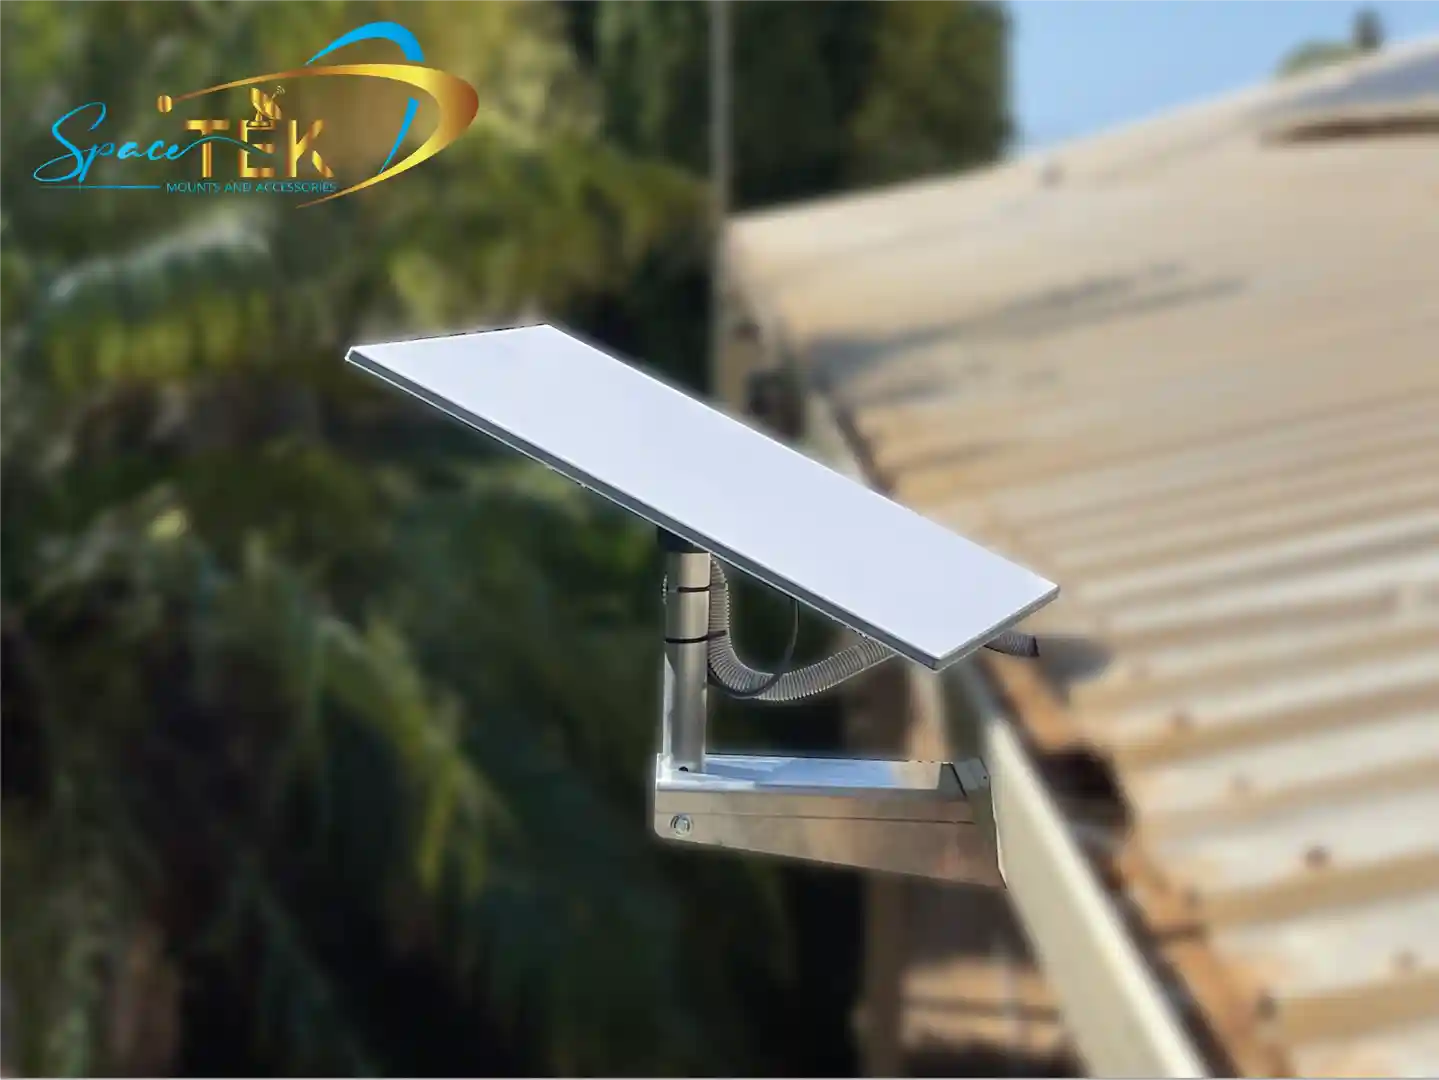
Use the Starlink app's obstruction tool to scan the sky. If you see red dots on the map, you must relocate the dish. In many Australian homes, ground-level installation just isn't viable due to gum trees or neighbouring structures. This is where mounting height becomes critical. Elevating your dish using a high-quality mounting solution from SpaceTek often resolves these "phantom" connection drops instantly.
If you are struggling with intermittent performance, check out our deep dive on conquering Starlink connection glitches. For those wondering how much obstruction is too much, this resource on Starlink Obstructions provides excellent visual benchmarks.
Inspecting Hardware and Cable Integrity
If the app says 'Starlink Disconnected' or 'Starlink Unplugged', the issue is likely physical. Australian conditions are notoriously tough on cables. High UV levels can make standard cable jackets brittle, and extreme heat can cause connectors to expand and loosen.
We recommend inspecting the entire length of your cable for:
- Kinks or sharp 90-degree bends (which can damage the internal copper).
- Chew marks from local wildlife (cockatoos and rodents are common culprits).
- Loose seating at the dish or the router port. The Gen 3 and Mini models require the plug to be pushed in until it is perfectly flush.
If you see a red light on your router, it specifically indicates a communication failure between the dish and the router. This is often solved by reseating the cable. For those running mobile setups or off-grid kits, consistent power is vital. We’ve developed StarPower DC solutions to ensure stable 12-24V conversion, which prevents the "reboot loops" caused by voltage drops.
If you're seeing strange lights on your equipment, read our guide on what the lights on your Starlink power supply mean. Long-term users should also be aware of Starlink dropouts after 2 years of exposure to the elements.
Optimising Router Performance and WiFi
Sometimes the satellite connection is perfect, but your home WiFi is the bottleneck. The Starlink router can technically support up to 128 connected devices, but in reality, bandwidth is shared. If you have 20 devices streaming 4K video, your speeds will crawl.
To improve performance:
- Placement: Optimise your Starlink router placement by keeping it central, elevated, and away from thick masonry walls.
- Split Bands: Use the app settings to separate the 2.4 GHz and 5 GHz networks. Use 5 GHz for gaming and streaming near the router, and 2.4 GHz for distance.
- Bypass Mode: If you have a large home, consider using a third-party mesh system to extend coverage.
If your WiFi network name has disappeared or you cannot connect, you may need to factory reset the Starlink router. On Gen 2 routers, this is done by power cycling 6 times in a row. On Gen 3 and Mini, there is a dedicated reset button. For more tips on fixing lag and jitter, see our article on Starlink poor performance.
Advanced Fixes and Maintenance for Long-Term Reliability
Once you have resolved the immediate issue, the goal shifts to prevention. In Australia, "set and forget" rarely works for satellite hardware. Our storms can be violent, and our summer heat can exceed 45°C, potentially triggering thermal shutdowns on the dish.
Weather Impacts and starlink troubleshooting guide Best Practices
Heavy rain causes "rain fade," where the water droplets in the atmosphere absorb the satellite signal. While Starlink is designed to push through most weather, a massive tropical downpour will cause temporary drops. The dish also has a built-in heater for snow, but in Australia, the bigger worry is heat. Ensure your dish is mounted using a heavy-duty SpaceTek solution where air can circulate around the back of the panel.

Maintenance is your best friend. We suggest:
- Quarterly Inspections: This is the most critical step. Ensure your mount hasn't loosened. A wobbly dish in high winds will constantly lose its tracking lock, which is the leading cause of 'phantom' dropouts.
- Firmware Updates: Starlink pushes updates automatically, usually between 2 AM and 4 AM. If your system is acting up, check the app to see if an update is pending.
- Cleaning: Use a soft, damp cloth to wipe away salt spray or thick dust, especially in coastal or outback areas.
For more weather-specific advice, read our troubleshooting tips for stormy weather and our general guide on Starlink setup issues.
Frequently Asked Questions for Australian Starlink Users
How do I know if a Starlink issue is due to installation vs service outages?
Check the physical stability of your mount first. If the dish is secure, check the Starlink App status dashboard. If the app shows "Searching" or "Obstructed" with no red banner alerts for outages, the problem is almost certainly your local setup or mount.
What is an obstruction scan and why does it matter?
The scan uses your phone's camera and the app's internal data to map objects blocking the dish's view. Even a 5% obstruction can cause hundreds of tiny drops a day. If your score is poor, you need to move the dish or increase its height using a SpaceTek extension mount.
Do traditional mounts work in Australian conditions?
Many generic or flimsy mounts fail due to high UV levels and coastal corrosion. We design SpaceTek mounts to be rust-resistant and custom-engineered for the specific wind loads found in Australia to ensure the dish remains perfectly still.
What’s the best solution for mobile Starlink on RVs?
For travellers, we recommend dedicated SpaceTek RV mounts and DC power supplies. Using our StarPower range allows you to run Starlink directly off your batteries without the efficiency loss of an inverter.
Will poor cable routing affect performance?
Yes. Tight loops or leaving cables exposed to direct sun will eventually lead to signal degradation. Always use protective conduit where possible and ensure all connections are flush.
Why Mount Quality Impacts Troubleshooting Success
A shaky or under-engineered mount is the silent killer of Starlink performance. If your dish moves even a few millimetres in the wind, it has to work harder to maintain its beam-forming connection with the satellites. This leads to increased latency (lag) and lower download speeds.
By using a high-quality, Australian-made SpaceTek mount, you eliminate the physical variables from your troubleshooting process. When your hardware is secure, any issues you encounter are much easier to diagnose through the app. We prioritise mount stability because it is the foundation of a reliable satellite connection.
If you've followed this troubleshooting guide and still can't get online, it may be time to contact Starlink Support. Make sure to include screenshots of your "Statistics" page and "Obstruction" map in your ticket to speed up their response.
For those looking to upgrade their setup for better reliability, explore our high-quality mounting solutions or contact us for expert advice on your specific installation.
Internal Guides You Should Read Next:

Leave a comment
This site is protected by hCaptcha and the hCaptcha Privacy Policy and Terms of Service apply.