Pre-Installation: Planning for a Reliable Setup
Before commencing any physical installation, thorough planning is paramount. This initial phase helps to identify the optimal location for your Starlink dish, select the most appropriate SpaceTek mounting solution, and gather all necessary tools and materials. For users in remote Australia, where access to resources can be limited, this preparation is crucial for a smooth and efficient installation.
Determining the Best Location for Your Starlink Dish
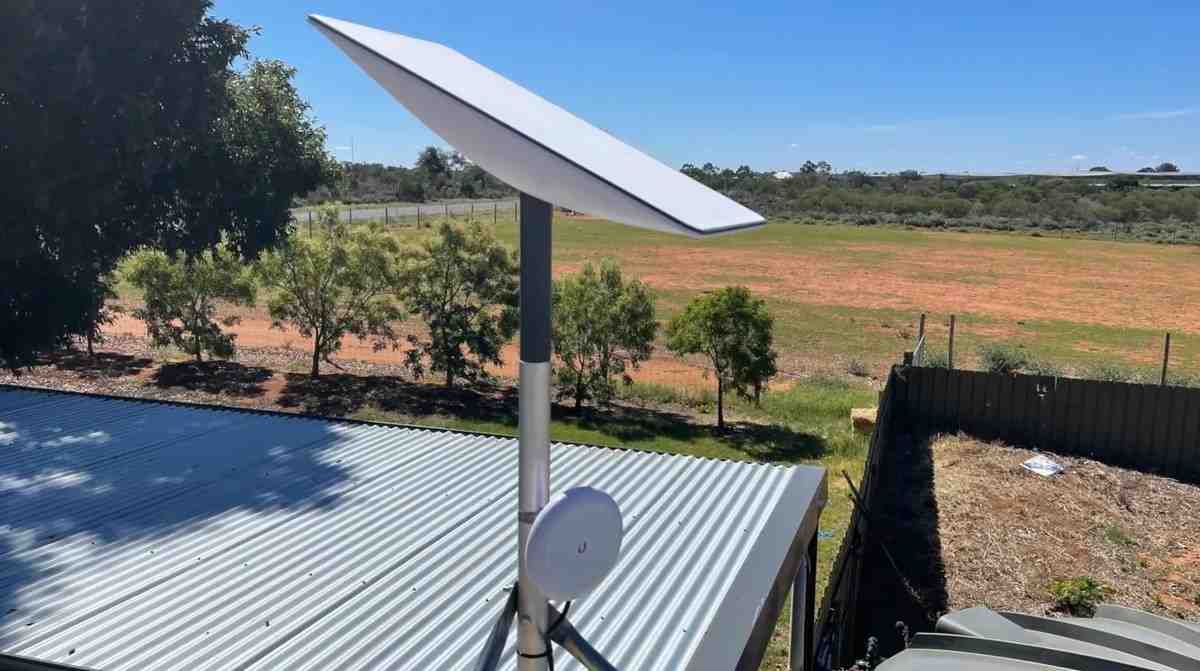
The performance of your Starlink system is directly dependent on its ability to maintain a clear view of the sky. This means an unobstructed line of sight to the orbiting satellites. Professional obstruction checking tools help pinpoint the ideal mounting location by scanning for potential blockages.
For optimal performance, your Starlink dish requires a 110° horizontal clear view, with at least 20° vertical clearance above the horizon. In the Southern Hemisphere, this typically means a north-facing orientation will yield the best results, as the Starlink constellation primarily orbits over the northern sky. Common obstructions to avoid include large trees (especially fast-growing eucalyptus trees in Australia), neighbouring buildings, chimneys, and even large HVAC units on your roof. Even small blockages can lead to service interruptions, which is particularly critical for Starlink for Remote Communities and Starlink for Remote Australia users who rely on consistent connectivity. Ensuring a clear path for your signal is the first, most vital step in how to install starlink on roof successfully.
To dig deeper into selecting the perfect spot, we have compiled detailed insights in our guide: What Is The Ideal Location For Installing My Starlink Dish.
Selecting the Right SpaceTek Mount for Your Roof Type
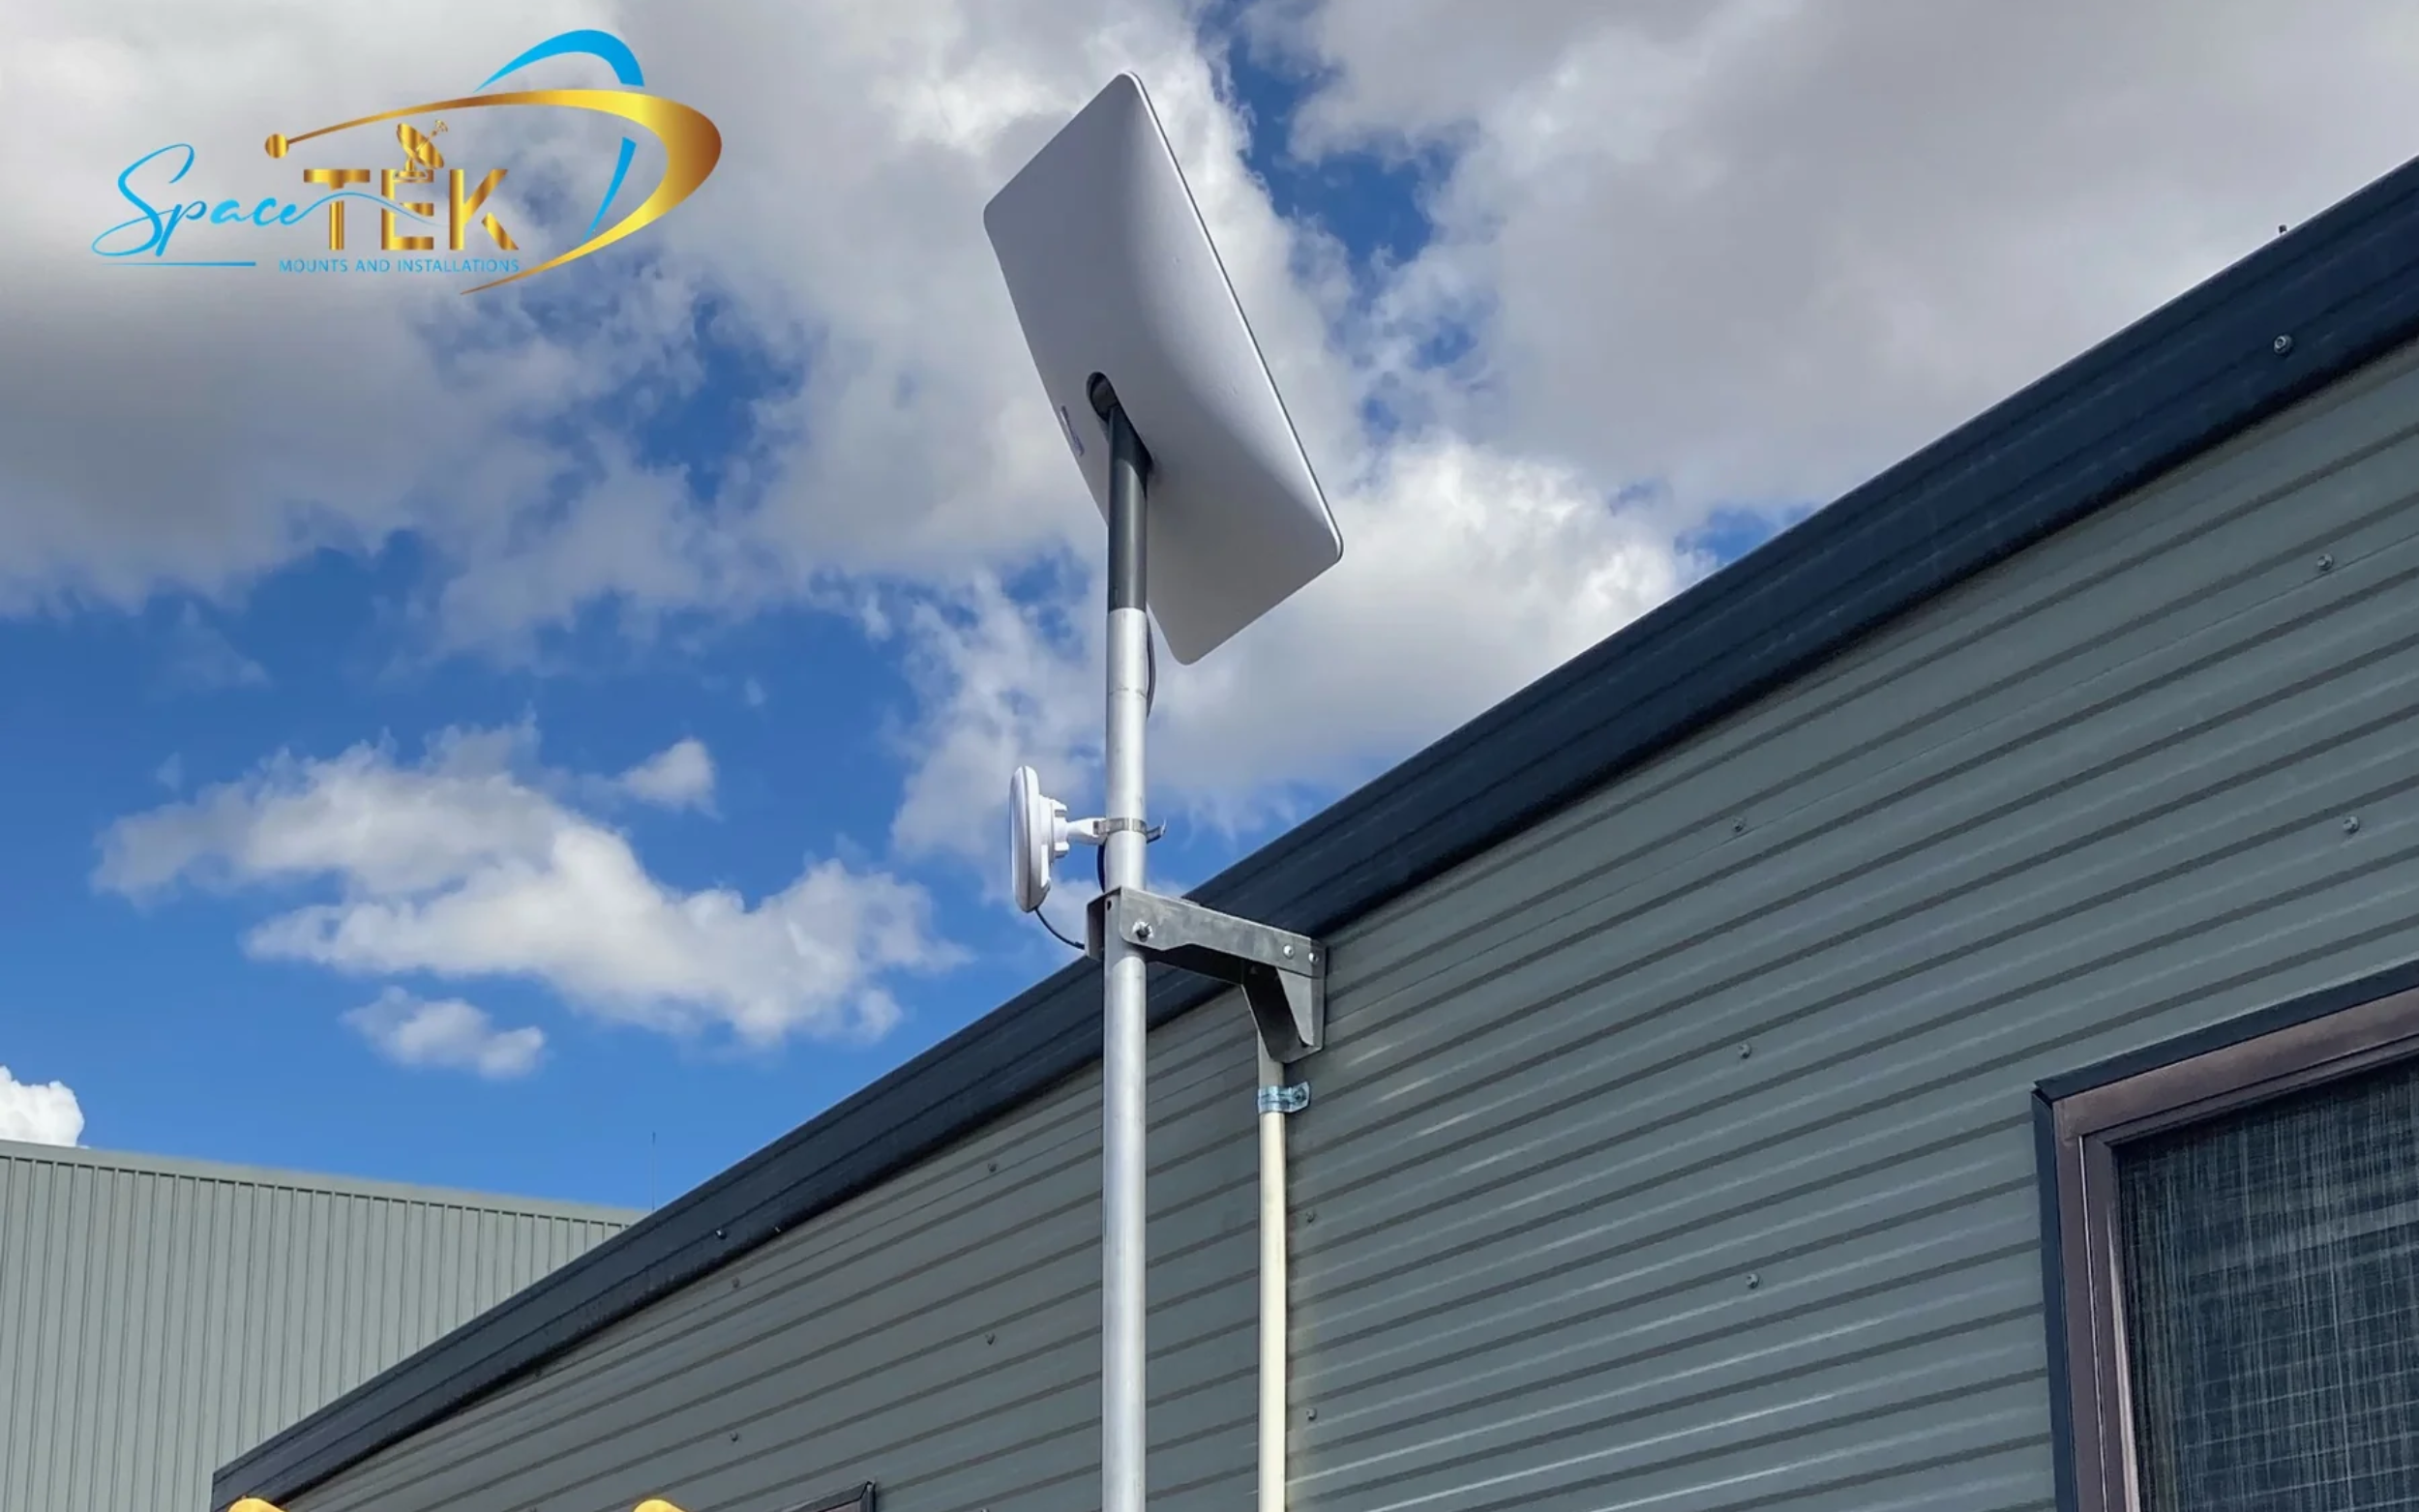
Once the optimal location has been determined, the next critical decision involves selecting the appropriate SpaceTek mount. We understand that every Australian roof is unique, presenting its own set of challenges and requirements. Our custom-engineered roof mounts are designed to accommodate various roof types and withstand the specific environmental conditions found across Australia, from intense heat to high winds and corrosive coastal air.
When choosing a mount, consider your roof material:
- Metal Roofs: Often found in rural and commercial settings, metal roofs require non-penetrating clamps to maintain roof integrity and warranty. Our solutions are designed to secure the dish without compromising the roof's coating or causing corrosion.
- Tile Roofs: These require careful planning to avoid breaking tiles and ensure proper waterproofing. Our mounts are designed to work with the existing structure, often by replacing a single tile or utilising a ridge-line approach.
- Shingle Roofs: These are common in residential areas. Our flashing solutions integrate seamlessly under existing shingles to create a watertight seal while providing a robust mounting point.
- Flat Roofs: While seemingly straightforward, flat roofs require mounts that can provide the necessary elevation and are often weighted to prevent wind uplift without penetrating the roof membrane.
We emphasise corrosion resistance, ensuring our mounts are built from materials that will endure the harsh Australian climate. Our range of mounts includes options for different overhang lengths and roof pitches, ensuring a vertical installation for optimal dish performance.
Step-by-Step Guide: How to Install Starlink on Your Roof with SpaceTek Solutions
Installing your Starlink dish on the roof requires precision and adherence to best practices to ensure both safety and a durable, leak-free setup. Our SpaceTek solutions are designed to simplify this process while maintaining the highest standards of structural integrity, weatherproofing, and cable management. For a visual guide to our installation process, refer to: Sky's The Limit: How To Install A Starlink Roof Mount.
Step 1: Final Preparations and Safety Checks
Safety is our utmost priority when working at heights. Prior to commencing any work on the roof, adhere to these critical safety protocols:
- Wear a certified safety harness and non-slip footwear. This equipment is essential for fall protection and maintaining secure footing, especially on sloped or uneven roof surfaces. Ensure your harness is compliant with AS/NZS 1891 standards.
- Ensure ladder stability and work with a partner. A stable ladder is fundamental for safe roof access. Always have a second person to steady the ladder and assist with tools or materials. Working with a partner also provides an additional layer of safety in case of an emergency.
- Avoid installation during wet or windy weather. Inclement weather conditions significantly increase the risk of accidents. High winds can make working on a roof unstable, and wet surfaces can be extremely slippery. Standard mounts can handle wind speeds up to 115 km/h once installed, but installation should occur in calm conditions.
- Disconnect the DC power supply to your Starlink system. Before handling any components, ensure the Starlink dish is completely powered off to prevent accidental electrocution or damage to the unit.
- Organise all tools and materials on the ground before ascending. Having everything you need readily accessible at ground level minimises unnecessary trips up and down the ladder, reducing fatigue and risk.
Step 2: Securing the SpaceTek Mount
Properly securing the SpaceTek mount to your roof's structure is fundamental for stability and longevity, especially given Australia's diverse weather conditions.
- Use a stud finder to locate roof trusses or rafters. Never secure a mount solely to roof sheeting or tiles. Always aim to attach the mount to the underlying structural timber for maximum stability and wind resistance.
- Mark pilot holes for the mount. Once the structural supports are located, accurately mark the drilling points for your SpaceTek mount. Precision here ensures the mount is level and securely aligned.
- Drill pilot holes at marked locations. Use the appropriate drill bit size (e.g., 6mm) for your chosen SpaceTek mount and the type of fasteners you are using. Drill slowly and steadily to avoid splintering.
- Apply roof sealant into each pilot hole. Before inserting any fasteners, generously apply a high-quality roof sealant into each drilled pilot hole. This creates an initial barrier against water ingress.
- Secure the SpaceTek mount using supplied lag screws. Drive the lag screws firmly into the pilot holes, ensuring they engage properly with the timber structure. Tighten them sufficiently to secure the mount without overtightening.
- Confirm the mount is firmly attached and level. After securing, gently test the mount's stability. It should not wobble or shift. Use a spirit level to confirm that the mounting plate is perfectly level, which is crucial for the Starlink dish to orient itself correctly. Starlink dishes work best when mounted within five degrees of vertical.
Step 3: Weatherproofing All Penetrations
Weatherproofing is arguably the most critical step in preventing long-term issues such as leaks and water damage to your home. A poorly sealed penetration can lead to significant problems over time.
- Apply flashing and mastic tape as per SpaceTek’s installation guide. Our purpose-built SpaceTek mounts often include integrated flashing or recommend specific flashing kits designed to create a watertight seal under your roofing material. Mastic tape provides an additional layer of protection, conforming to irregularities for a superior seal.
- Use high-grade silicone sealant around the base of the mount and over screw heads. After securing the mount and applying flashing, apply a generous bead of UV-resistant, high-quality silicone sealant around the entire base of the mount where it meets the roof surface. Also, cover the heads of all exposed screws with sealant. This creates a durable, weather-resistant barrier.
- Ensure a multi-layered water barrier for long-term durability. The combination of proper pilot hole sealing, flashing, mastic tape, and external silicone sealant creates a robust, multi-layered defence against water ingress. This comprehensive approach is essential for protecting your home against Australia's often unpredictable weather.
For detailed guidance on protecting your roof, particularly for tile roofs, refer to our specific instructions: How To Install A Starlink Tile Roof Mount Safely.
Step 4: Mounting the Dish and Managing Cables
With the SpaceTek mount securely installed and waterproofed, the final steps involve attaching your Starlink dish and managing its cable.
- Attach the Starlink dish to the SpaceTek mount until you hear a secure ‘click’. Our SpaceTek mounts are designed for seamless integration with your Starlink dish, ensuring a firm and stable connection.
- Connect the Starlink cable, forming a drip loop to prevent water ingress. Before the cable enters your home, create a small downward loop in the cable. This "drip loop" ensures that any water running along the cable will drip off at the lowest point of the loop, rather than travelling directly towards your cable entry point.
- Secure the cable to the roof using UV-resistant cable clips, spaced every 30–45 cm. This prevents the cable from flapping in the wind, which can cause wear and tear over time, and keeps it neatly organised. Secure the cable every 30 to 45 centimetres with clips or ties so the wind won’t catch it.
- Route the cable neatly towards the entry point. Plan the cable's path to minimise exposure, avoid sharp bends, and keep it away from areas where it could be stepped on or damaged.
Frequently Asked Questions About Starlink Roof Installation
We understand that installing Starlink, particularly in the unique conditions of remote Australia, can raise several questions. Here, we address common concerns to provide expert advice for Starlink for Remote Australia and Starlink for Remote Communities users.
Does drilling into my roof void its warranty?
This is a common and valid concern. The answer largely depends on your specific roof type and the terms of your roofing warranty.
- Review your roof warranty policy. Before any drilling, carefully read your roofing warranty documents. Some warranties may explicitly state that any roof penetration not performed by a certified professional or using specific methods will void the warranty.
- For metal and shingle roofs, use professional-grade sealing and SpaceTek mounts. While drilling into a metal roof often voids the warranty if not done correctly, our SpaceTek mounts are designed to integrate with proper flashing and sealing techniques (e.g., non-penetrating clamps for standing seam metal roofs) that may help preserve it. For shingle roofs, proper under-shingle flashing and meticulous sealing are crucial.
- Consider non-penetrating SpaceTek mount alternatives if required. If your roof warranty is particularly stringent or if you wish to avoid penetrations entirely, we offer non-penetrating SpaceTek mount solutions that can be weighted down, suitable for flat roofs or situations where drilling is not an option.
- Document your installation process for warranty purposes. Take clear photographs of each step of the installation, especially the sealing and flashing process. This documentation can be invaluable if you ever need to demonstrate that the installation was performed correctly.
How much wind can a SpaceTek Starlink mount withstand?
Our SpaceTek mounts are specifically engineered and tested to withstand the challenging wind conditions prevalent across Australia.
- SpaceTek mounts are engineered for Australian wind conditions (standard rating: 115 km/h). When properly installed to structural elements and with appropriate sealing, our mounts provide robust stability against significant wind forces. Penetrating mounts, when installed correctly, can be steady up to 185 km/h.
- For cyclone-prone regions, follow tethering recommendations and use ballast calculations for non-penetrating mounts. While our mounts are strong, extreme weather events like cyclones or tornadoes require additional precautions. In such regions, we recommend supplementary tethering cables to further secure the dish and mount. For non-penetrating mounts, accurate ballast calculations are essential to ensure the system remains stable. Tools like Wind load calculation tools can assist in determining the necessary weight.
What ongoing maintenance is required for a roof-mounted Starlink?
Even after a professional installation, regular maintenance ensures your Starlink system continues to perform optimally and extends its lifespan.
- Monthly visual inspection of the dish and mount. From ground level, check for any obvious signs of damage, loose cables, or obstructions (e.g., leaves, bird nests) on or around the dish.
- Quarterly check of mount tightness. Safely access the mount and check that all bolts and screws are still tight and secure. Vibrations from wind can sometimes cause fasteners to loosen over time.
- Annual inspection of all sealant and weatherproofing. Visually inspect all sealant points (around the mount base, screw heads, cable entry points) for cracks, degradation, or peeling. Reapply sealant as necessary to maintain a watertight barrier.
- Clean the dish surface as needed. While Starlink dishes have a self-heating feature to melt snow, dust, dirt, or bird droppings can accumulate. Gently clean the dish surface with a soft cloth and water if necessary, ensuring not to scratch the surface.
- Inspect cables for UV damage or animal interference. Check the entire length of the Starlink cable, especially exposed sections, for signs of UV degradation (cracking, brittleness) or damage from wildlife. Replace or protect compromised sections immediately.
- Conduct post-storm inspections. After any significant wind event, heavy rain, or severe weather, perform an immediate inspection of your Starlink dish, mount, and cabling to ensure everything remains secure and undamaged.
Reliable Internet Starts with the Right Accessories
A professional installation using SpaceTek’s custom-engineered mounts and accessories ensures long-term reliability and optimal Starlink performance in Australia’s unique conditions.
We believe that investing in the correct mounting solution is as crucial as the Starlink hardware itself, providing the stability and protection needed for consistent high-speed internet. For expert advice or to explore our range of mounting solutions, browse our Starlink Mounts and Adaptors or contact our team for personalised support.

Leave a comment
This site is protected by hCaptcha and the hCaptcha Privacy Policy and Terms of Service apply.