
How to unplug starlink gen 3 cable depends on which kit you have:
For Standard Gen 3:
- Grip the rubber boot firmly (not the cable itself)
- Pull straight out with steady force
- No release tab exists—it's a friction fit
For Performance Gen 3:
- Rotate the collar counterclockwise
- Pull straight out once the collar releases
- Look for the red alignment notch
If you've ever wrestled with your Starlink cable and wondered whether you're about to break something expensive, you're not alone. The Gen 3 cable's weatherproof design makes it tricky to remove, especially when you're storing your dish or swapping cables.
Many rural Australians discover this the hard way during their first attempt to disconnect. The tight moisture seal feels stuck, and there's no obvious release mechanism like you'd find on a typical cable.
Understanding the proper technique protects your equipment and saves you from costly replacements. It also prevents dust and debris from entering the connector port, which is particularly important in Australia's harsh outback conditions.
Know your how to unplug starlink gen 3 cable terms:
- Starlink Gen 3 cable adapter
- starlink gen 2 to gen 3 cable adapter
- what type of cable does starlink gen 3 use
Step-by-Step Guide on How to Unplug Starlink Gen 3 Cable
When we look at the latest hardware, the disconnection method varies significantly between the Standard and Performance kits. For both types, the primary rule is to avoid pulling on the actual wire. Instead, we must focus our grip on the connector housing.
For the Standard Gen 3, the connection is maintained by high-friction rubber seals. To disconnect, we recommend placing your thumb and forefinger on the textured gland or rubber boot. Apply a steady, firm, and straight outward force. If it feels particularly stubborn, a very slight side-to-side wiggle can help break the initial seal of the rubber rings, but never twist the connector.
The Performance Gen 3 model uses a more traditional mechanical lock. Before pulling, we must disengage the locking mechanism by rotating the collar. Once the collar is turned fully counterclockwise, the cable should slide out with minimal resistance. For more information on identifying your specific connector type, check out our Starlink plugs guide.
Removing the Standard Gen 3 Cable Without a Release Tab
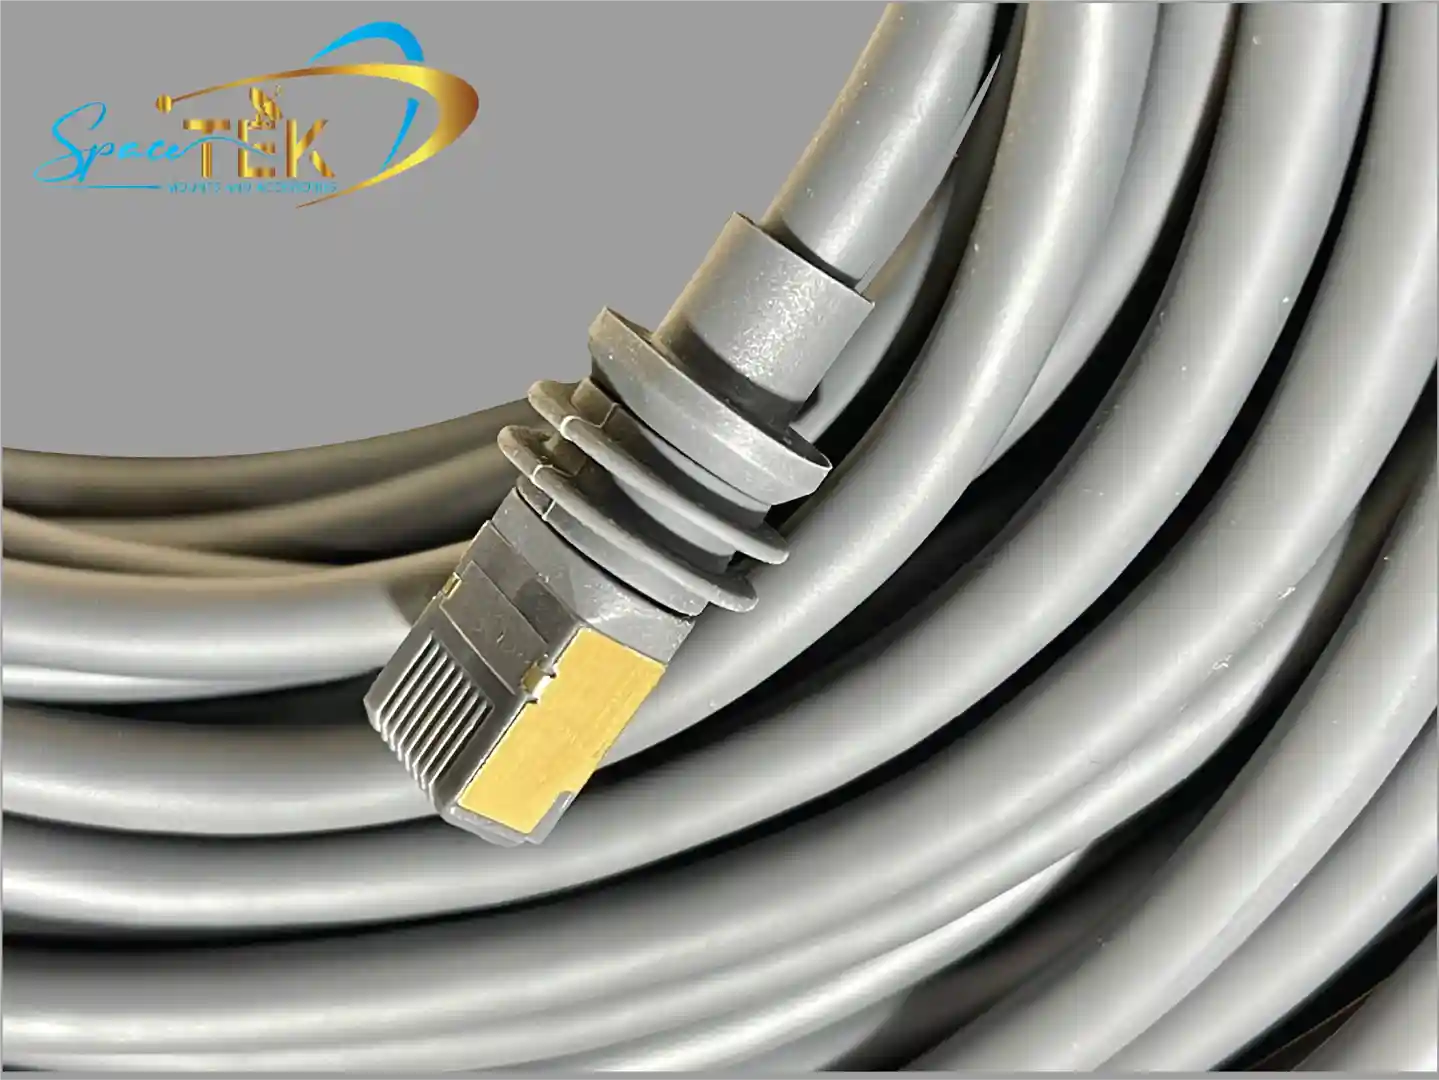
The most confusing aspect for many users is the lack of a release tab on the Standard Gen 3 cable. Unlike the Gen 2 proprietary connectors or standard RJ45 ethernet clips, this version relies entirely on a friction fit.
The connector is encased in a thick rubber boot designed to create a watertight seal. This seal is so effective that it creates a vacuum-like grip. To remove it safely, we suggest gripping the boot as close to the dish as possible. Pulling straight out is essential to avoid bending the internal pins. Because there is no "click" to release, you simply have to overcome the resistance of the moisture seal. You can read more about these specific requirements in our detailed guide to Starlink satellite cable.
Disconnecting the Performance Gen 3 Cable via the Rotating Collar
The Starlink Performance Gen 3 kit features a more robust, industrial-style connector. This cable includes a red notch for alignment, which must be noted during both installation and removal.
To disconnect this cable, we must first locate the rotating collar at the base of the connector. By rotating this collar counterclockwise, we retract the locking teeth that hold the cable flush against the dish. Once the collar stops moving, the cable can be pulled straight out. This design is specifically engineered for high-durability environments, ensuring a secure connection even in demanding conditions.
Why Your Starlink Gen 3 Cable is Difficult to Unplug
The difficulty in unplugging the cable is actually a sign of quality. The Gen 3 system carries an IP67 rating, meaning it is designed to be completely dust-tight and capable of withstanding immersion in water.
To achieve this, the connector uses multiple rubber O-rings that create a tight friction fit. Over time, environmental factors like heat can cause these rubber seals to expand slightly, making them even tighter. In Australia, where temperatures can soar, this seal is vital for protecting the sensitive electronics from moisture and dust ingress. However, this same protection is what makes the initial "pull" feel so heavy. Using low-quality alternatives can lead to failure, which is why we discuss why cheap Starlink cables fail in the heat to help you avoid unnecessary hardware risks.
Maintenance and Troubleshooting for Gen 3 Connectors
Maintaining the integrity of your connection is just as important as knowing how to unplug starlink gen 3 cable. We recommend inspecting the port and the cable end every time you disconnect them, especially if you are using your kit for travel or as a mobile setup.
Dust and sand are the primary enemies of Starlink ports in Australia. If sand gets into the connector, it acts as an abrasive, wearing down the rubber seals and potentially damaging the internal pins. We suggest using a can of compressed air to blow out any grit before reconnecting. For those who frequently move their setup, using port covers or a small bag secured with a rubber band can prevent debris from entering the port during transport. Our Beginners Guide to Starlink Gen 3 offers further tips on long-term hardware care.
Avoiding Damage When You Unplug Starlink Gen 3 Cable
One of the biggest risks during disconnection is internal wire breakage. The Starlink cable contains thin 18AWG copper cores. If we pull on the cable itself rather than the connector gland, we risk stretching or snapping these delicate wires.
While some users suggest using pliers to get a better grip on the rubber gland, we advise extreme caution. Pliers can easily crush the plastic housing or tear the rubber boot, compromising the IP67 waterproofing. If you must use a tool, ensure it is only gripping the hard plastic gland and not the flexible cable. This concern is widely debated among enthusiasts, as seen in this Starlink forum discussion on cable detachment.
What to Do if the Cable is Stuck or Damaged
If the cable refuses to budge, do not use excessive force or a hammer. Instead, try to apply a small amount of steady pressure while gently wiggling the connector from side to side to break the seal. If you notice that the rubber boot is torn or the internal pins are bent, the cable must be replaced.
SpaceTek provides high-quality, durable cable solutions and adapters designed to withstand the Australian climate. It is always better to replace a damaged cable than to risk short-circuiting your dish or router. If you experience persistent connection glitches after a difficult removal, the port itself may have been compromised. In these cases, we recommend checking for debris or using a Starlink Gen 3 cable adapter to ensure a secure fit with your existing infrastructure.
Conclusion and Expert Support
Knowing how to unplug starlink gen 3 cable correctly is the first step in ensuring your satellite system survives the harsh Australian climate. Whether you are navigating the friction fit of the Standard kit or the rotating collar of the Performance model, the key is patience and the correct grip. Protecting the 18AWG cores and maintaining the IP67 seal will keep you connected whether you are in the red centre or on the coast.
At SpaceTek Australia, we specialise in providing the high-quality, rust-resistant mounts and accessories you need to keep your Starlink secure. Our products are designed specifically for Australian conditions, ensuring that once your cable is plugged in, your dish stays exactly where it should. For more information on how to enhance your setup, explore The Ultimate Guide to Starlink Gen 3 Compatible Accessories.
If you are still having trouble with your cable or need advice on the best mounting solution for your home or RV, we are here to help. Get in touch with our team today for expert guidance tailored to your needs.

Leave a comment
This site is protected by hCaptcha and the hCaptcha Privacy Policy and Terms of Service apply.