
Why Getting Your Starlink Installation Right Matters
Starlink installation mistakes can turn your dream of fast rural internet into a nightmare of dropped connections, roof leaks, and voided warranties. While Starlink has revolutionised connectivity for regional Australia, its performance depends entirely on a proper installation. A rushed setup with makeshift hardware can lead to constant drop-outs and expensive damage.
Common errors like ignoring obstructions, using improper mounts, poor cable management, and failing to prepare for weather can cost hundreds in repairs. Australia's harsh conditions—from cyclone winds to coastal salt air—punish cheap materials and sloppy work, causing rust on Colorbond® roofs, water leaks, and equipment failure.
The good news is that most Starlink installation mistakes are avoidable. With the right knowledge and hardware, you can ensure a flawless setup. I'm Aaron Wroblewski, founder of SpaceTek Australia. With over 25 years in remote communications, I've helped hundreds of Australians get their installation right the first time. Let's walk through the critical errors to avoid.
The 5 Most Common Starlink installation mistakes:
- Ignoring obstructions: Failing to use the Starlink app to find a clear 110-degree sky view.
- Using improper mounts: Relying on concrete blocks or non-rated hardware that causes rust and damage.
- Poor cable management: Not using drip loops, weatherproof glands, or surge protection.
- Skipping weather prep: Not accounting for wind loads or proper dish orientation.
- Wrong kit choice: Attempting complex roof work without professional help or using a portable kit for a permanent install.
The Top 5 Critical Mistakes to Avoid
1. Rushing the Site Survey and Ignoring Obstructions
The most common Starlink installation mistakes is also the easiest to avoid: failing to check for a clear view of the sky. Your dish needs an unobstructed 110-degree cone of space to communicate with the satellites. Even a single tree branch can cause frustrating drop-outs during video calls or streaming.
Before you drill a single hole, use the free obstruction checker in the Starlink app. Walk to your potential mounting spot and scan the sky to identify any trees, buildings, or other obstacles. Remember to account for future tree growth. If your ground-level view is blocked, a roof or pole mount is often the best solution to get above the interference.
For more detailed guidance, check out our blog on tips to navigate around dish obstructions or Starlink's official advice on where to install your dish.
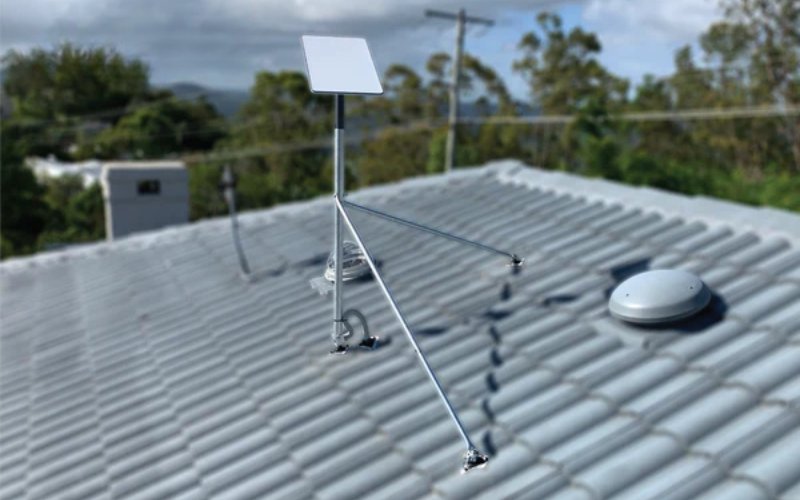
2. Using Improper Mounts and Hardware on Aussie Roofs
Using makeshift mounts is one of the most expensive Starlink installation mistakes. Propping your dish on concrete blocks or using untreated timber can lead to rust on your Colorbond® roof, voided warranties, and costly repairs. These materials trap moisture, creating a breeding ground for corrosion.
Australia's climate demands robust hardware. Cheap, mild-steel screws will corrode quickly, especially in coastal areas. Every hole drilled in your roof is a potential leak, so seal penetrations properly with neutral-cure silicone and use screws with EPDM washers. The solution is to invest in purpose-built mounts designed for Starlink and Australian conditions. Our mounts are crafted from high-quality aluminium and carbon fibre to prevent rust, ensure proper ventilation, and last for decades.
Our guide on 7 clever ways to avoid DIY Starlink mounting mistakes has more details. See our range of Gen 3/V4 mounts and accessories for solutions that won't let you down.
3. Botching Cable, Power, and Network Connections
A perfect mount is useless if the wiring is wrong. Common Starlink installation mistakes with cables and power can cause performance drops and equipment damage. The Starlink cable is tough but not indestructible; avoid sharp bends and protect it where it enters your home. Always use a weatherproof gland and form a 'drip loop' to prevent water from tracking inside.
Consistent power is also essential. Use a high-quality surge protector to guard your equipment against electrical spikes, a common threat during Australia's storm season. For maximum speed and stability in larger homes, consider integrating Starlink into a hardwired home network. While Wi-Fi is convenient, a direct ethernet connection to key devices like desktop computers, smart TVs, or a central mesh network system can eliminate signal interference and provide the fastest, most reliable performance possible.
Learn more from our detailed guide to Starlink satellite cable and our article on how to conquer Starlink power challenges.

4. Not Preparing for Harsh Weather and Post-Install Problems
Failing to prepare for Australia's weather is a Starlink installation mistake that catches many off guard. Strong winds are a major threat, and standard mounts may not be sufficient in cyclone-prone or exposed areas. Our mounts are engineered for superior wind resistance, but you must assess your local conditions. Proper mounting is your best defence against the elements.
Even with a perfect install, issues can arise. Before panicking, try these simple troubleshooting steps: check Down Detector for Starlink for widespread outages, and try power cycling your system. Also, ensure all cables are secure. If you see a 'Motors Stuck' error, your dish is likely mounted too flat (less than 40 degrees from vertical), preventing it from aligning correctly.
Read our advice on protecting your Starlink mount from wind and troubleshooting Starlink internet problems easily.
5. Misunderstanding Different Kits and When to Get Help
Choosing the wrong kit or overestimating your DIY skills are mistakes that lead to frustration and unsafe situations. The Standard Kit (Gen 2/3) is for permanent residential or business installations, while the Starlink Mini Kit is a portable solution ideal for RVs and temporary setups.
While Starlink is designed for self-installation, the hardest part is often mounting the dish. Be honest about your comfort level with working at heights, using power tools, and ensuring a waterproof seal. If you have any doubts, especially with complex roof lines or difficult access, it's safer and more effective to hire a professional. They have the right equipment and expertise to guarantee a secure, compliant, and optimal setup.
For more on finding qualified help, see our guide on how to get Starlink installed with local services.
Product Compatibility: Choosing the Right Mounts for Your Starlink Kit
At SpaceTek Australia, we know every installation is unique. Choosing the wrong mount for your kit is a starlink install mistake that leads to instability and corrosion. That's why we've engineered a range of mounting solutions specifically for each Starlink variant, built to survive the Australian climate.
Starlink Mini
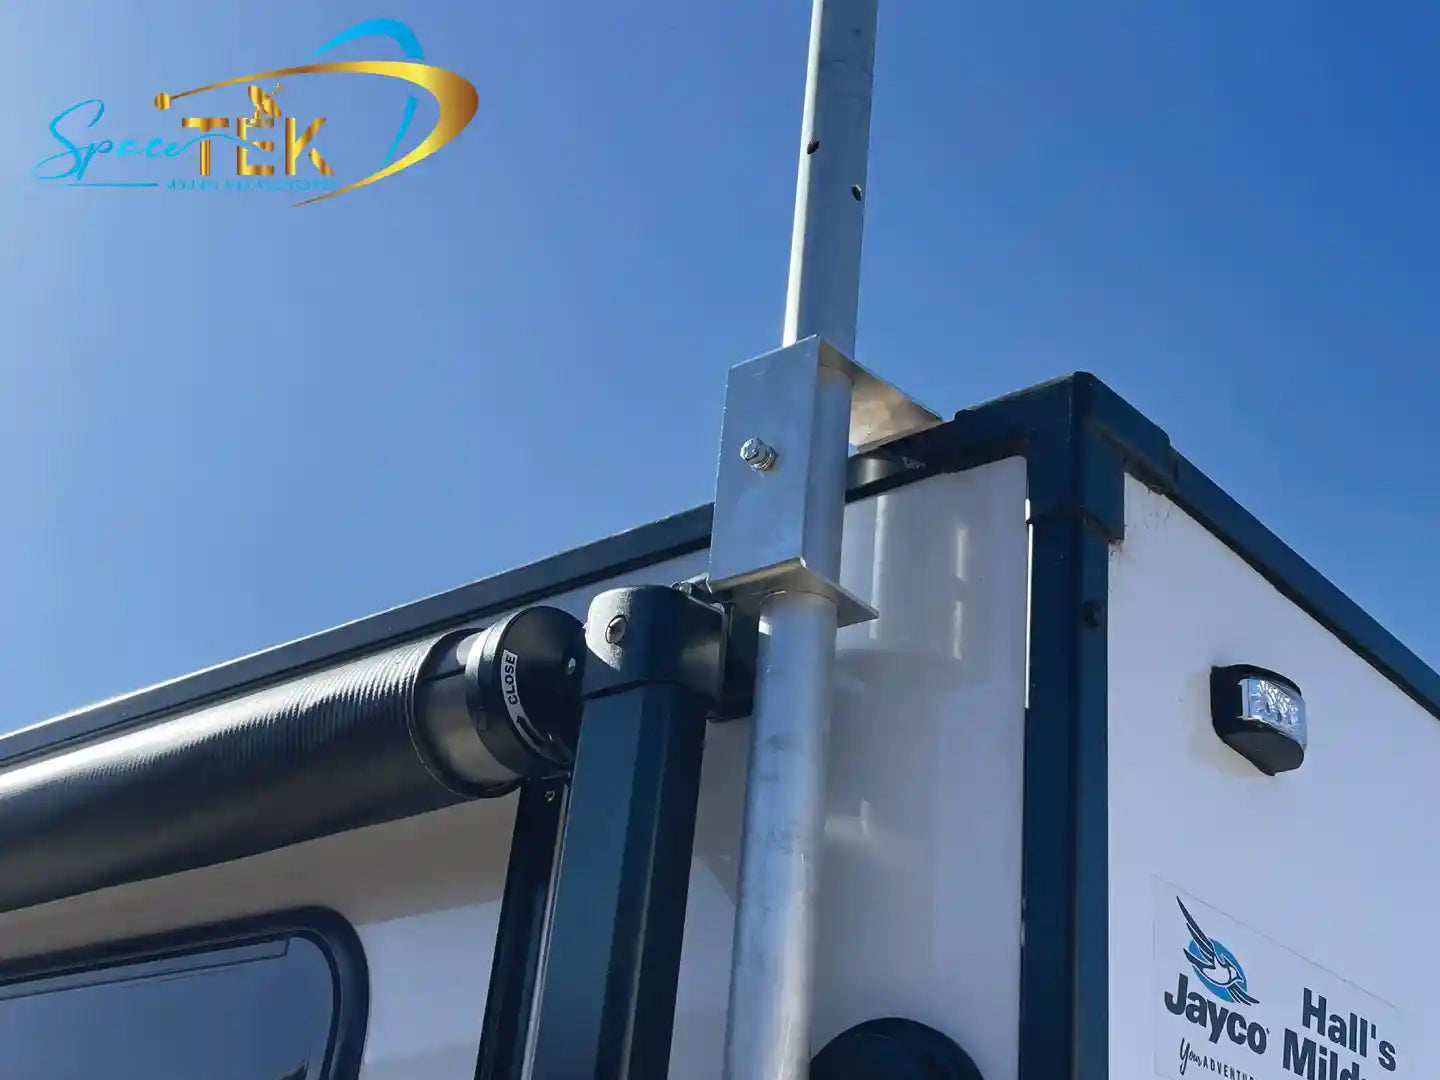
The Starlink Mini is a game-changer for portable connectivity, perfect for nomads and remote workers. Our Starlink Mini Mounts and Accessories improve its portability without sacrificing stability. Made from lightweight, weather-resistant aluminium, they provide rock-solid support for your caravan, pole, or temporary setup, ensuring you can get connected wherever you roam.
Starlink Gen 2
The Gen 2 Rectangular Dish is the workhorse for thousands of Australian homes. For these permanent installations, a robust, long-term mounting solution is critical. Our Gen 2 Mounts and Accessories are engineered from rust-resistant, high-strength materials to handle coastal salt, tropical humidity, and desert dust. They protect your property while providing the secure platform your dish needs for years of reliable service.
Starlink Gen 3
The latest Gen 3 Standard kit offers improved performance and a sleeker design. To match this advanced hardware, you need an equally sophisticated mount. Our Gen 3/V4 Mounts and Accessories collection includes options in both carbon fibre (for incredible strength-to-weight) and high-grade aluminium. These mounts are precision-engineered to ensure your Gen 3 dish maintains optimal stability and performance.
Starlink RV/Portability
Life on the road shouldn't mean living without reliable internet. Our Starlink RV mounting solutions are designed for travellers who need connectivity that moves with them. Browse our Starlink RV Mounts and Accessories to find secure, user-friendly options that withstand vibration on corrugated roads and allow for quick setup at your destination. They provide the stability your dish needs, even on uneven ground.
Conclusion: A Flawless Setup for Lasting Performance
Getting your Starlink installation right the first time is about securing reliable internet for years to come and protecting your home from preventable damage. We've covered the most critical starlink install mistakes, from poor site surveys and improper mounts to botched cabling and weather prep. Each error is avoidable with the right knowledge and quality hardware.
Here’s a quick recap of the key differences between standard and portable installations:
| Feature | Standard (Permanent) Installation | Portable (Mobile) Installation |
|---|---|---|
| Primary Goal | Long-term, "set and forget" stability on a fixed structure like a roof or wall. | Rapid setup and takedown on various surfaces for use while travelling or at temporary sites. |
| Mounting Strategy | Requires robust, rust-proof mounts (e.g., SpaceTek aluminium or carbon fibre options) securely bolted to the structure for maximum wind resistance. | Needs versatile, non-permanent mounts (e.g., SpaceTek magnetic, pole, or caravan mounts) that are durable yet easy to deploy. |
| Cabling Approach | Involves permanent routing through walls or roofs, demanding weatherproof glands and drip loops to create a professional, water-tight seal. | The cable is managed externally for temporary use. The focus is on protecting it from physical damage and trip hazards, not permanent routing. |
| Power & Network | Connects to a stable AC power source. A surge protector is critical, and integrating with a hardwired home network is recommended for peak performance. | Often relies on flexible DC power sources (like a vehicle's 12V system). Connections must be durable to withstand repeated plugging and unplugging. |
Australia's unique conditions demand more than off-the-shelf solutions. At SpaceTek Australia, we channel our 25 years of expertise into creating the most secure, rust-resistant, and user-friendly Starlink mounts for Australian conditions. Our kits, engineered from high-quality aluminium and carbon fibre, provide superior weather resistance and long-term durability.
Investing in proper installation hardware now saves you hundreds in repairs and countless hours of frustration. It's the difference between internet that just works and internet that constantly lets you down.
If you're unsure which mount suits your kit, roof type, or location, we're here to help. Don't let preventable starlink installation mistakes compromise your connectivity. Contact us for expert advice—we'll guide you to the right solution for a flawless setup.
Leave a comment
This site is protected by hCaptcha and the hCaptcha Privacy Policy and Terms of Service apply.