Why Getting Your Starlink Mount for Metal Roof Right Matters

A starlink mount for metal roof installation requires the right hardware to prevent leaks, corrosion, and warranty voids. Here's what you need to know:
- Standing seam roofs: Use non-penetrating clamps that grip the seam without drilling
- Corrugated/trapezoidal roofs: Use mounting brackets with double-seal gaskets and corrosion-resistant screws
- Material choice: Opt for 316 stainless steel or marine-grade aluminium to resist Australian weather
- Avoid ballast: Never use concrete blocks or wood—they trap moisture and cause rust
- Cable management: Route cables with drip loops and UV-rated clips to prevent damage
- Use the Starlink app: Scan for obstructions before mounting to ensure clear sky view
Metal roofs are actually ideal for Starlink. They're elevated, structurally sound, and offer clear sightlines—but only if you mount correctly.
The wrong mount can void your roof warranty, create leak points, and corrode in months. The right one will last decades without damaging your roof or compromising your signal.
Australian conditions are particularly harsh. Salt spray, UV exposure, and extreme temperature swings destroy cheap mounting hardware fast.
That's why choosing tested, certified mounts designed specifically for metal roofing is critical. Not all mounts are created equal, and definitely not all are built for Australian weather.
Whether you're mounting on standing seam, corrugated iron, or trapezoidal profiles, the installation method differs significantly. Each roof type demands specific hardware to maintain integrity and performance.
Common Starlink mount for metal roof vocab:
Choosing the Right Starlink Mount for Metal Roof
Selecting a Starlink mount for metal roof isn't just about finding something that fits the pipe; it's about protecting the structural integrity of your home. Metal roofs are fantastic for satellite broadband because they provide a stable, elevated platform, but they are also sensitive to improper penetrations and dissimilar metals.
When we evaluate a mount, we look for high wind load ratings. In many parts of Australia, a mount must meet Wind Classification C3 (W60) to be considered safe. Furthermore, the mount must account for thermal expansion. Metal roofs move as they heat and cool; a rigid, poorly designed mount can tear at the fixing points over time.

Standing Seam vs Corrugated Profiles
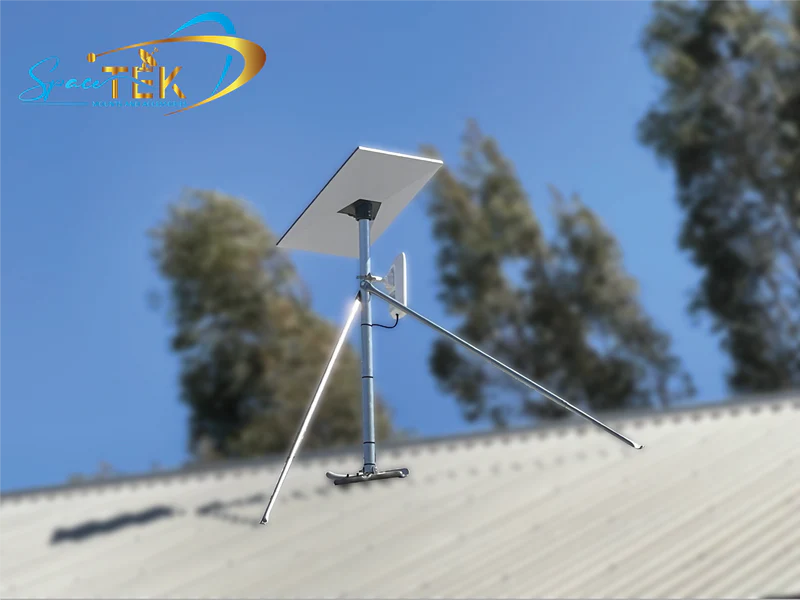
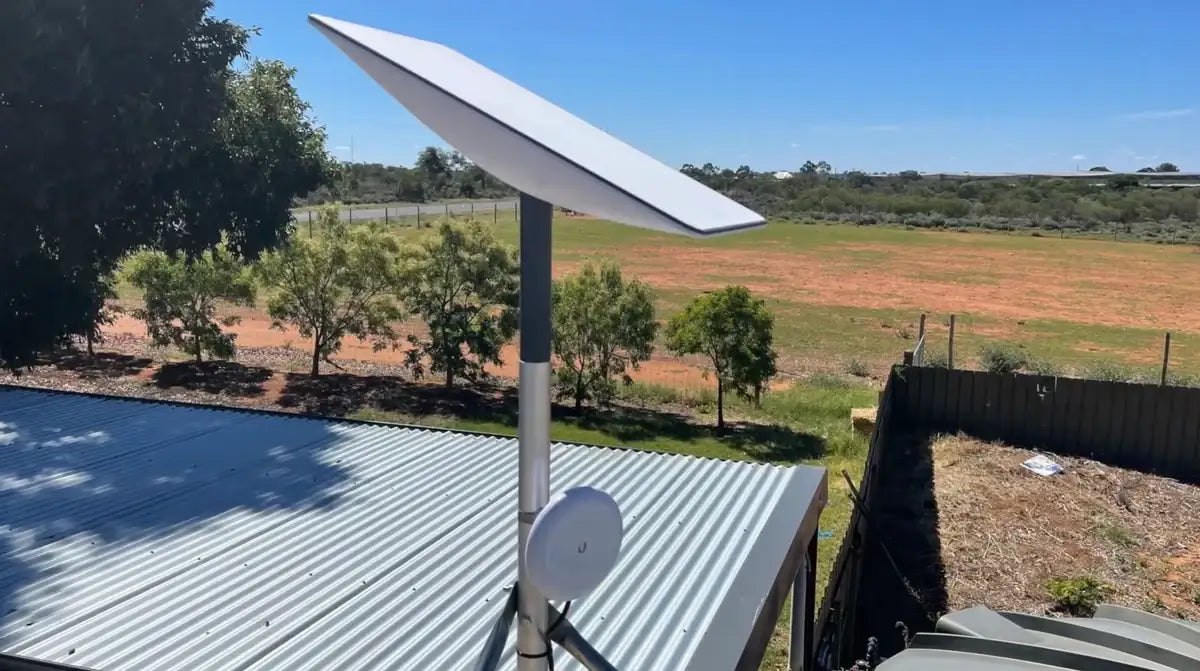
The profile of your roof dictates your mounting strategy. If you have a standing seam roof (like Klip-Lok), you are in luck. You can use SpaceTek's non-penetrating clamp systems that squeeze the seam. This is the "holy grail" of installations because it involves zero drilling, meaning there is zero chance of a leak and your roof warranty remains fully intact.
For those with standard corrugated iron or trapezoidal ribs, you will likely need a piercing mount. However, not all "tin roof" mounts are equal. You should look for SpaceTek systems that use EPDM rubber gaskets and high-quality fasteners to create a watertight seal. We've written extensively on mounting Starlink on tin and corrugated roofs to help you navigate these specific challenges.
Why Material Choice Matters for Australian Weather
Australia’s climate is a mount-killer. If you live near the coast, salt spray will turn cheap galvanised steel into a pile of rust in a few seasons. This isn't just an aesthetic issue; rust can bleed onto your roof, causing permanent staining and structural degradation.
We always recommend SpaceTek mounts made from 316-grade stainless steel or marine-grade aluminium. These materials offer superior UV stability and won't cause galvanic corrosion—a chemical reaction that occurs when two different metals touch and moisture is present. To understand why your choice of bracket can be a friend or foe to your roof, you need to consider the long-term chemical compatibility of the materials.
Step-by-Step Starlink Mount for Metal Roof Installation
- Scan for Obstructions: Before you even pick up a drill, use the Starlink app. Move around your roof to find the "sweet spot" where the sky is completely clear.
- Site Selection: Choose a location near the ridge if possible, as this often provides the best clearance and easiest cable access.
- Alignment: Use a SpaceTek pivot mount if your roof is slanted. It is vital that the mast is perfectly vertical so the dish can track satellites effectively.
- Fixing: For corrugated roofs, ensure your bracket alignment lands on the crest of the rib, never in the valley where water pools.
- Sealing: Apply a generous amount of neutral-cure silicone to the screw holes and ensure the EPDM gaskets are compressed but not crushed.
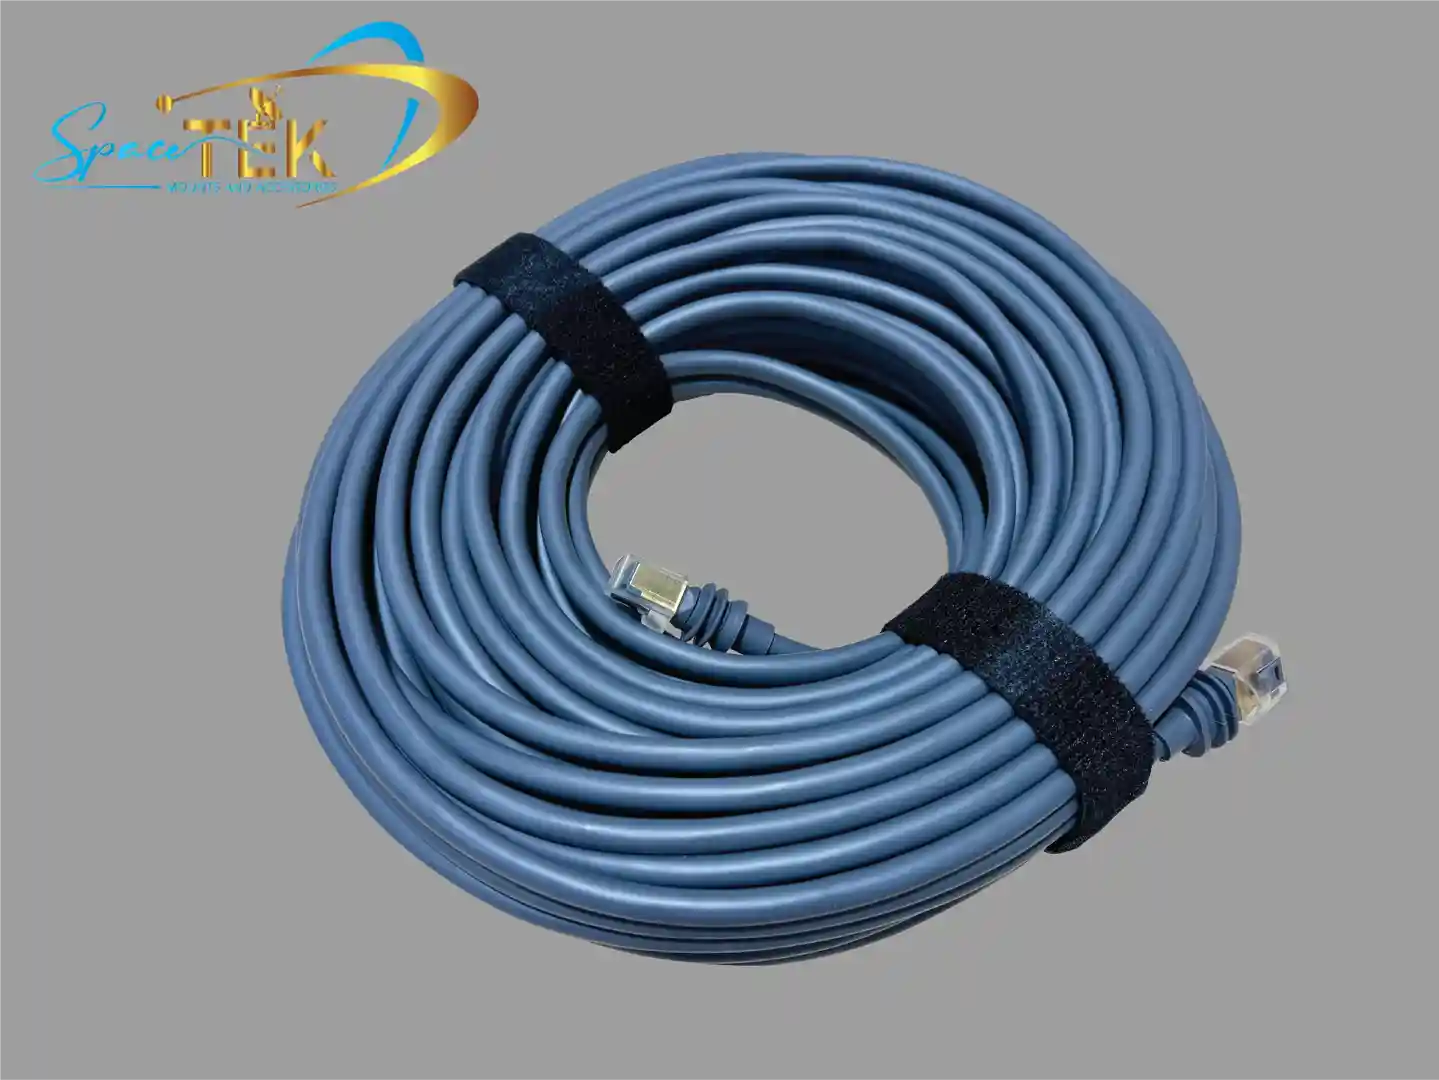
Cable Routing and Weatherproofing
The cable is the lifeline of your system. On a metal roof, the edges of the sheets can be razor-sharp. Always use a "drip loop"—a small U-shaped dip in the cable before it enters the building—to ensure rainwater drips off the cable rather than running into the entry hole.
Secure your cables every 60-90cm using UV-rated clips. Avoid cheap plastic zip ties that will snap after six months in the sun. If you are installing the latest hardware, our tin roof mount kit for dishy gen 3 includes the necessary adapters to keep everything tidy and weather-protected.
Maintaining Your Roof Warranty
One of the biggest mistakes we see is the use of ballast. Some DIYers use concrete blocks or wood to weigh down a mount. This is a disaster for metal roofs. These materials trap moisture against the metal, leading to rapid chemical degradation and rust.
Furthermore, many roof manufacturers will void your warranty if they find unapproved penetrations or evidence of moisture pooling. This is why investing in a SpaceTek starlink roof mount kit is a smart move—it ensures the installation is "by the book" and protects your home's value.
Starlink Mount for Metal Roof: Gen 2 vs Gen 3 vs Mini
The hardware has evolved, and your mount needs to match your specific dish version:
- Gen 2 (Actuated): Requires a SpaceTek pipe adapter for a secure mast installation, providing a much more robust connection than the basic ground stand.
- Gen 3 (V4 Kickstand): This dish is larger and doesn't have a motor. It relies on a Gen 3 V4 mount that allows for manual tilt adjustment.
- Starlink Mini: While highly portable, many Australians are mounting these to 4x4 roof racks or caravans. For these setups, look for SpaceTek's ultra-compact aluminium brackets that can withstand high-speed vibrations.
Getting Starlink installation right
Mounting Starlink on a metal roof doesn't have to be a stressful experience, but it does require respect for the materials involved. By avoiding damaging ballast, choosing rust-resistant metals like 316 stainless steel, and using the correct profile-specific hardware, you can enjoy high-speed internet without compromising your roof's lifespan.
At SpaceTek Australia, we live and breathe these installations. Our kits are designed for the toughest Australian conditions, ensuring your connection stays rock-solid from the Tassie coast to the Top End. If you're unsure which setup is right for your specific roof profile, don't guess—contact us for expert advice. We're here to help you get connected properly the first time.
Leave a comment
This site is protected by hCaptcha and the hCaptcha Privacy Policy and Terms of Service apply.