
How to order Starlink roof mount kits starts with identifying your Starlink dish model and roof type, then choosing rugged, Australian-made options from specialist suppliers like SpaceTek Australia for enhanced durability and local conditions. By opting for locally engineered solutions, you ensure your hardware is built for the specific demands of the Australian environment.
Quick ordering steps:
- Identify your Starlink model – Standard (Gen 3), Mini, or High Performance
- Assess your roof type – Tin, tile, shingled, or flat
- Choose your mount type – Pivot (penetrating), Ridgeline (non-penetrating), Pipe Adapter, or Wall Mount
- Select your supplier – Choose specialist Australian retailers like SpaceTek for heavy-duty mounting solutions
- Gather installation tools – Drill, 6mm bit, 9/16in hex socket, level, marker, and silicone sealant
If you live in rural or remote Australia, getting reliable internet often means installing Starlink. The standard mount that comes with your dish is designed for ground-level testing, not permanent elevated installations on roofs or walls. That means you need a proper roof mount to get your dish up high, away from obstructions, and positioned for optimal signal reception.
The challenge is figuring out which mount suits your specific setup. There are at least eight distinct types of mounts available for Starlink Standard kits alone, including wall, pivot, pipe adapter, ridgeline, mobility, roof rack, and actuated mount options. Each one is designed for different roof types, installation methods, and mounting surfaces.
Australian conditions add another layer of complexity. Coastal salt air, harsh UV exposure, and extreme weather events demand mounting solutions built from corrosion-resistant materials like hot-dip galvanised steel or marine-grade stainless steel. SpaceTek mounts are created specifically to withstand cyclonic winds and provide long-term durability in our climate.
The good news is that ordering the right mount is straightforward once you understand your requirements. Whether you are mounting on a tin roof, tile roof, or caravan, there is a solution designed specifically for your needs. Some mounts require drilling and permanent installation, while others use ballast weights for non-penetrating setups.
I'm Aaron Wroblewski, founder of SpaceTek Australia, with over 25 years of experience in remote communications and satellite systems. I created SpaceTek specifically to address the gap in durable, user-friendly mounting solutions for Australian conditions, and I will guide you through how to order starlink roof mount options that actually work for your setup.
How to order Starlink roof mount vocab explained:
How to Order Starlink Roof Mount Options for Every Setup
When we look at how to order Starlink roof mount systems, it is essential to choose specialist providers that offer heavy-duty reinforcement needed for extreme Australian weather. At SpaceTek, we focus on Starlink mounts Australia that are specifically engineered to handle high wind loads and coastal corrosion.
There are three primary categories you will encounter:
- Pivot Mounts: These are the "bread and butter" of roof installations. Designed for slanted roofs, they feature a swiveling mechanism that allows you to ensure your dish is perfectly vertical, even if your roof is steep.
- Ridgeline Mounts: These are non-penetrating options. If you don't want to drill holes in your roof, this mount sits over the peak and is held down by ballast weights. It is an excellent choice for gable roofs.
- Pipe Adapters: If you already have an existing antenna mast or a sturdy pole on your roof, a pipe adapter is the easiest way to secure your Starlink. It clamps onto poles ranging from 31mm to 63.5mm in diameter.

Choosing the Right Mount for Your Starlink Model
Before you hit "buy," you must ensure the mount is compatible with your specific hardware generation. SpaceTek designs brackets specifically for each version to ensure a secure fit.
- Gen 2 (Standard Actuated): This is the rectangular dish that moves itself. We recommend checking our guide to find the right fit for Gen 2 Standard Actuated to ensure you get a mount that supports the internal motor.
- Gen 3 (Standard V4): The latest model features a kickstand and does not rotate automatically. Ordering for this model requires mounts that offer manual tilt adjustment. For a deeper dive, see our guide to Gen 3 roof mount kits.
- Starlink Mini: This ultra-portable version has its own set of compact SpaceTek mounts, including pivot and pipe adapters designed for smaller footprints.
How to Order Starlink Roof Mount Kits for Specific Roof Types
The material of your roof dictates the type of hardware you need. In Australia, we mostly deal with tin (corrugated or Klip-Lok) and tile.
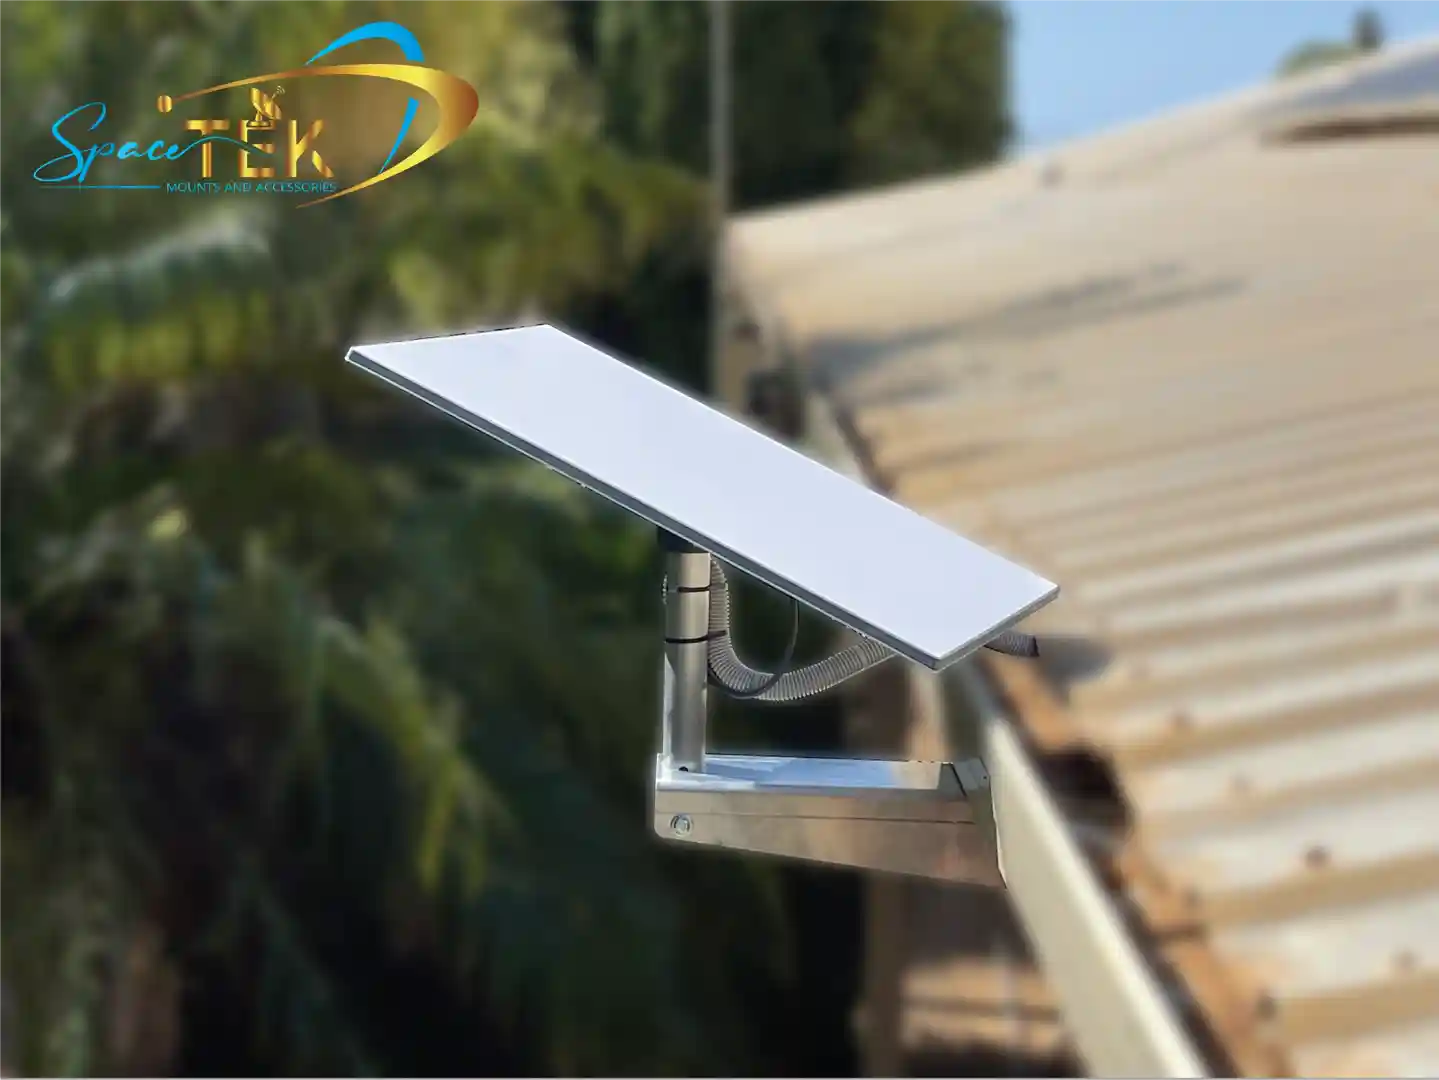
For tin roofs, a SpaceTek Pivot Mount or a Long Wall Mount is usually best. These allow for clearance over overhangs—the Long Wall Mount can clear up to 12 inches (30cm), while the Short Wall Mount is better for shallow 2-inch overhangs. If you are working with tiles, we have conducted extensive mounting tests on tile, tin, and corrugated roofs to find the most secure fixings that won't cause leaks.
If you are a renter or simply want to avoid drilling, the SpaceTek Ridgeline Mount is your best bet. It supports slopes up to 45 degrees and is rated for high wind resistance. For even higher durability, our specialised roof peak mounts made of heavy-gauge galvanised steel are available.
Ordering Mounts for RVs and Mobile Applications
For those of us who take our internet on the road, how to order Starlink roof mount solutions for vehicles is a top priority. Mobile applications require mounts that can handle vibration and constant wind resistance while driving.
- Roof Rack Mounts: These are designed to clamp onto crossbars. SpaceTek kits are built to fit a wide variety of standard bar sizes.
- Mobility Mounts: These create a waterproof seal and are made from high-quality materials like 316-grade stainless steel or aluminium.
- Carbon Fibre Poles: For temporary setups at a campsite, lightweight carbon fibre telescopic poles are becoming a popular choice for getting the dish above the tree line.
Explore our full range of Starlink RV and portability mounts to find a solution that fits your caravan or 4x4.
Installation Requirements and Final Steps
Once you have ordered your SpaceTek mount, you need to prepare for the physical installation. Safety is paramount when working on a roof. We always recommend that if you are uncomfortable with heights or power tools, you should contact a professional installer.
Essential Tools and Safety Considerations
Most SpaceTek roof mount installations require a basic set of tools:
- A drill with a 6mm (1/4 in) bit.
- A 9/16 inch hex socket or spanner.
- A level to ensure the mast is vertical.
- Silicone sealant or mastic tape to waterproof the holes.
When drilling into your roof, always aim for a structural beam. This provides the enduring foundation your dish needs. We also recommend tethering your dish. While SpaceTek mounts are incredibly sturdy, a safety tether can prevent a total loss if an unexpected extreme wind event occurs. For those with tile roofs, please read our guide on how to install a tile roof mount safely to avoid cracking your tiles.
How to Order Starlink Roof Mount Accessories and Spares
Your installation isn't just about the mount; you might need extra parts to complete the setup. When you are figuring out how to order Starlink roof mount kits, don't forget to check if you need:
- Mounting Adapters: Specialized brackets to ensure a perfect fit for different dish generations.
- Cable Routing Clips: These keep your installation neat and prevent the cable from flapping in the wind, which can lead to damage over time.
- Weatherproofing Kits: Additional seals and gaskets for high-exposure environments.
You can browse all these SpaceTek parts and accessories in our online store to ensure you have everything delivered in one go.
Conclusion and Expert Support
Ordering the right Starlink roof mount is the difference between a frustrating, intermittent signal and a lightning-fast, reliable connection. By choosing a mount that matches your dish generation and roof type—and prioritising high-quality, rust-resistant materials—you ensure your hardware survives the tough Australian climate.
At SpaceTek Australia, we take pride in providing mounts that are built to last, offering 10-year warranties on many of our products because we know they can handle the heat, the salt, and the wind. For more technical details, check out our guide on everything you need to know about mounting hardware.
If you have questions about your specific setup or need help choosing the right bracket for your home or RV, don't hesitate to get in touch with our experts. We are here to help you get connected and stay connected, no matter where you are in Australia.


Leave a comment
This site is protected by hCaptcha and the hCaptcha Privacy Policy and Terms of Service apply.