Why Proper Starlink Alignment (and the Right Mount) Makes All the Difference

How to align your Starlink dish correctly involves using the official app to position the hardware within a 5-degree tolerance zone. This precision ensures your phased-array antenna maintains a stable connection with satellites orbiting at 550 kilometres. For official guidance on the necessity of this process, you can refer to the Starlink Help Center.
- Power on your Starlink system and wait 5–10 minutes for it to boot.
- Connect your phone to the STARLINK Wi-Fi network.
- Open the Starlink app and navigate to the alignment tool.
- Slowly rotate the dish until the indicator is centred in the target zone.
- Stay within the 5-degree tolerance shown in the app.
- Tighten all mounting hardware and confirm stability.
In Australia, the dish typically points south — but the app will always show your exact target direction based on your location.
Gen 3 Standard, Enterprise, and Mini kits require manual alignment. Older motorised models handled this automatically.
Getting the angle right matters more than most people realise. Starlink's satellites orbit at just 550 kilometres above Earth — far lower than traditional geostationary satellites at 36,000 kilometres. That proximity means even small deviations in dish positioning have a real impact on signal quality.
The app will trigger a 'Starlink Misaligned' alert if your dish drifts more than 5 degrees from its target. When that happens, speeds drop — or the connection cuts out entirely.
But here's what most guides skip over entirely. Alignment is only half the problem. If your mount isn't stable, your dish will drift — even after a perfect initial setup. Wind, heat expansion, and vibration are constant forces in the Australian climate, and they all work against you.
That's where most DIY setups fall apart. Cheap or generic mounts shift over time. They corrode in coastal air, warp under UV exposure, and flex in strong winds. Each of those small movements pushes your dish further from that critical 5-degree window. Getting the mount right from the start is what turns a good alignment into a permanent, reliable connection.

How to align your Starlink dish starts with the Starlink app’s built-in alignment tool, which guides you to rotate the dish until it sits within the optimal target zone. For Gen 3 and Mini kits, staying within a 5-degree tolerance is critical for stable performance. But here’s what most people miss: alignment is only half the equation. If your mount isn’t solid, UV-resistant, and properly engineered for Australian conditions, your dish will drift over time — even if you nailed the alignment on day one.
The Real Issue Nobody Talks About
If you’ve ever set up satellite internet before, you’ll know the frustration — constant tweaking, signal dropouts, and unclear instructions. Starlink is simpler, but not foolproof. The biggest hidden issue isn’t just alignment — it’s poor mounting hardware and confusing setup decisions:
- Cheap mounts shifting in the wind and losing that 5-degree sweet spot.
- Rusting or warping in the intense Australian coastal heat.
- Confusion around angles and placement during the initial DIY phase.
- The hidden costs and delays of trial-and-error with flimsy accessories.
At SpaceTek, we remove that uncertainty completely with purpose-built mounting systems designed for Australian conditions — plus expert guidance so you’re not guessing. You can learn more about how Starlink dish angles work to ensure you are getting the most out of your hardware.
How to Align Your Starlink Dish Correctly
How to align your Starlink dish involves using the official app to physically orient the hardware toward the most active part of the satellite constellation. For the latest Gen 3 Standard and Mini kits, this is a manual process that replaces the motors found in earlier versions.

- Power on the Starlink system: Plug in all cables and allow at least 10 minutes for the initial boot sequence and satellite search.
- Connect to Wi-Fi: Use your mobile device to join the STARLINK network.
- Access the alignment tool: Open the Starlink app. If the dish needs positioning, a "Starlink Misaligned" alert will appear, or you can find the tool in the hardware settings.
- Rotate slowly: Stand behind the dish and rotate it slowly. A real-time graphic on your phone will show a target box.
- Centre the indicator: Move the dish until the indicator sits perfectly in the centre of the target box. The app will confirm when you are within the required 5-degree tolerance.
- Secure the hardware: Once the app gives you the green light, tighten your mounting bolts immediately to prevent physical shifting.
For a deeper dive into the setup process, our complete guide to Starlink installation provides the technical details needed for a professional-grade result. It is also helpful to understand how to set up your Gen 3 Dishy for the best possible speeds.
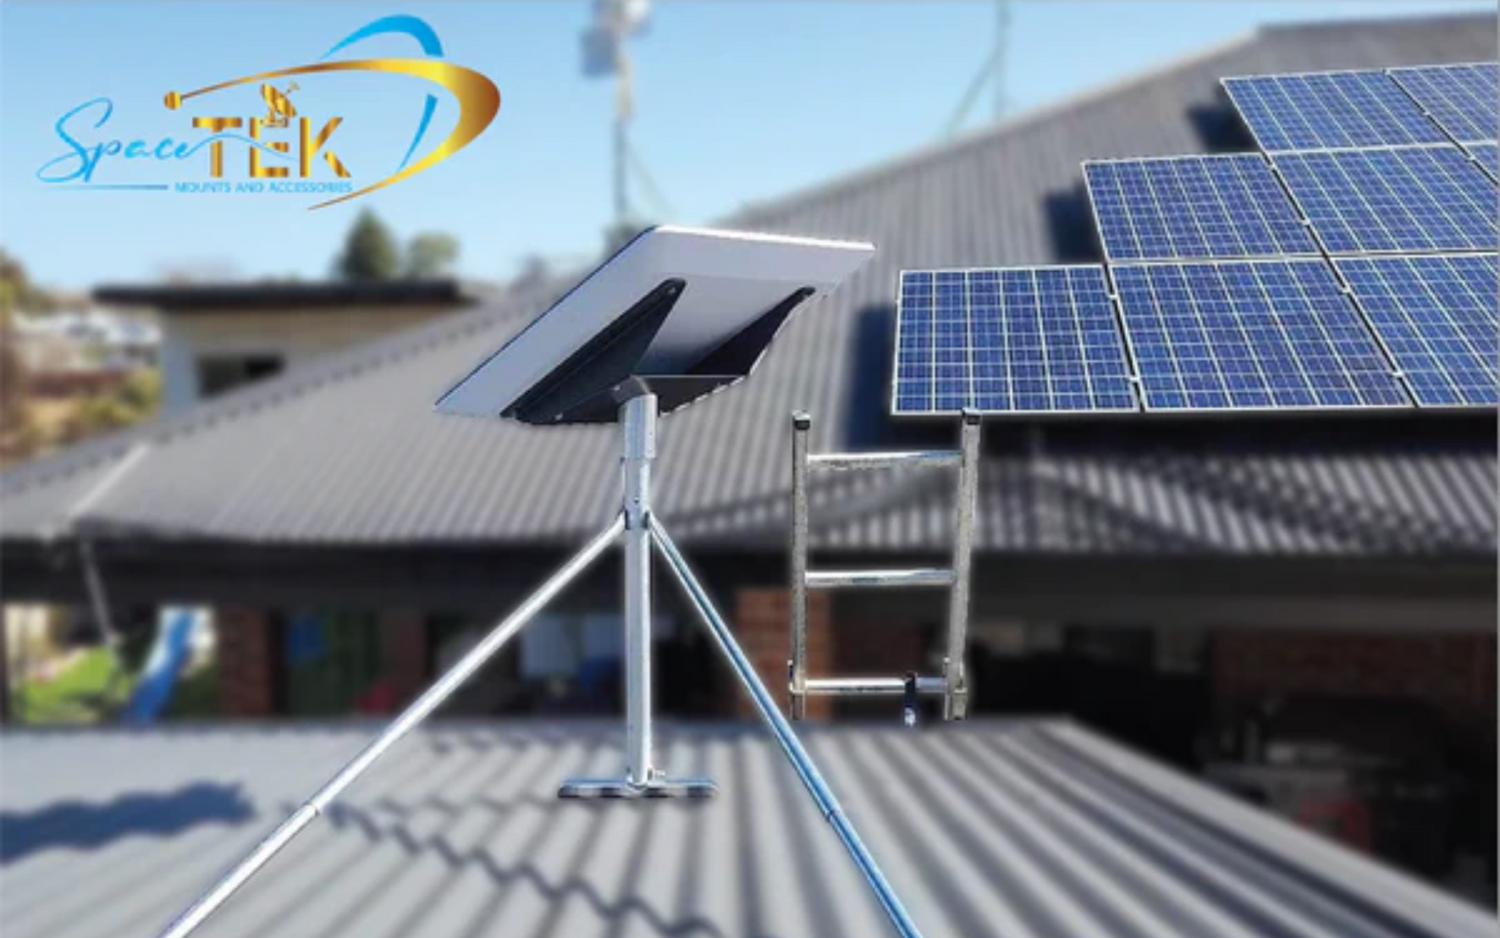
Residential Solutions — Getting a Clear Sky View That Actually Lasts
Residential Starlink solutions require a clear 110-degree field of view, typically facing south in the Southern Hemisphere to avoid interference. Positioning the dish at the highest point of the roof peak ensures the signal remains unobstructed by trees or neighbouring buildings.

Why Height and Position Matter More Than You Think
Mounting your dish higher reduces the likelihood of signal dropouts caused by tree branches, neighbouring buildings, or your own roofline. Even a small obstruction can lead to frequent, micro-interruptions that ruin video calls or gaming sessions.
When choosing your ideal installation location, always use the app's obstruction scanner first. This tool maps a 3D bubble of the sky to predict if any objects will block the satellite's path. If you find yourself surrounded by trees, you may need to navigate around dish obstructions by using an elevated mount or a mast.
How to align starlink dish for maximum height
If your roof peak doesn't offer a clear enough view, you'll need to gain extra elevation. Using a Starlink pipe adapter allows you to attach your dish to existing masts or custom poles.
Height alone isn't enough; the mount must be rigid. If a tall pole flexes in the wind, your alignment will swing outside that 5-degree tolerance, triggering the "Starlink Misaligned" error. SpaceTek aluminium mounts are engineered specifically for long-term stability, ensuring that once you aim for the stars, your connection stays locked in.
Commercial Solutions — Built for Uptime, Not Guesswork
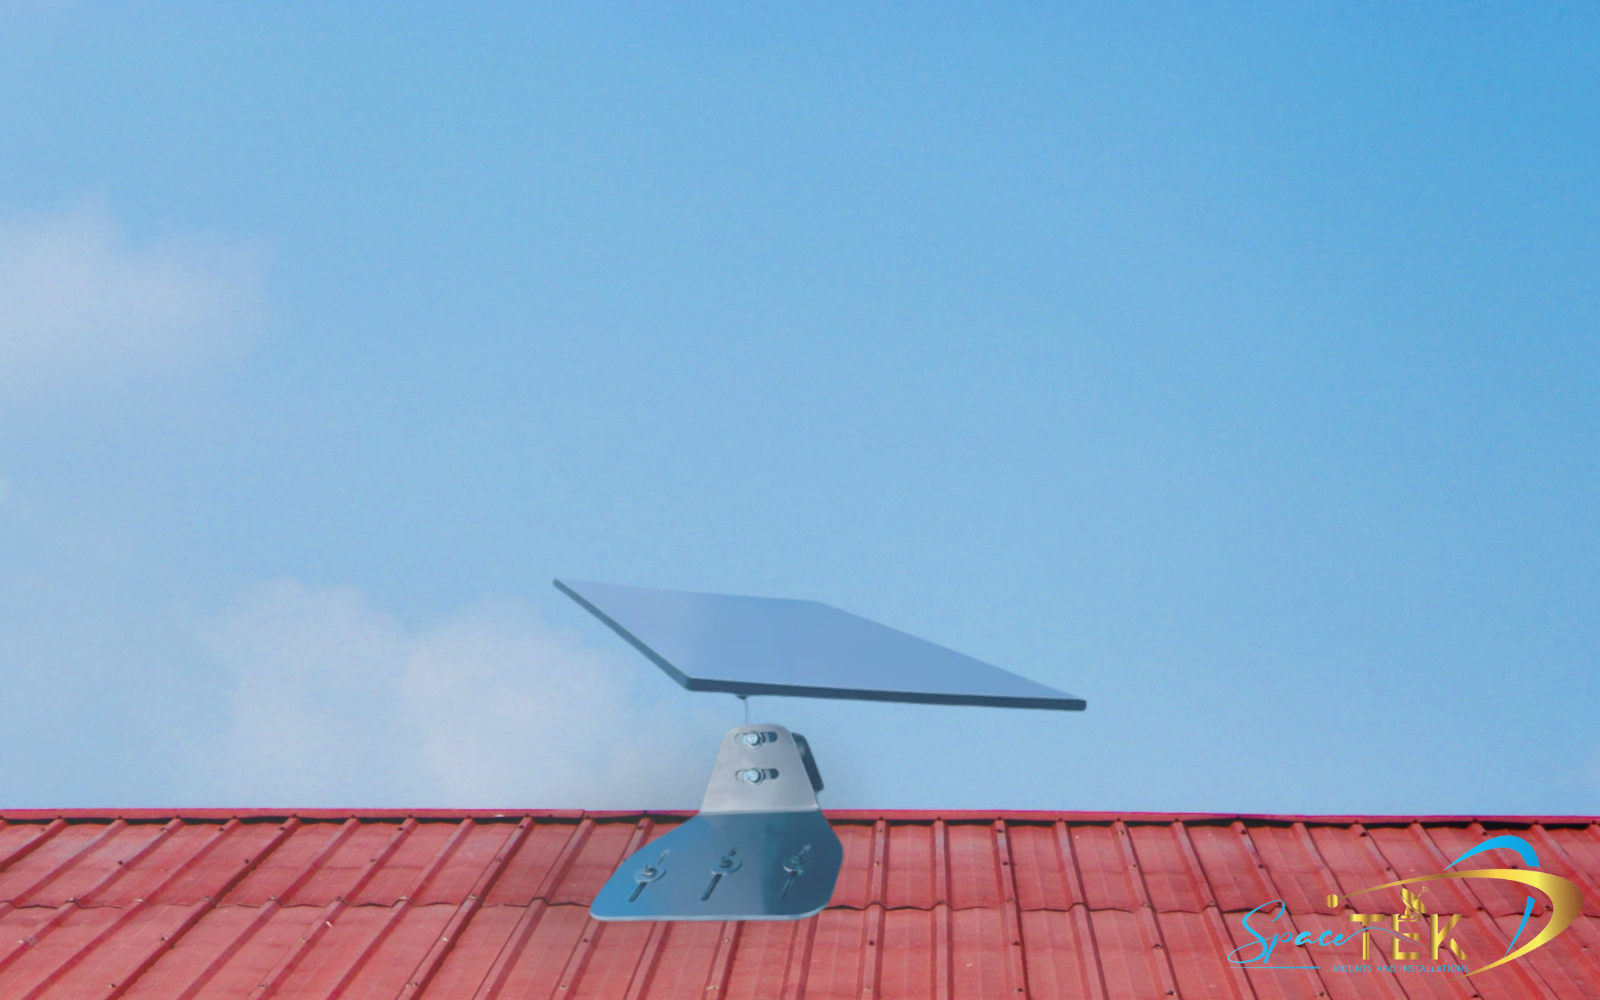
Commercial solutions for Starlink focus on maximum uptime by using vibration-proof mounts that resist high wind loads. Ensuring a stable 8-degree tilt prevents rain buildup and maintains the precise alignment required for enterprise-grade connectivity.

Stability Is Everything
Commercial installs require mounts that are vibration-proof and capable of resisting high wind loads. A common mistake in commercial setups is mounting the dish vertically against a wall or chimney. Starlink dishes should be installed as close to vertical as possible but must maintain a specific tilt — usually around 8 degrees — to ensure proper operation and prevent rain buildup on the face of the dish.
For those managing high-demand connections, exploring our commercial mounting range is the best way to ensure your hardware is supported by engineering that matches its technical capabilities.
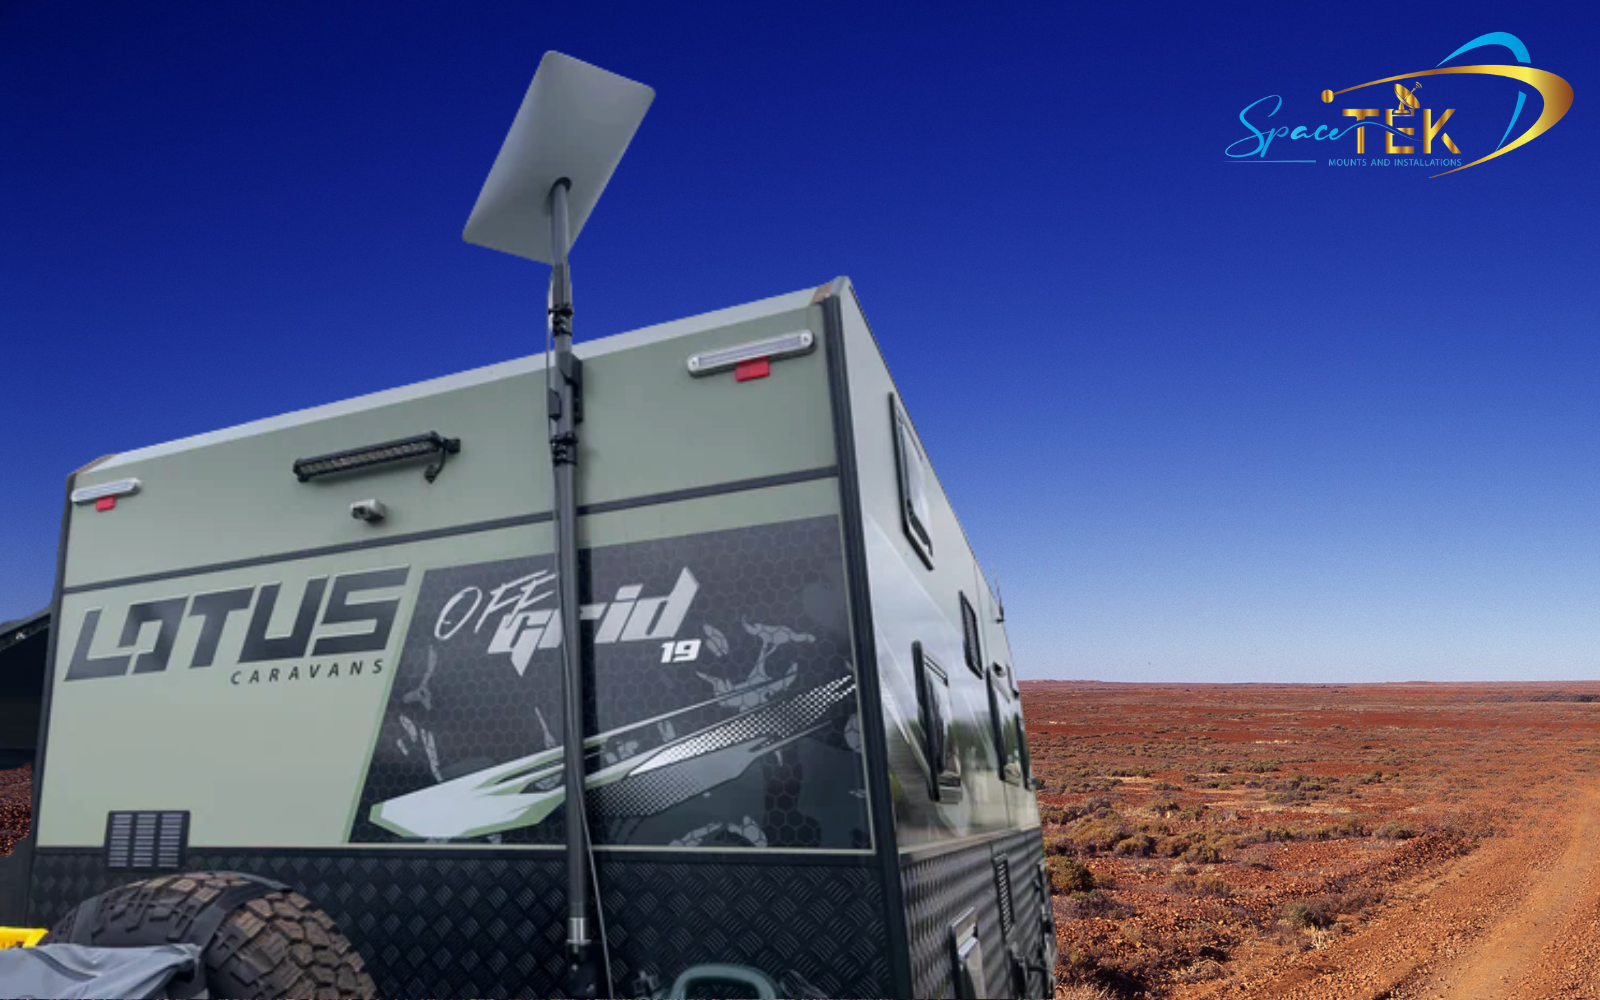
Mobile & Off-Grid Setups — Alignment on the Move
How to align your Starlink dish while travelling involves using the app's compass and obstruction tool to find a clear south-facing window at every new campsite. Maintaining a level base and clearing roof-mounted obstacles like solar panels is essential for a fast, stable mobile connection.

Quick Mobile Setup Tips
- Clear the clutter: Ensure roof racks, awnings, or solar panels aren't casting shadows into the dish's 110-degree field of view.
- Use the compass: Use the app's compass guide to find your south-facing orientation before you even unpack the dish.
- Level ground: While the dish can compensate for some tilt, keeping the base as level as possible makes the manual alignment process much faster.
- Avoid the ground: Ground-level obstructions like tall grass or nearby vehicles are the most common causes of mobile signal failure.
How to align starlink dish while travelling
When you move to a new location, the Starlink app may still be "remembering" the obstructions from your last stop. It is a best practice to reset the obstruction map in the settings menu whenever you travel more than a few kilometres. This allows the system to start fresh and provide an accurate alignment target for your new surroundings. For those on the move, check out our vehicle mounting solutions designed to handle the rigours of the Australian outback.
Why Material Quality Matters for Australian Conditions
Material quality matters for Australian conditions because high UV levels and salt air quickly degrade inferior materials like plastic or steel, leading to alignment drift. Using precision-machined aluminium ensures the mount remains rigid and rust-free, maintaining the dish's 5-degree alignment window over the long term.

Precision-Machined Aluminium vs. Cheap Imports
Many generic mounts found online are made from thin, powder-coated steel or, worse, 3D-printed plastics. These materials fail in the Australian climate:
- Rust: Coastal environments cause steel mounts to corrode within months, seizing bolts and weakening the structure.
- Thermal Warping: Extreme heat can cause some materials to flex, pushing your dish out of its 5-degree alignment window.
- UV Degradation: Plastics become brittle and snap under the weight of the dish during high winds.
SpaceTek mounts are built from precision-machined aluminium. They are lightweight, naturally rust-resistant, and won't warp in the sun. This ensures your alignment remains "set and forget," regardless of what the weather does. You can view our full range of residential mounting solutions to see the difference quality engineering makes. Understanding proper dish placement is also vital for long-term success.

Frequently Asked Questions About Starlink Alignment
What does the 'Starlink Misaligned' error mean?
This alert is triggered when the dish's internal sensors detect that it has drifted more than 5 degrees from the optimal target angle. It usually means the mounting bolts have loosened, or the mount itself has flexed in the wind. To fix it, simply open the alignment tool in the app and re-orient the dish.
Do I need to realign my Starlink after a storm?
If you have used a high-quality, rigid mount like those from SpaceTek, you should not need to realign. However, if you notice a drop in speeds after high winds, check the app. It's possible the wind shifted the dish slightly, or debris like wet leaves has created a new obstruction in the field of view.
Can the dish be laid flat?
While the Gen 3 dish can technically function at various angles, laying it completely flat is not recommended. A flat dish is prone to rainwater pooling, which can degrade the signal. An 8-degree tilt is the industry standard to ensure water runoff and optimal satellite tracking.
Does Starlink automatically align itself?
Only the older Gen 1 and Gen 2 "motorised" dishes align themselves. The current Gen 3 Standard, Starlink Mini, and Enterprise kits all require manual alignment using the Starlink app.
Is Starlink alignment a DIY job?
Yes, for most people, it is a straightforward DIY task. However, if your roof is steep, difficult to access, or you are performing a complex commercial install, we recommend consulting a professional. You can find a professional installer through our network to ensure the job is done safely.
Conclusion — Don’t Just Align It. Build It Right From the Start.
Proper Starlink alignment is what gets you online — but the right mount and accessories are what keep you online. In Australia’s harsh climate, cutting corners with flimsy hardware leads to signal instability, constant re-adjustments, and early hardware failure.
SpaceTek Australia eliminates that uncertainty. Our precision-machined aluminium mounting systems are designed specifically for Australian conditions — giving you the stability and durability needed for long-term performance.
We make the process simple:
- DIY-friendly installation with clear instructions.
- Precision engineering that prevents "alignment drift."
- Rust-free materials built for coastal and outback environments.
- Expert support and access to a nationwide installer network.
Don't settle for a "good enough" connection. Build a setup that lasts. Explore the full range of SpaceTek mounting solutions today, or contact our expert team for advice on your specific installation.
Leave a comment
This site is protected by hCaptcha and the hCaptcha Privacy Policy and Terms of Service apply.