Introduction
Starlink is becoming the top internet choice for regional and remote Australia. A proper installation is key for a stable signal, your safety, and equipment life. This guide covers installations for tin and tile roofs, RVs, and portable setups using Spacetek’s specialised mounts.
I'm Aaron Wroblewski, founder of SpaceTek Australia. With over 25 years in satellite communications, my team and I create mounting systems for Australian conditions. We help thousands get reliable Starlink setups, from coastal homes to outback stations.
1. Choosing the Right Starlink Dish
Your Starlink Installation Australia starts with the right dish. Each model has different mounting needs.
Starlink offers several dish models in Australia, including the rectangular Gen 2 dish, the smaller round Gen 3 model, and the compact Starlink Mini. Each version, including high-performance business kits, has a unique size and shape, requiring a specific mount.
Mounting is different for each model. The rectangular Gen 2 dishes need different mounts than the round Gen 3 and Mini. Our Gen 2 collection is for the rectangular dish. Our Gen 3 V4 mounts and accessories are for the newer round dishes.
SpaceTek mounts are designed for all dish types. Our systems ensure a secure fit for any model. We also have specific Starlink Mini mounts for this compact model.
Every Starlink kit includes the dish, router, and cables. The right SpaceTek mount completes the setup. Our compatible Starlink mounts and adapters guide helps you find the perfect match.
2. Determining Your Installation Location
A successful Starlink Installation Australia needs the right spot. Your location choice affects signal strength and reliability.
Installation Types
- Fixed Roof Installations: Best for homes and businesses. They provide a permanent, stable connection.
- RV and Caravan Setups: Offer mobile connectivity. They keep you online while travelling. Our Starlink RV mounting kit essentials guide has more details.
- Portable and Temporary Setups: Give you flexibility. They are great for camping, work sites, or testing locations.
Critical Location Factors
Three factors are essential for any installation.
- Clear Sky View: Your dish needs a clear, unobstructed view of the sky. Trees, buildings, and power lines can block the signal. The dish needs a 110° horizontal view and 20° vertical clearance.
- Easy Access: You will need to access the dish for maintenance. Choose a spot you can reach safely. This makes cleaning and cable checks easier.
- Strong Support: The mount must be attached to a solid structure. This is vital for handling Australia's weather. Our mounts are tested for high winds but need a strong anchor.
Using the Starlink App's Obstruction Checker
The Starlink app helps you find the best location. Its "Obstruction Checker" tool is essential.
Download the app on iOS or Android. The tool uses your phone's camera to scan for obstacles. Point your phone at the sky. The app will show problem areas in red.
Walk around your property and test different spots. Look for a location with no red areas. This saves you from installation problems later.
Think about the future. A small tree today could be an obstruction tomorrow. Consider seasonal changes, like leaves on trees in summer. If you have unavoidable obstructions, a taller mount can lift the dish above them.
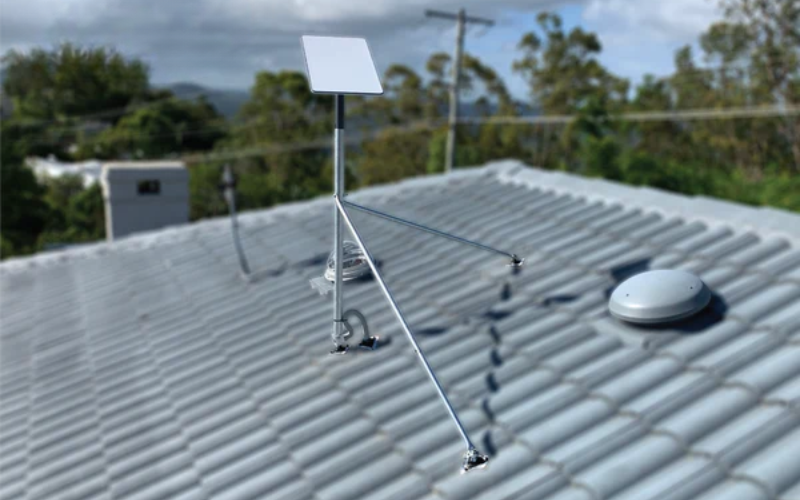
3. Installing on a Fixed Roof (Permanent)
A fixed roof installation offers the most stable connection for your home or business. Our Australian-made roof mounts are built for our harsh weather. They ensure your Starlink Installation Australia is secure and reliable.
3.1 Tin Roof Installation
Our mounts are designed specifically for Australian tin roofs. They keep your installation secure and weatherproof.
- Position the mount. Choose a spot with a clear sky view. Align the mount with a structural beam or rafter underneath. Use the Starlink app's obstruction checker to mark your pilot holes.
- Fasten to trusses. Drill 6mm pilot holes at a slight downward angle. Use non-penetrating clamps if possible to protect your roof warranty. Insert and tighten lag screws firmly but do not overtighten.
- Weatherproof all points. Push mastic tape into each pilot hole. Apply silicone sealant around every hole. Use a double seal to keep all moisture out.
3.2 Wall or Eave Mount Installation
A wall or eave mount is a good alternative to avoid roof holes. It can also provide easier access.
- Select a sturdy location. Choose a spot on a wall or eave you can reach safely. Ensure the wall can support the mount's weight.
- Ensure a clear sky view. Use the Starlink app to check for obstructions. The roofline must not block the dish's view. Mount the dish as high as possible.
- Fasten to wall studs. Use a stud finder to locate studs. Drill pilot holes into the studs. Secure the mount with lag screws. Apply sealant around all holes.
- Check for stability. Gently push and pull the mounted dish. It should be completely rigid with no wobble.
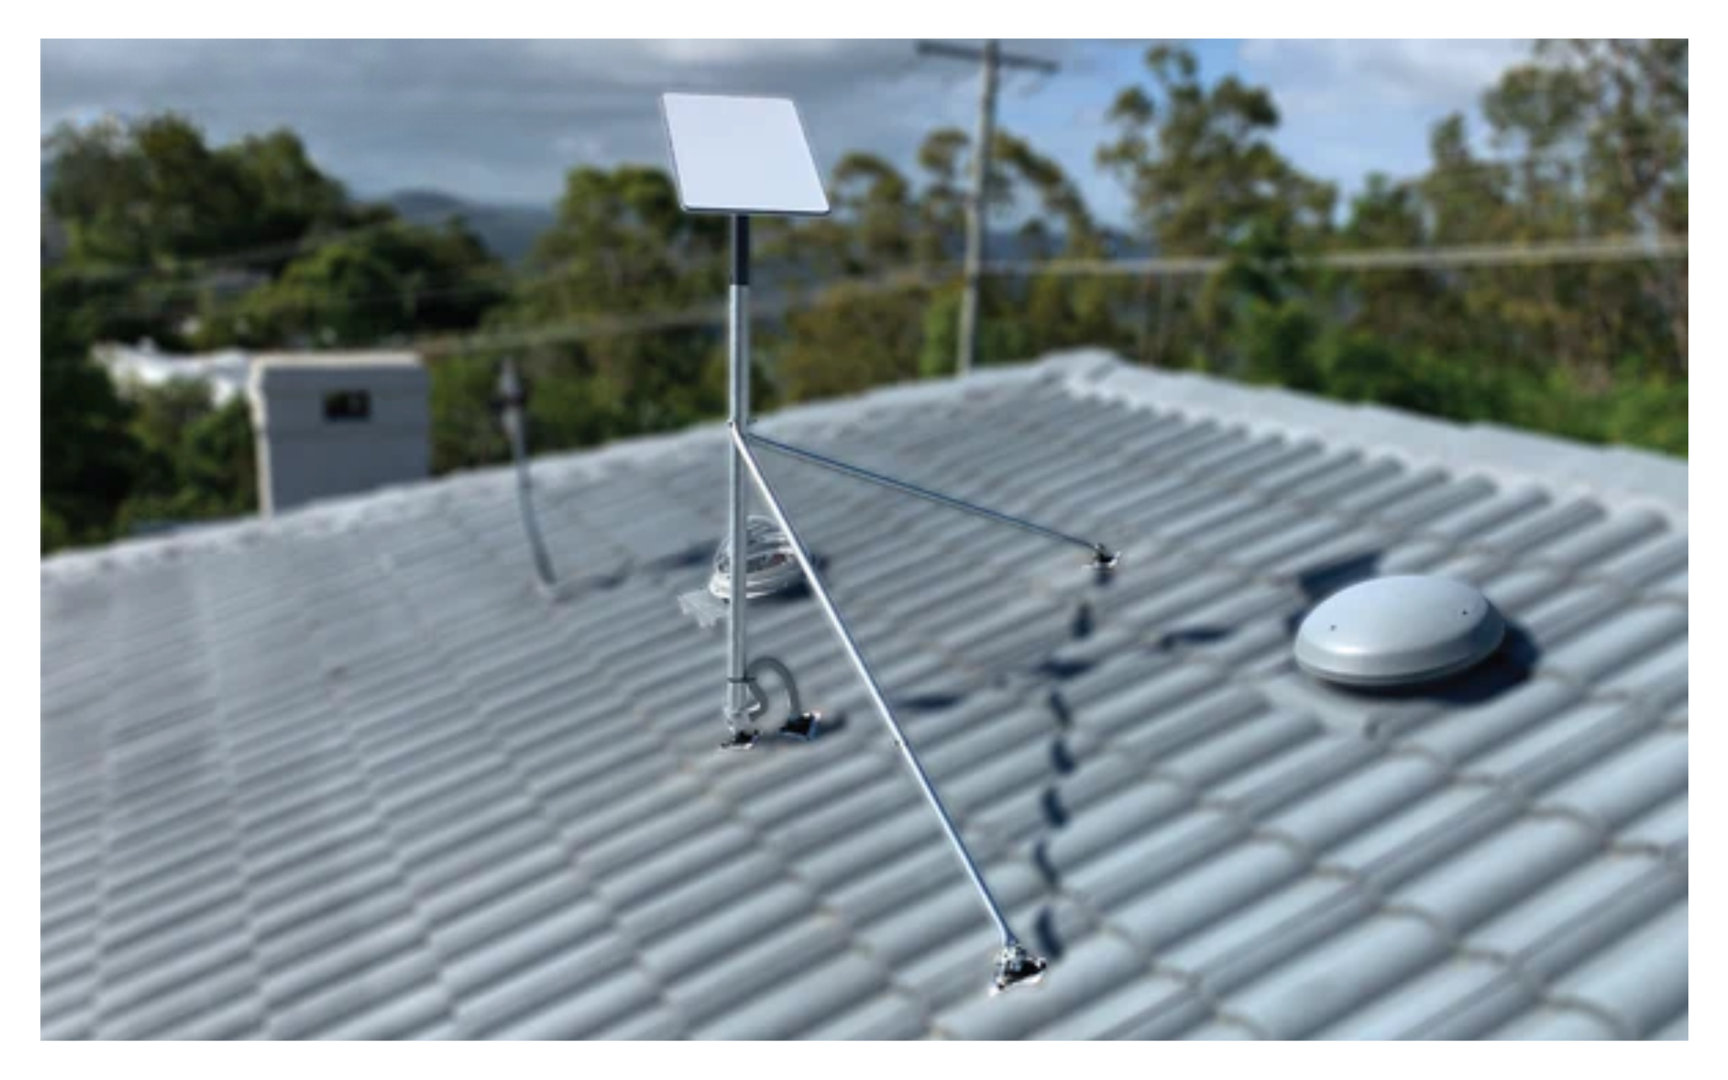
3.3 Ridge Cap Mount Installation
Ridge cap mounts are perfect for pitched roofs. They provide the highest mounting point for a clear sky view.
- Position the mount. Center the mount directly over the ridge cap. Ensure it sits flush with the roof's angle.
- Secure to the roof structure. Drill pilot holes through the ridge cap into the rafters on both sides. Use long lag screws to secure the mount. Tighten screws evenly.
- Weatherproof all fixings. Apply a generous amount of sealant around all screw heads. Make sure there are no gaps for water to enter.
3.4 Dish Adjustment for Optimal Signal
After mounting, you need to align the dish.
Some Starlink models align automatically. Do not adjust them manually.
For models that require manual alignment, follow these steps:
- Power up your Starlink. Plug it in and wait for it to boot.
- Open the Starlink app. Find the alignment tool in the Settings or Support section.
- Follow the app's instructions. The app will guide you to the best direction. Gently adjust your dish until the app confirms optimal alignment.
- Confirm signal strength. Check the signal quality and obstructions in the app.
- Run a speed test. Verify your connection speed once online. If you have issues, the app provides troubleshooting guides for messages like Offline - Disconnected or Offline - Searching.
4. Installing on an RV or Caravan
Starlink Installation Australia for RVs and caravans lets you stay connected anywhere. You can choose an in-motion system for use while driving or a stationary mount for when you are parked. Our Starlink RV and portability mounts are built tough for Australian roads.
4.1 In-Motion Mounts
An in-motion mount keeps you online while driving. This is great for navigation or for passengers.
- Choose a location. Select a flat, central spot on your RV's roof or roof rack. It needs the clearest possible sky view in all directions.
- Install the mount. Position your Spacetek in-motion mount carefully. It must be absolutely secure to handle wind and vibrations. Use appropriate fasteners for your roof material and apply weatherproof sealant around all holes.
- Route and secure the cable. Plan a path that avoids sharp bends. Use UV-resistant cable ties every 30-45 cm. Our IP68 waterproof bulkhead RJ45 socket connector creates a clean, weatherproof entry point.
4.2 Suction Cup Mounts
Suction cup mounts are great for temporary, stationary setups at campsites. They are simple to use but require proper surface preparation.
- Clean the mounting surface. Use our Starlink Mini suction cup windscreen mount on a clean surface. Remove all dirt, dust, and grime from your RV's windscreen or a smooth panel.
- Attach the suction cups. Press each cup down firmly. Work out any air bubbles. Engage any locking mechanisms.
- Mount the dish. Attach your Starlink dish to the mount. Check that it clicks securely into place. Give it a gentle shake to confirm it is solid.
Troubleshooting
- Check suction before travel. Make this part of your pre-departure routine.
- Avoid extreme temperatures. Hot or cold surfaces can affect suction.
- Re-attach if suction weakens. If you notice a loose grip, remove, clean, and re-attach the mount immediately.
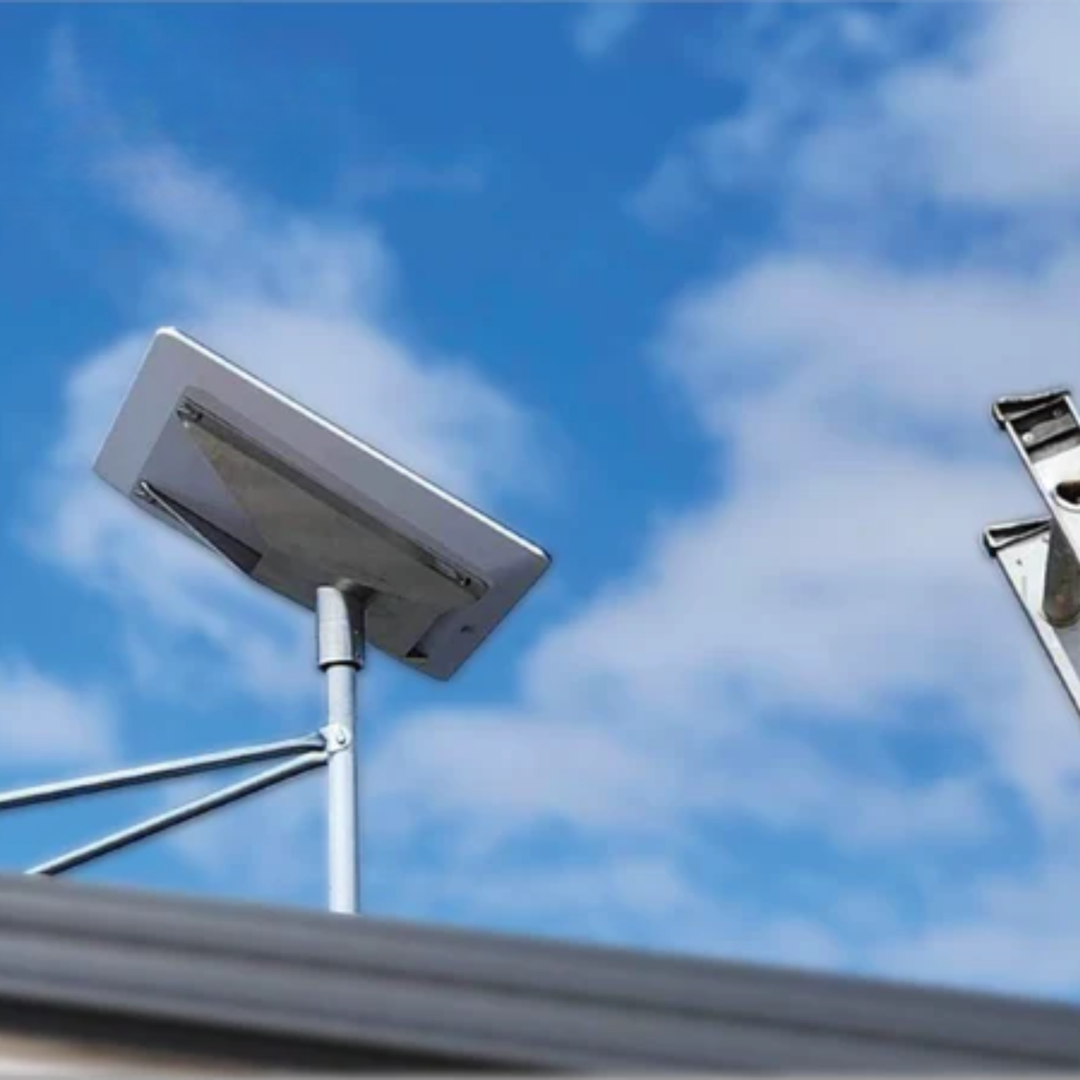
5. Portable or Temporary Setup
A portable Starlink setup provides high-speed internet anywhere. It is perfect for camping, weekend cabins, or testing locations for a permanent install. Our Starlink parts and accessories include robust tripod mounts designed for Australian conditions.
Setting Up Your Portable System
- Unfold the tripod legs. Make sure each leg locks firmly into place. This creates a stable base.
- Choose your ground. Place the tripod on the flattest, most stable ground you can find. Hard-packed earth is better than soft sand.
- Attach your dish. The dish should slide onto the tripod pole with a click. Use the correct adapter if you have a Starlink Mini.
- Position for a clear sky. Use the Starlink app's obstruction checker. Move the tripod until you find a spot with a clear view. Adjust the tripod's height to clear low obstacles.
- Manage your cables. Keep the Starlink cable neat and visible to prevent tripping. Use cable ties or a bright sleeve to make it more noticeable.
%20(16)_compressed.png?alt=media&token=872d614f-1a11-484d-bec5-9934544a1354 "Starlink Mini dish on a portable tripod mount at an Australian campsite - Starlink Installation Australia")
Portable setups offer great flexibility. You can experiment with different positions to avoid shadows or adjust for weather. Our tripod mounts are built to handle Australian conditions, from coastal salt spray to inland dust.
6. Safety and Maintenance Tips
Your Starlink Installation Australia requires attention to safety and regular upkeep. A well-maintained system performs better and lasts longer.
Roof Safety Precautions
Your safety must always come first during a roof installation.
- Check the weather. Never work on a roof in wet, windy, or stormy conditions.
- Use a sturdy ladder. The ladder should extend one metre above the roofline. Position it at a safe angle.
- Wear non-slip footwear. Proper work boots are essential for grip on a roof.
- Use a safety harness. For steep roofs, a harness anchored to a secure point is vital.
- Never work alone. Always have someone on the ground to help and call for assistance if needed.
Maintenance Tips
Regular maintenance ensures reliable internet performance.
- Check mount stability. Every few months, check that all bolts and screws are tight. This prevents the dish from coming loose in a storm.
- Inspect sealant. Look for cracks or peeling in the weatherproof sealant. Reapply fresh sealant immediately to prevent leaks.
- Clean the dish and mounts. Remove dust, bird droppings, and debris with a soft cloth and water. This maintains signal quality.
- Check cables for damage. UV rays can damage cables over time. Inspect for cracks or fraying. Ensure cables are securely clipped down.
7. Tailoring Your Installation with Spacetek
Choosing the right mount is the key to a successful Starlink Installation Australia. At SpaceTek Australia, our mounts are engineered for Australian conditions. They are made from durable, powder-coated steel and marine-grade aluminium to resist rust and corrosion.
Choosing Your Perfect Mount
Match your mount to your specific needs. Consider your roof type, whether the installation is permanent or portable, and your Starlink dish model. For coastal areas, our marine-grade stainless steel options offer extra protection.
This guide will help you find the right Spacetek solution:
| Installation Type | Recommended Spacetek Product(s) | Compatible Starlink Dish | Best Use Case |
|---|---|---|---|
| Tin Roof (Permanent) | Tin Roof Mount Kit, Custom Roof Mounts | Mini, Standard Gen 3, Gen 2 | Permanent home or business installation on metal roofs |
| Tile Roof (Permanent) | Tile Roof Mount Kit, Ridgeline Mounts, Pole Mounts | Mini, Standard Gen 3, Gen 2 | Permanent home installation on tile or terracotta roofs |
| RV In-Motion | Gen 3 Basic In-Motion Mount, Starlink Gen 3 V4 Standard Mobility Mount | Mini, Standard Gen 3 | Internet access while driving in an RV or caravan |
| RV Stationary | Starlink Mini Suction Cup Windscreen Mount | Mini, Standard Gen 3 (with appropriate adapter) | Temporary, stationary setup at a campsite or park for RVs/Caravans |
| Portable Camping | Tripod Portable Mount, Starlink Mini Basic In-Motion Mount (with tripod adapter) | Mini, Standard Gen 3 | Camping, off-grid adventures, temporary internet access |
| Wall/Eave Mount | Wall Mount Kit, Eave Mount Kit | Mini, Standard Gen 3, Gen 2 | Permanent installation avoiding roof penetration, easier access |
| Existing Mast Upgrade | Mast Adapter for Dishy Rectangle Gen 2 | Standard Gen 2 | Reusing an existing antenna or satellite mast for Starlink |
Our Australian-made mounts provide the solid foundation your Starlink dish needs for optimal performance.
Conclusion
A proper Starlink Installation Australia is essential. A secure, well-planned setup maximizes performance and protects your hardware from harsh weather. Whether you need a permanent roof mount, an RV system, or a portable solution, quality mounting hardware is the foundation of reliable internet.
Our Australian-made Spacetek mounts are engineered to deliver rock-solid performance in any environment. The investment in a proper installation ensures you get reliable, high-speed internet without frustrating dropouts.
Ready to get your installation right? Explore Spacetek's full product range to find the perfect mount, or get in touch with us for personalised support and expert advice.
Leave a comment
This site is protected by hCaptcha and the hCaptcha Privacy Policy and Terms of Service apply.