Why Your Starlink's Position is Everything
Positioning Starlink for best signal and performance comes down to three critical factors that determine whether you'll enjoy blazing-fast internet or frustrating dropouts. Here's what you need to get right:
Key Requirements for Optimal Starlink Performance:
- Clear Sky View - An unobstructed view of the sky, especially facing south in Australia.
- Stable Mount - A weather-resistant mounting system that won't shift or corrode.
- Proper Elevation - Space for the dish to self-align, typically between 35-50 degrees.
Your Starlink dish communicates with satellites 550km overhead. Even small obstructions like tree branches can cause significant speed drops or service interruptions. The dish's self-aligning motors require space to move freely, and any interference directly impacts your connection quality.
Getting the positioning wrong means you're handicapping a $599+ investment. I'm Aaron Wroblewski, founder of SpaceTek Australia, and with over 25 years in satellite internet, I've seen that proper mounting and placement makes the difference between frustration and flawless connectivity. The mounting system you choose is just as crucial as where you place it.
The Ultimate Guide to Positioning Starlink for Best Signal and Performance
This section provides a comprehensive walkthrough of everything you need to consider, from finding the perfect spot to choosing the right hardware for a flawless installation.
Finding the Sweet Spot: Location and Obstructions
The single most critical factor for optimal Starlink performance is a completely unobstructed view of the sky. Your dish needs a clear line of sight to moving satellites, and even minor obstructions like tree branches or buildings can cause micro-interruptions, leading to reduced speeds or dropouts.
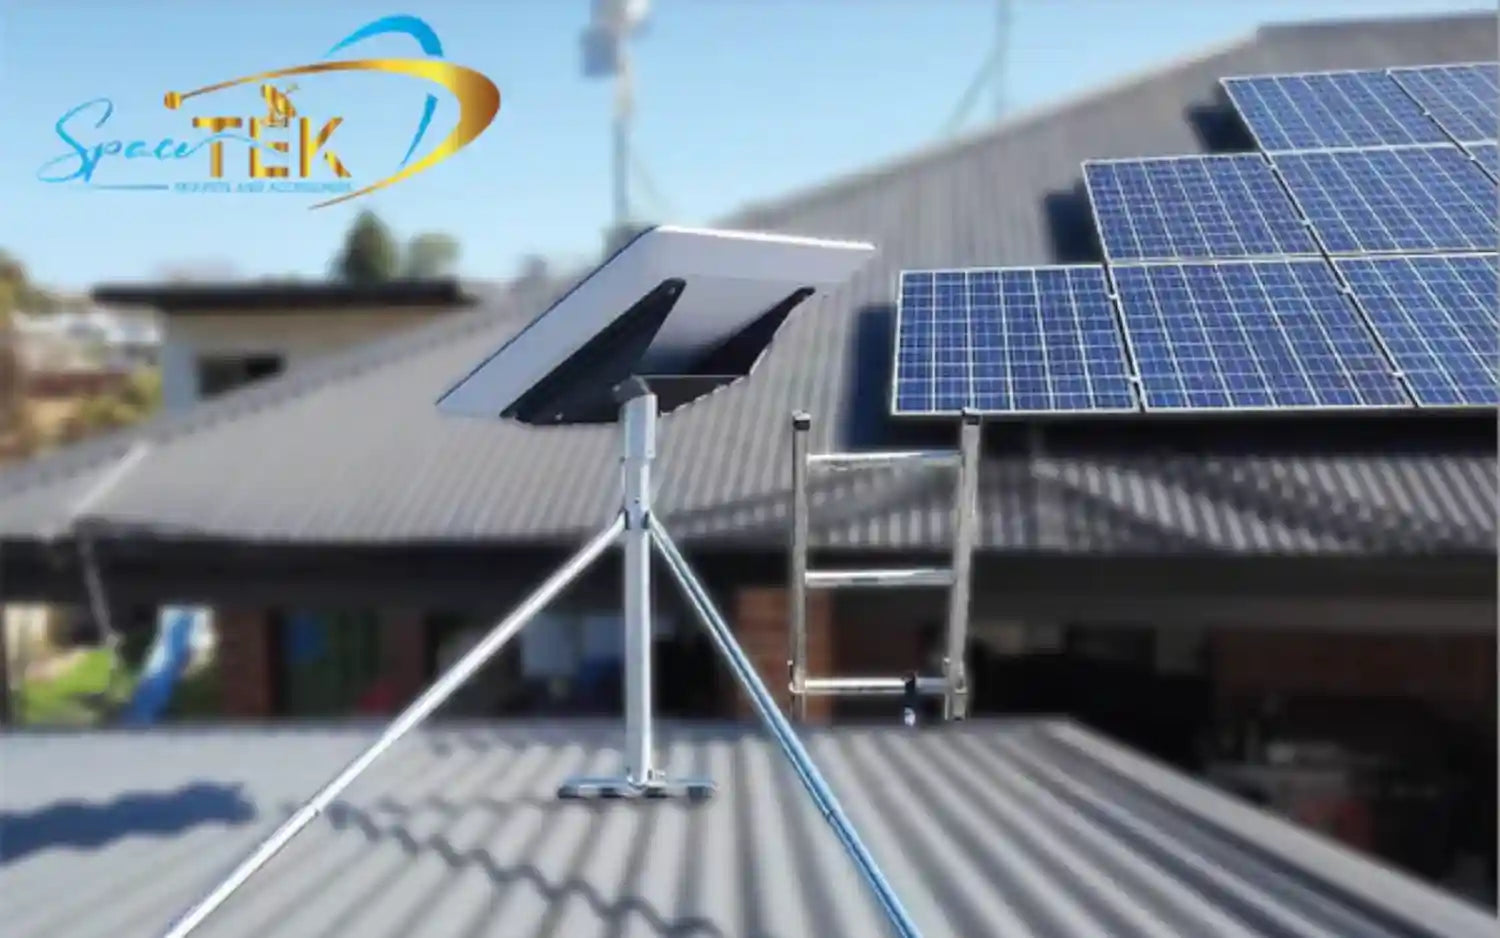
Generally, the highest point on your property, like the roof peak, is best. If you're surrounded by tall trees or buildings, a tall pole mount might be necessary.
The Starlink App: Your Obstruction Detective
Starlink's app has an essential obstruction-checking tool that uses your phone's camera and augmented reality to scan for obstacles. Before you install, walk around your property and use the app's "Check for Obstructions" feature to find a spot with a clear view. For us in the Southern Hemisphere, this clear view is predominantly towards the south. If the app shows obstructions, don't install there—it will lead to performance issues. You can learn more with our guide on tips to steer around dish obstructions or the official Starlink Help Centre advice on how to fix obstructions.
Obstructions vary by environment. In rural areas, it's often trees and hills, while in urban settings, it's tall buildings. In both cases, elevating the dish is the key solution.
Understanding Starlink's Self-Aligning Magic
Starlink features a self-aligning capability. When powered on, its internal motors and phased array antenna automatically find and track satellites. This means you do not need to manually aim the dish. Forcing it into position can damage the motors and void your warranty.
While the dish aims itself, its initial placement is crucial. In the Southern Hemisphere (including Australia), the dish needs a clear view southwards. It will automatically tilt to an optimal elevation, usually between 35-50 degrees. This tilt is also vital for shedding rainwater, which can otherwise disrupt your signal. The Starlink app will alert you if the dish is misaligned by 5 degrees or more. For more detail, see our Starlink dish angles explained: A guide for Australian users and Starlink's own page on why you need to align your Starlink.
Choosing the Right Mount for a Secure Installation
Once you've found the perfect spot, a secure mount is essential for stability and protecting your investment. We offer a range of high-quality, rust-resistant mounts designed for Australian conditions.
Recommended Mounting Options:
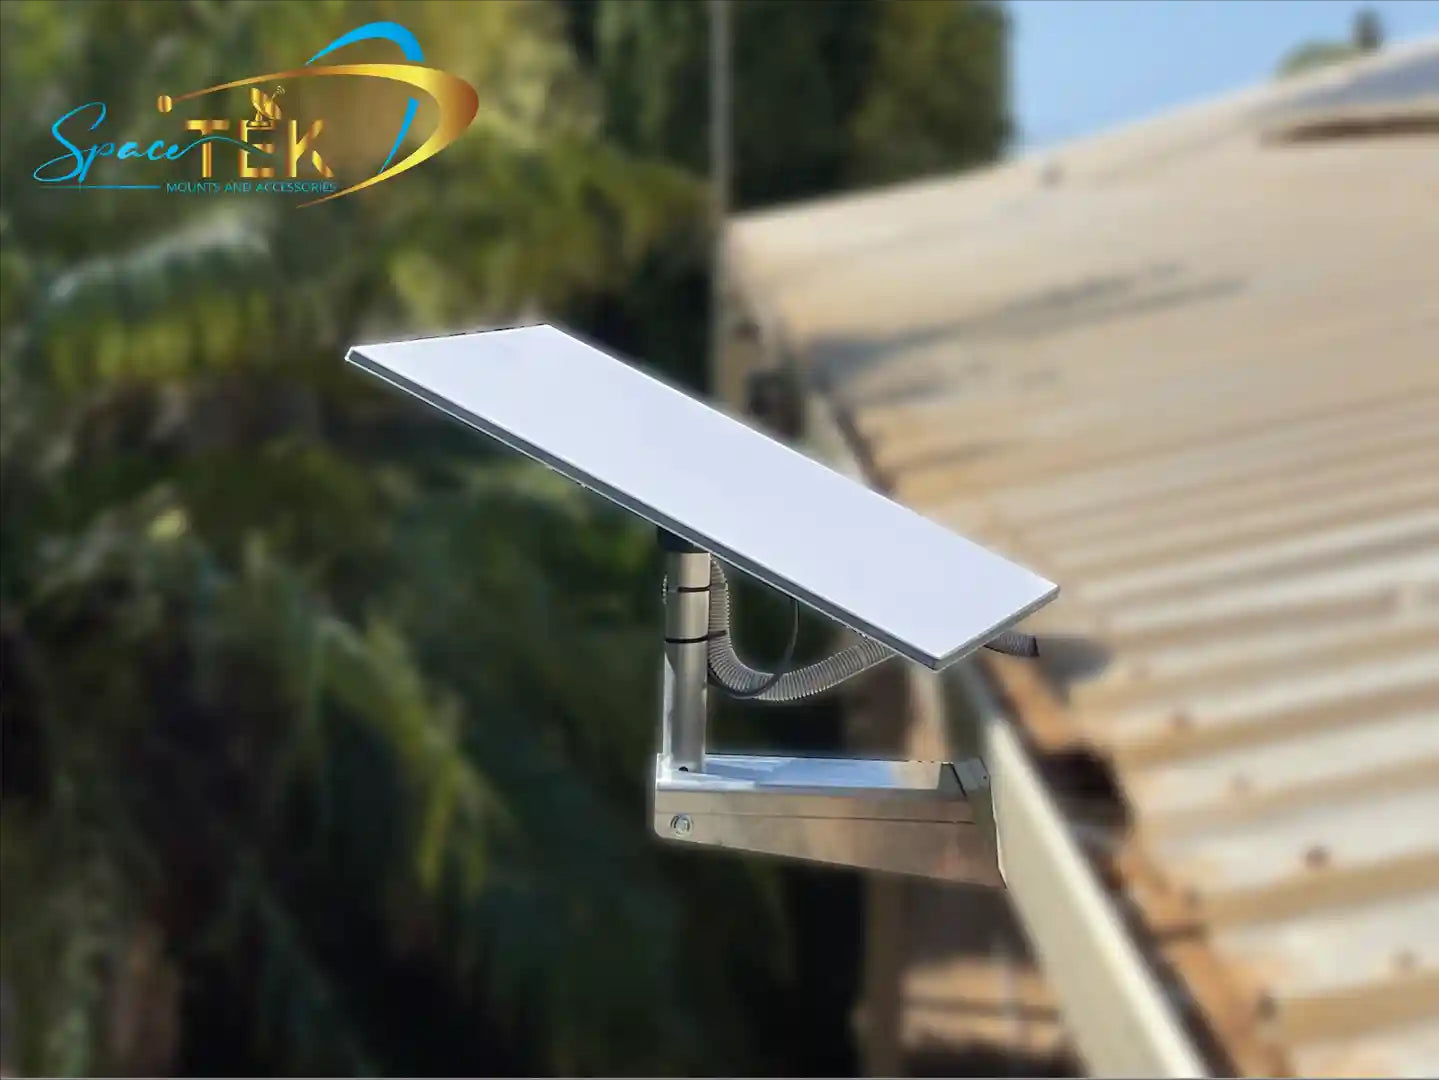
- Roof Mounts: Often the best choice for height and a clear view. Our mounts are made from durable aluminium and stainless steel to withstand harsh weather.
- Pole Mounts: An excellent alternative for clearing tall trees or other obstacles. Our pole mounts are engineered for stability in gusty conditions.
- Vehicle and RV Mounts: For those on the move, our Starlink RV and Portability Mounts are designed for quick setup and durability during travel.
When choosing a mount, prioritise stability, weather resistance (we use marine-grade materials), and compatibility with your Starlink hardware. Our mounts are designed for a perfect fit and easy DIY installation.
Best Practices for Positioning Starlink for Best Signal and Performance
Beyond placement, these best practices ensure optimal performance.
- Cable Management: Protect the Starlink cable from UV rays and physical damage using conduit. For mobile setups, use waterproof solutions like our IP68 waterproof bulkhead RJ45 sockets to prevent moisture damage. Secure cables to prevent tripping hazards and damage.
- Weather and Environment: Starlink is weather-resistant, but a stable mount is crucial to prevent wind from causing alignment issues. The dish's tilt helps shed heavy rain, which can cause temporary 'rain fade'.
- Fixed vs. Mobile Setups: Fixed installations prioritise permanent stability, while mobile setups require flexibility and ruggedness. For mobile use, consider power solutions like our 12V DC power supplies for Starlink to run your system efficiently.
- Final Installation Checks: Before finishing, use the app to confirm a clear view, double-check all mount fasteners are tight, inspect the cable for damage, and run a speed test to confirm performance. For more tips, see our guide to boost your Starlink internet.
Finalising Your Setup and Maintaining Peak Performance
Getting the final details right is the difference between a frustrating internet experience and seamless connectivity. Even Starlink's impressive technology can't overcome a poorly executed installation.
The Consequences of Incorrect Positioning
When your Starlink isn't positioned correctly, the problems cascade quickly. You'll face:
- Signal dropouts: Freezing video calls and buffering movies.
- Slow speeds and high latency: Turning fast downloads into a waiting game.
- Interrupted service: Making simple online tasks an exercise in patience.
- Potential damage: Pooled rainwater on a flat dish can disrupt signals and harm the hardware. Manually forcing the dish can also damage its internal motors.
These issues all degrade your Signal-to-Noise Ratio (SNR), meaning the dish works harder for a worse connection. Learn more in our guide on Starlink SNR explained: How signal-to-noise ratio affects your speed, power use, and reliability.
Your Checklist for a Flawless Australian Setup
A flawless setup starts with finding a location with a clear southern sky view using the Starlink app. From there, a high-quality mount is non-negotiable. Whether it's a roof mount, a sturdy pole mount, or one of our Starlink RV and Portability Mounts, it must provide a stable, secure platform that allows the dish to self-align without obstruction.
In our harsh climate, materials matter. Our mounts use marine-grade aluminium and stainless steel to prevent rust and degradation. Proper cable management, using protective conduit and waterproof connectors, is also vital for long-term reliability.
Positioning Starlink for best signal and performance is about ensuring every element works together. A correct installation means a more efficient system that lasts longer and delivers the speed you pay for.
At SpaceTek Australia, we provide the most secure, rust-resistant, and user-friendly Starlink mounts available, designed specifically for Australian conditions. We understand your internet is a lifeline, and our products are tested to ensure they complement Starlink's technology, not hinder it.
Ready to ensure your Starlink performs at its absolute best? Contact SpaceTek for expert advice custom to your specific Australian environment.

Leave a comment
This site is protected by hCaptcha and the hCaptcha Privacy Policy and Terms of Service apply.