
How to Install a Starlink Mini: What You Need to Know First
To install the Starlink Mini, you simply need to download the Starlink app, activate your dish using the KIT number, find a clear spot with an unobstructed view of the sky using the app's obstruction checker, mount the dish securely, connect the DC power cable firmly, and connect your device to the default STARLINK WiFi network to customise your settings. This straightforward process allows you to get online in under 15 minutes, making it incredibly easy to set up high-speed satellite internet wherever you travel.
The Starlink Mini is about half the size and weight of the Standard dish, roughly the footprint of a laptop, with a built-in WiFi router and no moving parts. That makes it one of the most practical satellite internet options for Australians travelling remote areas, whether you're in a caravan doing a big lap, parked up at a remote work site in the Pilbara, or just trying to stay connected far from the nearest tower.
The challenge isn't the dish itself. It's everything around it: finding the right mount for your roof type, powering it cleanly off a 12V system without voltage drop issues, and routing the cable inside without hacking holes through your rig. That's exactly what this guide covers.
At SpaceTek Australia, we've helped hundreds of Aussie travellers and remote workers get their Starlink Mini dialled in properly. The gear, the power, the mounting: all of it built for real Australian conditions, not just a sunny driveway demo.
Here's everything you need to know.
What is Included in the Starlink Mini Kit?
When your package arrives, you will find a surprisingly compact box. Because the router is built directly into the dish itself, the hardware footprint is minimal. Here is exactly what you get inside the standard box:
- Starlink Mini dish: The phased-array antenna with an integrated WiFi 5 router.
- Kickstand: A pre-installed, fold-out stand for quick ground or table deployments.
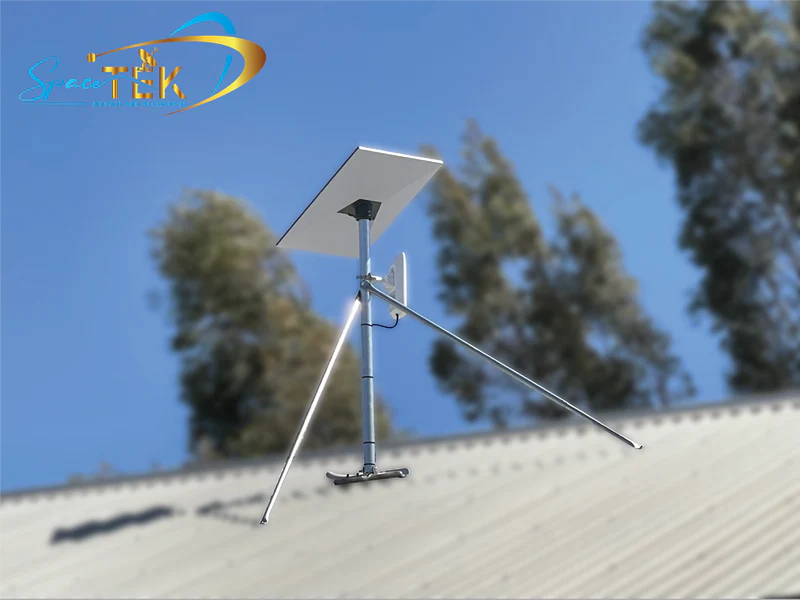
- Pipe adapter: For mounting the dish to existing poles or masts.
- 15-metre DC power cable: The outdoor-rated cable that delivers power to the dish.
- 240V AC power supply: A standard wall plug adapter for mains power.
While this kit is fantastic for a backyard setup or a quick picnic, you will immediately notice that it lacks any dedicated 12V accessories or vehicle-specific Starlink mounts.
For caravanners, campers, and four-wheel drivers, this is a major off-grid limitation. The included 240V power supply requires you to run an inverter, which wastes valuable battery capacity. Additionally, the basic plastic kickstand is easily knocked over by a gust of wind or a curious dingo. To see the official manufacturer layout of these components, you can refer to the Official Starlink Mini Kit Installation Guide.
Step-by-Step Guide: How to Install a Starlink Mini
Setting up the Starlink Mini is a straightforward process, largely because the dish uses advanced electronic beam steering. Unlike older, motorised satellite dishes, the Mini does not physically rotate or tilt to track satellites. Instead, it electronically steers its connection across the sky. This means you do not need to worry about hyper-precise manual pointing during your initial setup.
For a comprehensive look at the entire setup ecosystem, check out our Setup Starlink Mini Complete Guide.
Step 1: Download the App and Learn How to Install a Starlink Mini
Before you head out of mobile range, download the official Starlink app from the Apple App Store or Google Play Store.
Once downloaded, open the app and log in using the account credentials you created when purchasing your subscription. If you bought your dish from a retail outlet, you will need to activate it by entering the unique KIT number found on the box or on the back of the dish itself.
Choosing the Right Location: How to Install a Starlink Mini for Maximum Signal
Your Starlink Mini requires a clear, unobstructed 110-degree field of view of the sky to maintain a continuous connection with the overhead satellite constellation.
To find the perfect spot on your vehicle or campsite:
- Open the Starlink app and select the Obstruction Checker tool.
- Follow the on-screen prompts to scan the sky using your phone's camera.
- Look for a location free of overhanging tree branches, camp awnings, roof-mounted solar panels, or high-profile vehicle accessories.
- If you are mounting the dish permanently on a caravan roof, we recommend positioning it just behind a rooftop air conditioning unit. This provides a natural wind buffer when driving while keeping the dish high enough to avoid side obstructions.
Steps 3 to 7: Powering, Aligning, and Customising Your Connection
Once you have identified the ideal location, follow these final steps to get online:
- Step 3, plug in the power: Squeeze the release tab on the kickstand to access the ports. Plug the 15m DC power cable firmly into the dish until it sits completely flush. A loose connection will compromise the IP67 weather-resistance and cause intermittent power loss.
- Step 4, power on: Connect the other end of the cable to your power source. The small LED status light on the back of the dish will light up, indicating it has power and is booting up.
- Step 5, connect to the network: Go to your device’s WiFi settings and look for the default network named STARLINK. Connect to it.
- Step 6, customise your SSID: The Starlink app will automatically open and prompt you to name your new wireless network (SSID) and set a strong, secure password. Once saved, your device will disconnect from the default network, and you will need to reconnect using your new credentials.
- Step 7, optimise and align: If the dish detects that it is positioned at an inefficient angle, the app will display an alignment alert. Simply follow the guided compass on your screen, rotating the dish horizontally until the app confirms optimal alignment.
When choosing your network settings, keep in mind that the built-in router transmits on both the 2.4GHz and 5GHz wireless bands. The 2.4GHz band maxes out at around 50Mbps but offers a much longer range, making it perfect if you are sitting outside under your caravan awning. The 5GHz band is significantly faster but has a shorter range, which is ideal when you are working directly inside your vehicle.
Choosing the Best Starlink Mounts for Your Vehicle
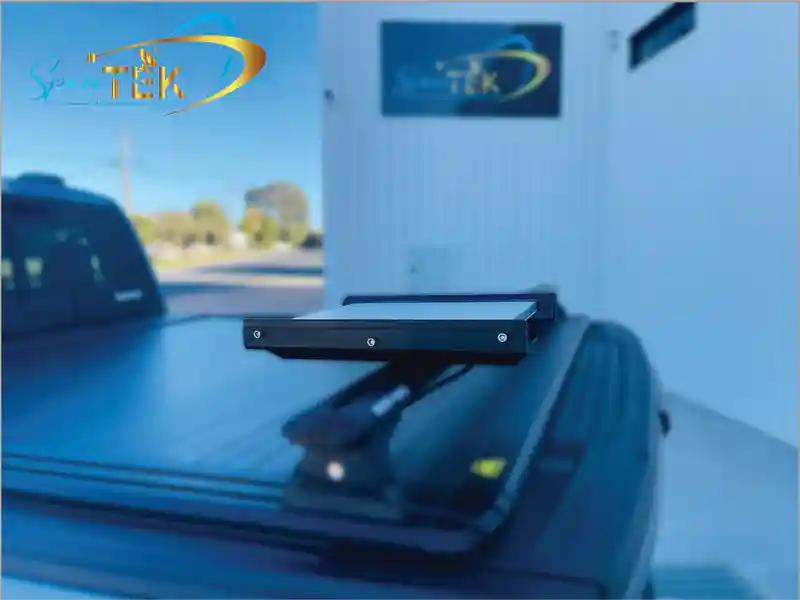
A secure mount is the absolute foundation of a reliable mobile internet setup. High-speed highway winds, low-hanging tree branches, and severe corrugations on remote tracks like the Oodnadatta or the Tanami will quickly destroy a poorly secured dish.
We strongly advise avoiding cheap, 3D-printed plastic options. The intense Australian UV rays will degrade and embrittle these plastics within months, leading to catastrophic failure at high speeds. Instead, look for precision-machined or folded aluminium dish mounts that are built to withstand our harsh climate.
Depending on your vehicle and roof material, you have several excellent no-drill mounting options:
- Steel roofs with magnetic mounts: This is the most popular option for 4WDs and commercial vehicles. Premium magnetic Starlink mounts utilise heavy-duty, rubber-coated neodymium magnets. High-quality magnets can hold significant pull force, ensuring your dish stays glued to your roof even at highway speeds.
- Fiberglass or aluminium roofs with VHB adhesive landing pads: Many modern caravans and motorhomes feature fiberglass or aluminium roofs where magnets cannot stick. For these surfaces, VHB (Very High Bond) adhesive landing pads provide an incredibly strong, permanent hold without requiring you to drill water-leaking holes through your roof membrane.
- Repositionable magnetic discs: If you want the flexibility of a magnetic mount on a fiberglass roof, you can permanently adhere four steel discs to your roof using VHB adhesive. This creates a secure, magnetic landing pad, allowing you to easily remove the dish when you pack up camp.
- Suction cup mounts: For temporary setups, heavy-duty suction cup mounts are highly effective. These can be attached to any smooth, non-porous surface, such as a vehicle window or a clean fiberglass panel.
For a deeper dive into these options, explore our comprehensive Starlink Mini Mount Complete Guide or browse the premium range in the SpaceTek Australia Starlink Mini Collection. If you are planning a more permanent installation using standard hardware, you can also refer to the Official Starlink Mini Pipe Adapter and Flat Mount Guide.
Powering and Routing Your Starlink Mini Setup
Power management is where most off-grid travellers run into trouble. The Starlink Mini is highly efficient, though power demands can peak during initial startup, cold-weather heating, or when downloading major firmware updates.
While you can run the dish off your caravan’s inverter using the included 240V AC plug, this is highly inefficient. Inverters consume a baseline current just to stay turned on, wasting valuable amp-hours from your battery bank.
The superior solution is direct DC-to-DC power. Because the Starlink Mini accepts a wide DC input voltage range, you can run it directly off your 12V or 24V battery systems. However, simple 12V cigarette lighter plugs often suffer from severe voltage drop over long cable runs, which can cause the dish to randomly reboot when power demands spike.
To prevent this, we highly recommend using our specialised StarPower V2 and StarPower V3 DC power supplies. These units step up the voltage to a stable, higher output, completely eliminating voltage drop and ensuring your dish receives clean, reliable power through the standard 15m cable. These StarPower V2 and V3 DC power supplies offer massive DC-to-DC efficiency advantages over AC inverters, preserving your battery capacity for longer off-grid stays. For connection points, Anderson plugs are the preferred method for semi-permanent caravan installations, offering a much more secure and vibration-resistant connection than a standard cigarette lighter socket.
To learn more about optimising your electrical setup, check out the Starlink Mini Power Supply Guide.
How to Route Your Cables Without Drilling Holes
Getting the power cable from your roof mount into your caravan or 4WD cabin does not require a drill. Here are three highly effective, no-drill routing methods:
- Slide-out seals: Most modern caravans have rubber weather seals around the slide-out sections. The flat, thin profile of the Starlink DC cable can easily be slipped through these rubber flaps without compromising the seal.
- Wet bays and utility ports: Route your cable down the back of your van and bring it inside through an existing wet bay, battery box vent, or external power inlet hatch.
- Solar cable entry glands: If your vehicle already has solar panels installed, you can often run the Starlink cable through the existing waterproof cable entry gland on the roof.
Built-In Router vs. Third-Party Routers
The Starlink Mini features a built-in router, which is incredibly convenient for keeping your setup simple and lightweight. However, you do have the option to bypass the internal router and connect to a high-end third-party router inside your vehicle.
- Using the built-in router: Best for most travellers. It minimises cable clutter and draws the least amount of power.
- Using a third-party router: Best for remote workers or those with complex local networks. By utilising the RJ45 Ethernet port on the back of the Mini, you can run the connection into a dedicated mobile router.
Note: Squeezing a standard RJ45 Ethernet cable into the Mini's port will void its IP67 weather-resistance rating. If you plan to use the Ethernet port outdoors, you must use a specialised waterproof Ethernet cable to prevent water damage.
For detailed technical instructions on router configurations, consult the Official Starlink Router Mini Installation Guide.
Troubleshooting, Safety, and Maintenance
Even with the best gear, remote travel will eventually throw a challenge your way. Knowing how to quickly troubleshoot your setup can save you a massive headache when you are hundreds of kilometres from help.
Quick Troubleshooting Steps
- No signal or "searching": Verify that your dish has a completely clear view of the sky. Even a single overhanging branch can block the satellite beam. If the sky is clear, power cycle the system by disconnecting the power source for 30 seconds, then plugging it back in.
- Slow speeds: Ensure you are connected to the 5GHz WiFi band if you are close to the dish. Also, check the app to see if the dish is currently performing a automatic firmware update, which can temporarily slow down your connection.
- Random reboots: This is almost always a power issue. Check your 12V connections for loose terminals, or upgrade to a dedicated StarPower step-up DC power supply to eliminate voltage drop.
- Factory reset: If you forget your WiFi password or experience persistent software issues, you can factory reset the unit. Locate the physical reset button on the back of the dish, hold it down for 3 seconds, and the system will reboot to its default settings.
For a deeper look at resolving connectivity issues on the road, read our Starlink Mini Troubleshooting Guide.
Safety and Travel Maintenance
If you plan to use your Starlink Mini while on the move, you must be on an active Roam subscription plan that supports in-motion use. Starlink enforces a strict 160 km/h speed limit cap for in-motion connectivity. Always ensure your dish is locked into a road-rated, high-strength mount before hitting the highway. For official mobile installation safety guidelines, refer to the Official Starlink Mini Mobility Mount Guide.
To protect your investment from road debris, low branches, and harsh weather, we recommend using a heavy-duty polycarbonate protective cover. These covers act as a shield for the face of your dish without degrading the satellite signal, ensuring your setup survives the roughest corrugated roads Australia has to offer.
Frequently Asked Questions about Starlink Mini Setup
Can I power the Starlink Mini directly from a 12V battery?
Yes, the Starlink Mini can be powered directly from a 12V battery system because it accepts a wide DC input voltage range. However, running a direct 12V line over a long distance can cause a voltage drop, leading to system instability. To prevent this, we recommend using a StarPower step-up DC power supply to deliver a stable, higher voltage directly to the dish, bypassing the need for an inefficient AC inverter.
What is the maximum in-motion speed limit for the Starlink Mini?
The maximum in-motion speed limit for the Starlink Mini is 160 km/h. To use this feature, you must have an active Roam plan that supports mobile use, and the dish must be secured in a robust, road-rated vehicle mount.
Does using the Ethernet port affect the weatherproofing of the dish?
Yes. The Starlink Mini has an IP67 weather-resistance rating, but plugging a standard RJ45 Ethernet cable into the rear port will break the waterproof seal. To maintain protection against rain and dust, you must use a specialised waterproof Ethernet cable designed specifically for the Mini.
Building a Reliable Starlink Mini Setup
Installing the Starlink Mini is the ultimate way to unlock true off-grid freedom, allowing you to work, stream, and stay connected from the most remote corners of Australia. By following these simple steps, choosing a high-quality, Aussie-built mount, and setting up a reliable direct DC power solution, you can ensure your system performs flawlessly no matter where your adventures take you.
Don't let cheap plastic mounts or inefficient power setups ruin your trip. Equip your rig with premium, rust-resistant gear designed specifically for our rugged conditions. Explore our full range of specialised off-grid accessories at SpaceTek Australia today!

Leave a comment
This site is protected by hCaptcha and the hCaptcha Privacy Policy and Terms of Service apply.