Is Your Starlink Mini Not Connecting? Start Here

Starlink Mini troubleshooting most often comes down to one of four root causes: a power issue, a physical obstruction, a loose or damaged cable, or a software alert that needs clearing in the app.
Here is where to start:
- Check the Starlink app first — open it and look for any active alerts such as Offline - Searching, Offline - Booting, or Poor Cable Connection
- Check the status light on the back of the Mini — a slow pulse indicates the unit is powered; no light suggests a power failure; fast blinking indicates a reset is in progress
- Inspect the cable connection — unplug and firmly reseat the cable until you feel a mechanical click; check for debris, kinks, or visible damage
- Power cycle the device — unplug the power source, wait at least 30 seconds, then reconnect and allow time for a full restart
- Check for obstructions — use the Check for Obstructions tool in the Starlink app to confirm you have a clear 110-degree view of the sky
- Factory reset as a last resort — press and hold the reset button on the back until the LED blinks rapidly
If none of these steps resolve the issue, contact Starlink support directly through the app.
For anyone managing a remote property, running a touring rig, or relying on satellite internet for work in the field, a dropped connection is more than an inconvenience — it can mean lost productivity or lost contact during an emergency. The Starlink Mini is a genuinely capable piece of hardware, but like any technology, it performs best when the underlying infrastructure around it — power, mounting, and cable management — is set up correctly from day one.
Most connectivity issues are not caused by a faulty dish or a problem with the Starlink network itself. Research consistently points to improper installation and signal obstruction as the leading culprits. In the Australian context, that also means contending with extreme heat, UV degradation, vibration from corrugated roads, and the unpredictable power draws of a 12V vehicle system.
This guide walks through every layer of the problem — from reading your app alerts correctly to verifying your power supply and checking your physical installation — so you can diagnose and fix the issue methodically rather than guessing.

Know your starlink mini troubleshooting terms:
Why Connectivity Fails in Extreme Conditions
Connectivity in the Australian bush often fails because the environment places demands on hardware that standard consumer setups aren't designed to handle. Achieving true infrastructure independence means your Starlink Mini must remain operational despite searing heat, thick dust, and the critical need for communication during events like bushfires.
When you are suddenly offline, the environment is the first place to look. The Starlink Mini features integrated electronics that can trigger thermal throttling if the unit becomes too hot. In the peak of an Australian summer, a dish mounted directly to a hot metal roof without airflow can reach temperatures that force the system to slow down or shut off to protect itself.
Physical obstructions are another primary cause of failure. Unlike traditional satellite TV, Starlink requires a constant connection to a fleet of satellites moving rapidly overhead. Even a single overhanging branch or a nearby caravan air conditioning unit can cause "rain fade" symptoms or intermittent drops. During emergencies, smoke from nearby fires can also degrade signal quality, making a perfectly clear 110-degree sky view even more vital.

Why Proper DC Power Matters
The Starlink Mini is designed for portability, but it is highly sensitive to the quality of its power source. We have found that standard 12V vehicle fluctuations are a leading cause of random reboots and "brownouts" where the dish stays on but the connection drops.
To maintain a stable link, the Mini requires a stable regulated DC input. While the unit can run on various DC setups, including USB-C Power Delivery, the capacity of your battery must be able to handle peak loads. When the dish is searching for satellites or using the internal heater to clear moisture, its power draw increases. If your cabling is too thin or your DC-to-DC converter isn't up to the task, the voltage will sag, causing the hardware to glitch or restart.
Effective starlink mini troubleshooting should always include a technical checklist for your power path. If you are using a long cable run from your house battery to the dish, ensure you are using high-quality, thick-core cables to prevent voltage drop. If the device reboots every time your fridge compressor kicks in, your DC system needs better regulation or a dedicated circuit.

Troubleshooting Your Connection
When things go wrong, the Starlink app is your most powerful diagnostic tool. It allows you to distinguish between a hardware fault (like a broken cable) and a network issue (like an obstruction). Before you start pulling cables apart, check the dashboard for specific status messages.
Common app alerts include:
- Offline - Searching: The dish has power but cannot see the satellites. This is usually due to obstructions or improper alignment.
- Offline - Booting: The system is starting up. This can take some time. If it stays here longer, you may have a power stability issue.
- Poor Cable Connection: The system detects an issue with the physical link between the power source and the dish.
According to the official Starlink Mini WiFi guide, the status light on the back of the device is your first physical indicator. If that light is off, your troubleshooting starts with the power outlet and the cable. If the light is on but you can't connect, use the Starlink Mini Setup Guide to verify your alignment using the in-app tool.

Resolving the Starlink Mini Troubleshooting Disconnected Error
A "Disconnected" error is different from being "Offline." While "Offline" means the dish can't see the sky, "Disconnected" usually means the app cannot talk to the Starlink hardware at all. This is often a hardware link failure.
To fix this, follow a deep diagnostic guide:
- Inspect the Proprietary Connector: The Mini uses a specific plug designed to be weather-resistant. Even a tiny amount of dust or sand can prevent a full connection.
- The Mechanical Click: When inserting the cable, you must feel and hear a distinct click. If the plug isn't flush with the surface of the dish, it isn't seated correctly.
- Cable Integrity: Check the entire length of the cable for "crush points" or nicks. In Australia, rodents are known to chew through cable insulation, which can cause a short that triggers the "Disconnected" status.
Advanced Starlink Mini Troubleshooting via Debug Data
For those who want to go deeper, the Starlink app contains a "Debug Data" section. This is where you can find metrics like the cable_ping_drop_rate. In a healthy system, this should be minimal or zero. If you see a high percentage here, it confirms a physical issue with the cable or the connectors.
You can also perform an "Advanced Speed Test" within the app. This test splits the results to show you the speed between your device and the router, and then between the router and the satellite. If the device-to-router speed is low, you are likely dealing with WiFi interference or a blocked signal from your vehicle's metal walls. In these cases, using the integrated RJ45 Ethernet port to wire your connection can solve the problem instantly.

The Smarter Way to Mount Starlink
A significant portion of intermittent connectivity issues can be traced back to poor mounting. If your dish is sitting on a wobbly pole or a plastic suction mount, wind-induced sway can cause the signal to drop as the dish struggles to maintain its lock on the satellite.
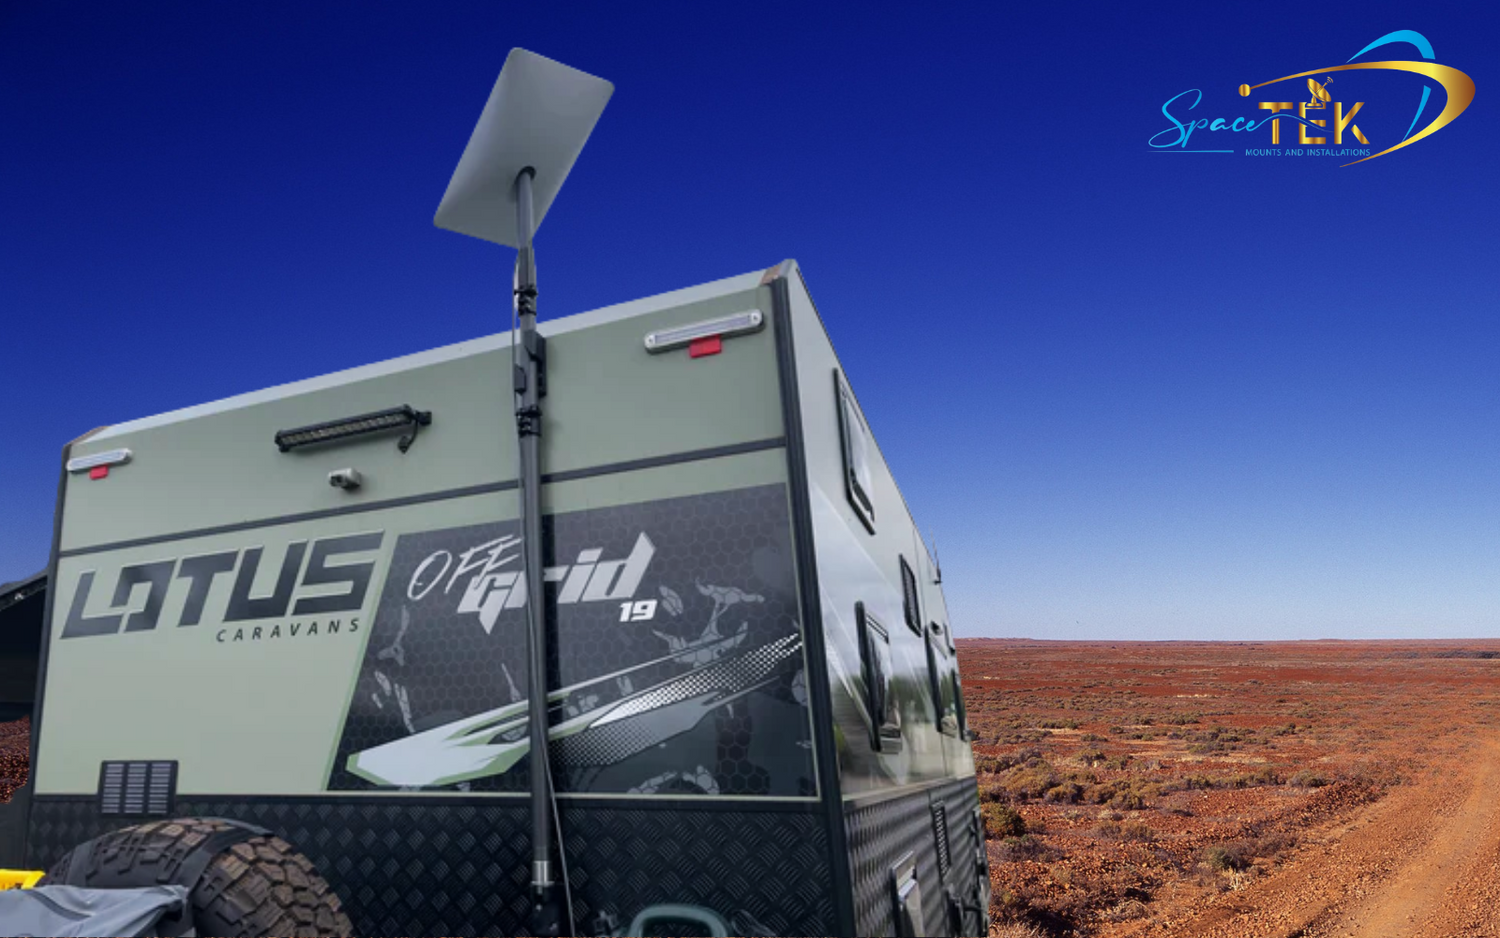
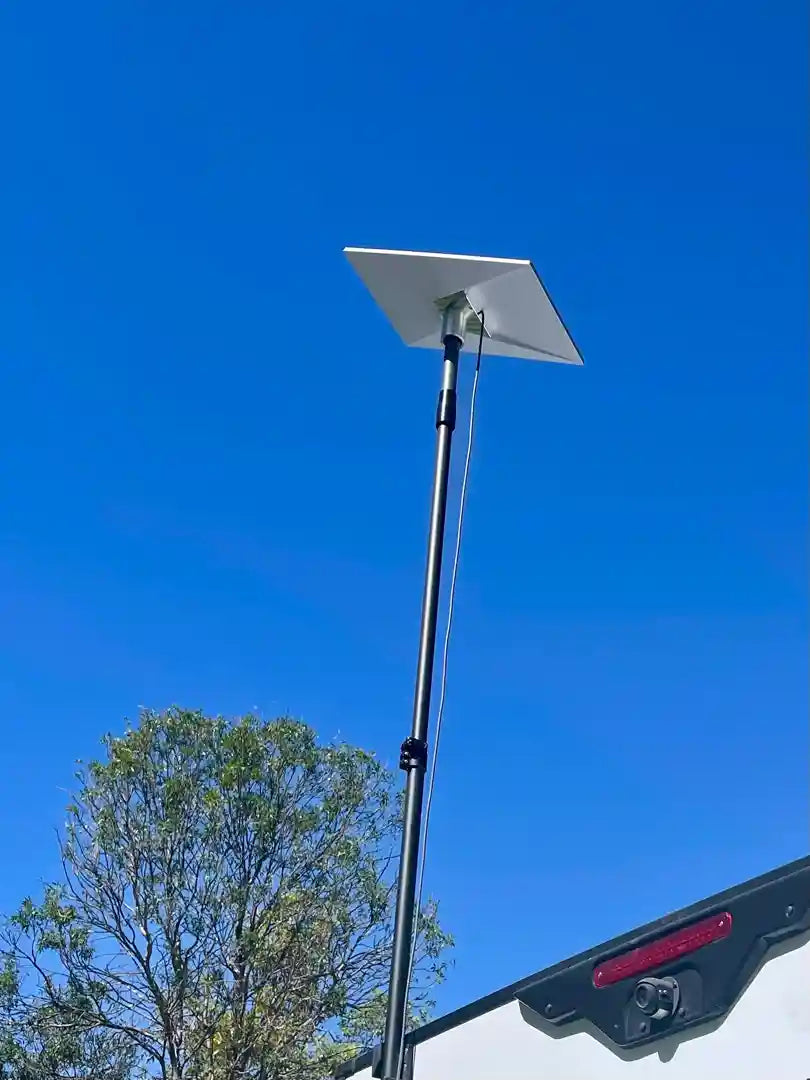
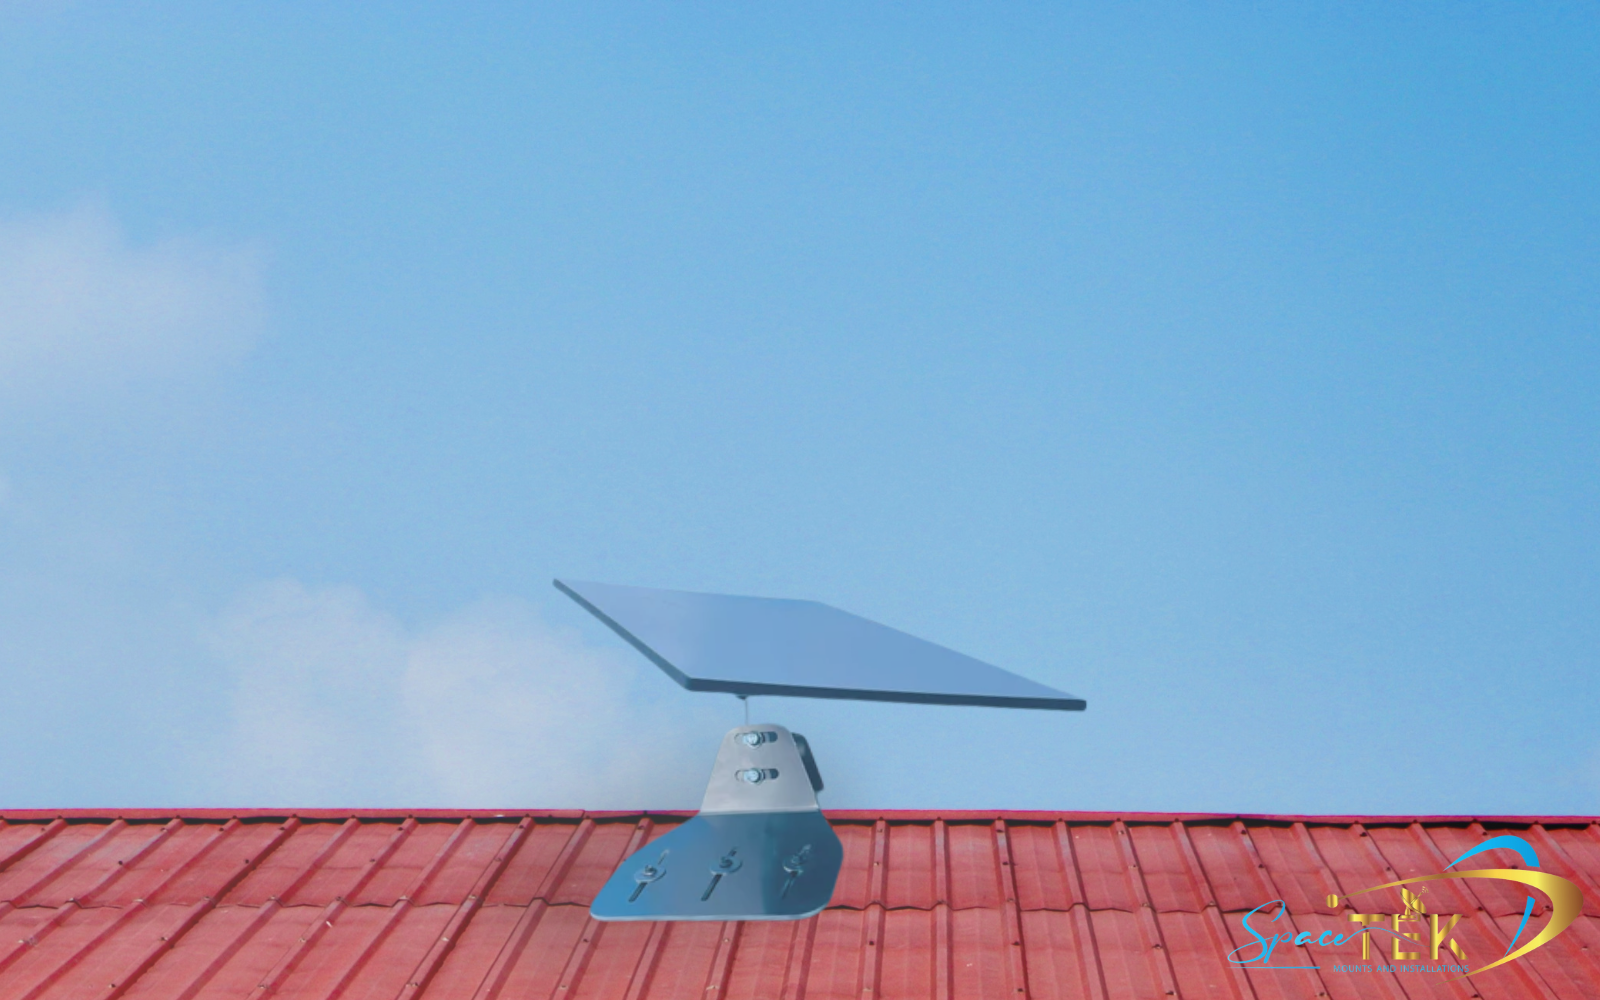
In the Australian environment, plastic mounts often become brittle under intense UV radiation. We recommend using high-quality mounts that provide superior vibration resistance. SpaceTek mounts are precision-machined or folded aluminium, ensuring they withstand the rigours of the road, unlike 3D printed alternatives which lack the necessary durability. Whether you are doing a roof installation on a home or mounting to a 4WD canopy, the goal is rock-solid stability.
Proper mounting also ensures the dish is positioned for an optimal 110-degree view of the sky. Elevating the dish above the roofline of a vehicle or building can be the difference between a frustrating, laggy connection and a seamless experience.
SpaceTek Product Range
Doing it properly the first time saves hours of frustration in the field. At SpaceTek Australia, we've engineered a range of mounting solutions specifically for the unique challenges of the Australian landscape. Our products are designed and manufactured in-house using precision-machined or folded aluminium, rather than 3D printing, to ensure maximum strength.

#
- Residential Solutions: For fixed installations, our house Starlink mounts provide the height and stability needed to clear local obstructions like gum trees or neighbouring roofs.
- Vehicle & Touring: Our vehicle mounts are designed for high-vibration environments. We offer aerodynamic in-motion mounts for the Mini and Gen 3 that keep your gear secure on the roughest corrugated tracks.
- Commercial & Emergency: For those requiring commercial-grade hardware, our kits are built to withstand extreme heat and provide infrastructure independence for remote worksites.
Whether you are using a Starlink Mini, a Gen 3 (V4), or an older Gen 2 kit, our accessories focus on rust-resistant materials and precision engineering to ensure your hardware stays where you put it.
Installation & Maintenance
Maintaining your Starlink Mini is just as important as the initial setup. Because the Mini is often moved around, the cables and connectors are subject to more wear and tear than a fixed residential dish.
- Cable Management: Never leave your cables coiled tightly or kinked. Use proper routing and, if possible, protect external runs with conduit.
- Connector Cleaning: Periodically check the power and Ethernet ports for dust or moisture. A quick blast of compressed air can prevent "Poor Cable Connection" errors.
- Weatherproofing: While the Mini is IP67 rated, this rating only holds if the official cables are used and seated correctly. Using a standard RJ45 Ethernet cable without the proper seal will void the water resistance.
- Voltage Verification: If you’ve modified your power setup, use a multimeter to ensure you have a stable regulated DC input at the end of the cable run.
If you aren't confident in your DIY skills, you can find a professional installer through our network to ensure your system is mounted using our precision-machined aluminium hardware and powered correctly from the start.
Frequently Asked Questions about Starlink Mini Troubleshooting
What is the difference between 'Disconnected' and 'Offline'?
The 'Offline' status typically indicates the dish has power but cannot establish a satellite link due to obstructions or alignment. In contrast, 'Disconnected' suggests the app cannot communicate with the hardware at all. This usually stems from a physical cable fault, power failure, or an unseated connector.
How do I perform a factory reset on the Starlink Mini?
Locate the reset button on the rear of the device and hold it for approximately three seconds. The LED status light will blink rapidly to confirm the process has started. Once finished, you must reconnect to the default network to configure your new settings.
Can I run the Starlink Mini directly from a 12V battery?
The Mini is compatible with DC power but requires a stable regulated DC input to function correctly. Because battery voltage fluctuates based on charge levels and other loads, a direct connection may cause instability. Using a high-quality DC-DC booster ensures the device receives consistent power and prevents unexpected reboots.
Starlink Mini Troubleshooting Made Simple
Starlink mini troubleshooting doesn't have to be a game of trial and error. By following a methodical process (checking the app alerts, verifying your power stability, and ensuring your physical mount is secure), you can resolve almost any connectivity issue. Investing in high-quality infrastructure, like precision-machined or folded aluminium mounts and regulated power setups, ensures your link remains stable even in the harshest Australian conditions.
If you've gone through the steps and still need help, contact our technical team or read more Starlink guides on our blog.
At SpaceTek Australia, we are committed to helping you stay connected, no matter how far off the beaten track you go. Invest once, install it right, and enjoy the freedom of truly reliable satellite internet.
Leave a comment
This site is protected by hCaptcha and the hCaptcha Privacy Policy and Terms of Service apply.