Understanding the Importance of Proper Dish Placement
Starlink RV roof mount is your best solution for securely attaching your Starlink dish to your RV, providing stable, high-speed internet even in Australia's remote locations. But to get it right, there are a few essential points to know upfront:
- Best Mount Option: SpaceTek Australia's Carbon Fibre Telescopic RV Mount
- Key Benefits: Lightweight, highly adjustable, durable in harsh Australian weather
- Installation Summary: Quick and simple setup, involves securing the mount firmly to your RV roof, attaching the Starlink dish, and managing cable routing neatly.
In remote Australia, stable internet is hard to come by. Starlink has changed the game, bringing high-speed satellite internet right to your RV—perfect for Remote Resident Rob who needs reliable connectivity for work and leisure. But even the best technology struggles without the right support, especially when faced with the tough Australian climate.
To ensure consistent internet speeds and avoid frustrating dropouts, your Starlink dish needs clear sky visibility and a secure mount. SpaceTek Australia's Carbon Fibre Telescopic RV Mount is designed to withstand wind, sun, and rain, making it ideal for Australia's rugged conditions.
Here's your quick-guide infographic summarising the best approach to Starlink RV roof mounting:

When it comes to Starlink RV roof mount installations, proper dish placement is absolutely critical. The Starlink satellite system operates using a constellation of low Earth orbit (LEO) satellites that fly approximately 550 kilometres above the Earth's surface. Unlike traditional geostationary satellites that hover 36,000 kilometres away, Starlink satellites move quickly across the sky, which is why your dish needs an unobstructed view.
For RV owners travelling through Australia's vast and varied landscapes, this presents unique challenges. Your dish needs to maintain a clear view of the northern sky (in the Southern Hemisphere) to track satellites effectively. Even partial obstructions can lead to:
- Reduced download and upload speeds
- Increased latency (ping)
- Intermittent disconnections
- Complete loss of service in severe cases
The Starlink dish is designed to electronically steer its beam to track satellites as they move across the sky. This is why mounting height and position are so crucial—your dish needs sufficient elevation to "see" over nearby obstacles.
Overcoming Obstacles to Signal Reception
In Australia's diverse environments, from the dense forests of Tasmania to the rugged outback, obstacles to signal reception vary widely. Common obstructions include:
- Trees and vegetation: Even a single large gum tree can block crucial portions of the sky
- Buildings and structures: Nearby sheds, caravan park facilities, or other RVs
- Geographical features: Hills, cliffs, and mountains, particularly in valley locations
- Your own RV: Air conditioning units, solar panels, or TV antennas on your roof
The Starlink app provides a useful "Check for Obstructions" feature that uses your phone's camera to analyse potential blockages in your dish's field of view. We recommend using this tool before finalising your Starlink RV roof mount location.
For Starlink in Remote Australia, these considerations become even more critical. In isolated areas, you can't simply move to another location if your signal is poor—you need to get the mounting right the first time.
Achieving the Best Connection in Remote Areas
Starlink for Remote Communities has been transformative across Australia. From cattle stations in the Northern Territory to isolated homesteads in Western Australia, reliable internet is now possible in places where connectivity was once a distant dream.

To achieve optimal connection in these remote areas:
- Prioritise elevation: The higher your dish, the better its view of the sky
- Consider adjustable mounts: Different locations may require different positioning
- Plan for mobility: Your ideal mounting position may change as you travel
- Account for weather: Australia's extreme conditions demand durable mounting solutions
"Since installing Starlink with a proper roof mount, we've maintained speeds of over 150 Mbps even during heavy rainfall in Far North Queensland," shares nomadic worker James Thompson. "The key was getting sufficient height to clear the surrounding rainforest canopy."
For those utilising Starlink for Remote Australia, SpaceTek Australia's Carbon Fibre Telescopic RV Mount offers the perfect solution. Its adjustable height allows you to extend the dish above potential obstructions while maintaining the stability needed in high winds and adverse weather.
Selecting the Best Starlink RV Roof Mount
Choosing the right Starlink RV roof mount is one of the most important decisions you'll make for your mobile internet setup—especially in Australia's diverse and challenging environments. A high-quality mount doesn't just hold your Starlink dish securely; it also ensures optimal performance, signal stability, and longevity of your valuable equipment.
SpaceTek Australia's Carbon Fibre Telescopic RV Mount is specifically designed to address these needs. Built explicitly for the rugged conditions we face in Australia, this mount offers a perfect balance of stability, durability, and ease of use.
One of the standout features of SpaceTek's Carbon Fibre Telescopic RV Mount is its superior stability, engineered to handle high winds and rough terrain. Whether you're parked near ocean breezes on the Great Ocean Road or enduring gusty outback weather, this mount keeps your dish firmly in place, ensuring consistent connectivity.
Another significant advantage is its lightweight construction. At just 2.3 kg, the carbon fibre design adds minimal weight to your RV, which is crucial when every kilogram matters. Even better, the carbon fibre material offers impressive strength without the corrosion issues commonly found with metal mounts. Its corrosion resistance makes it ideal not only for outback trips but also coastal trips, where salt air quickly degrades typical metal equipment.
Being able to adapt to various environments is essential for RV travel, and that's where the mount's adjustable height proves invaluable. You can effortlessly extend it from as low as 30 cm to as high as 100 cm. This adjustability means you can clear roof obstacles like air conditioners and solar panels, position your dish above surrounding trees or structures, and easily retract the mount when you're back on the road.
Given Australia's famously intense sunlight, you'll appreciate the mount's inherent UV resistance. It won't fade, degrade, or become brittle over time—maintaining both its structural integrity and appearance for years of travel.
SpaceTek's Carbon Fibre Telescopic RV Mount is fully compatible with all current Starlink dish models, including the rectangular Gen 2 and the latest Gen 3 dishes. This compatibility means your investment remains future-proof, adapting seamlessly as Starlink technology progresses.

Benefits of Using the Carbon Fibre Telescopic RV Mount
Travelling around Australia—with its harsh climate ranging from blistering deserts to humid rainforests—demands robust, long-lasting gear. The Carbon Fibre Telescopic RV Mount is perfectly custom to these conditions, offering unique benefits that improve your overall Starlink experience.
Thanks to its carbon fibre construction, this mount delivers strength without extra weight. Its robustness is proven by the many kilometres it has travelled atop RVs across Australia, easily handling rough terrain and extreme weather. Being lightweight yet solidly built, it won't add unnecessary strain to your RV's roof structure.
The height adjustability is a particular advantage. Have you ever parked in an area with trees blocking your signal? Instead of searching endlessly for a perfect spot, simply extend your mount to achieve clear sky visibility. Once you're ready to drive again, the mount quickly collapses, ensuring there are no issues with overhead clearances or wind resistance.
As it's entirely resistant to rust and corrosion, the mount thrives in Australia's coastal environments and tropical climates. Heavy rain, humidity, or even coastal salt spray won't cause damage or wear, making your mount a long-term, worry-free addition to your RV setup.
Installation and removal are a breeze, too. Without needing extensive modifications to your RV, it's quick to set up, easy to reposition, and simple to remove if you decide to transfer it to another vehicle or sell your RV later on.
Installation Tips for Your Starlink RV Roof Mount
Properly installing your Starlink RV roof mount isn't just about getting the best internet connection—it's also about safety, protection, and ensuring your investment lasts for years. Here’s a straightforward guide to help you install the Carbon Fibre Telescopic RV Mount safely and efficiently:
Begin by taking essential safety precautions. Always wear sturdy gloves and non-slip footwear when working on your RV's roof. Make sure your ladder is secure, and ideally, have someone with you to steady it. Before installing, double-check your RV roof’s weight limits, and carefully plan your cable routing to avoid electrical hazards.
Having the right tools on hand makes installation simpler. You'll typically need an electric drill with appropriate drill bits, marine-grade silicone sealant, measuring tape, a pencil or marker for marking points, a socket wrench, and weatherproof cable glands for sealing cable entry points.
Here’s the best way to install your Carbon Fibre Telescopic RV Mount:
- Choose an optimal mounting location, ensuring it has minimal obstructions and adequate structural support. Try to position your mount close to cable entry points to minimise cable length.
- Clean and prepare the mounting surface, then mark and drill pilot holes carefully according to the provided template. Apply marine-grade silicone sealant generously around the mounting points for a watertight fit.
- Securely attach the base plate to your RV roof with the provided hardware, tightening bolts evenly to ensure stability. Add extra sealant around the bolts for additional weather protection.
- Insert and secure the telescopic pole into the base plate. Once inserted, lock the mechanism in place firmly and check its stability before attaching your dish.
- Finally, attach your Starlink dish to the provided dish adapter on the mount, ensuring it can freely move and align itself as needed.
With SpaceTek's Carbon Fibre Telescopic RV Mount, you're choosing reliability, durability, and ease of use—everything you need for smooth, worry-free internet connectivity across Australia's diverse landscapes.
Cable Management for Your Starlink RV Roof Mount
Cable management might not be the most glamorous task when it comes to your Starlink RV roof mount, but trust us—taking the extra time to organise your cables neatly can make all the difference. Proper cable routing protects your valuable equipment, improves the lifespan of your setup, and ensures you're always connected when exploring Australia's remote corners.
Your Starlink system relies on a special cable that carries both power and data from your dish to the router. This makes it one of the most important parts of your setup—and also one of the most vulnerable. Poor cable management can lead to damage from harsh weather, wildlife, or even just daily movement and wear.
Common issues that come from neglecting your cables include physical wear and tear, water leaking into your RV at connection points, and signal loss caused by sharp bends or pinched cables. Plus, messy cables hanging off your RV roof aren't exactly picture-perfect for your trips across Australia!
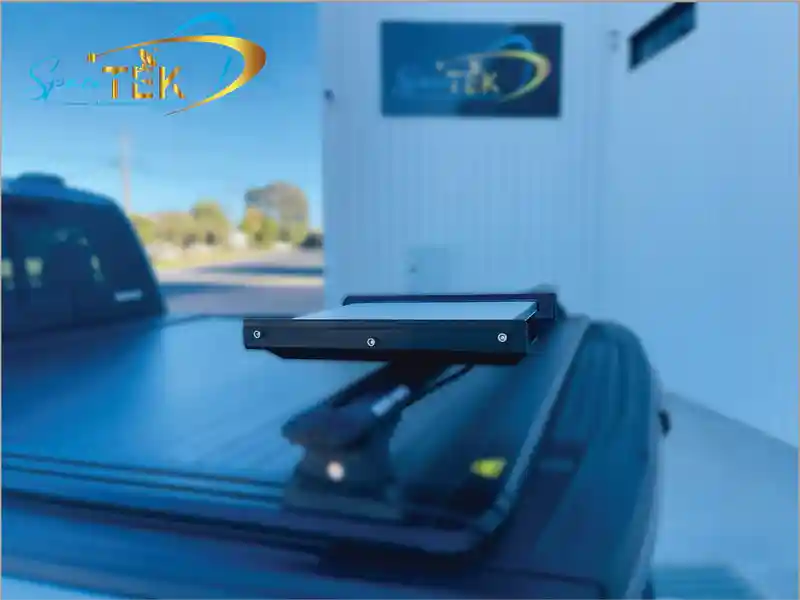
Here's a photo from our library highlighting a tidy, professional cable management setup on an RV roof mount:

At SpaceTek Australia, we know how tough Australian conditions can be—trust us, we've seen our fair share of outback surprises! That's why we always recommend a thoughtful approach to managing your cables to protect your Starlink dish and improve your RV's aesthetics.
Tips for Organising Cables on Your Starlink RV Roof Mount
When it comes to cable management, a bit of planning goes a long way. Firstly, focus on weatherproofing the points where your Starlink cable enters your RV. This spot is particularly vulnerable to water entry, especially during heavy rain or thunderstorms. We recommend using a robust cable gland or weatherproof entry port for your RV roof. If possible, install the entry point on a vertical surface to stop water from pooling. Adding what's called a "drip loop" before the cable enters your RV can further prevent water ingress, along with applying a generous amount of marine-grade silicone sealant around the entry point.
Next, consider protecting your cables against Australia's rugged environment. The hot sun, strong winds, and occasional curious wildlife can all take their toll. To prevent damage, use UV-resistant cable conduits to shield exposed sections of your cable. Securely fix cables every 30-50cm using heavy-duty cable ties or clips to stop them from moving around in high winds. Also, remember to avoid sharp bends—try to maintain a gentle curve, roughly three to four times the cable diameter, to ensure optimal signal strength.
It's also important to plan for movement. Your Starlink dish moves automatically to track satellites, and your telescopic mount may need adjusting depending on your location. Make sure to leave some slack near the dish to allow for this movement. Consider flexible conduit or protective sleeves at points where cables bend or articulate. If you'll be regularly removing your dish, a quick-disconnect option or a neatly coiled service loop at the connection point can save you time and trouble.
Lastly, don't forget about cable management inside your RV. Keep cables neatly organised using cable clips or raceways, ensuring they're safely away from heat sources and foot traffic. Labelling your cables can also save headaches down the track, especially if you need quick troubleshooting during your travels. For your router, consider a tidy wall-mount setup to free up space and maximise your Wi-Fi coverage.
As seasoned traveller and Grey Nomad Pauline Williams finded, investing in quality UV-resistant conduit made a huge difference for her Starlink RV setup. She noted, "After our first outback trip, we noticed the cable had started to degrade where it was exposed to the sun. Using durable UV-resistant conduit from SpaceTek completely solved the problem—two summers in the Northern Territory later, and it's still holding strong!"
For those looking for an all-in-one solution, SpaceTek Australia's specially designed cable management kits offer everything you need. Our kits include weatherproof sleeves, robust cable ties, and secure clips custom specifically for Starlink installations, ensuring that your setup not only looks neat but also withstands Australia's challenging conditions.
By following these simple yet essential cable management tips, you'll enjoy stronger signals, a tidier appearance, and peace of mind knowing your Starlink system is protected wherever your next trip takes you.
Protecting Your Starlink Dish from the Elements
Australia's diverse and often extreme climate can really put your Starlink RV roof mount to the test. From the scorching outback heat where temperatures regularly soar above 40°C to tropical downpours and coastal salt spray, your valuable Starlink dish needs proper protection to keep delivering those fast internet speeds you've come to rely on.
While Starlink dishes are built tough with IP56 weather resistance, a bit of extra protection goes a long way in Australia's unforgiving conditions. Think of it as sunscreen for your tech—sure, you might survive without it, but you'll definitely last longer with proper protection!
Weatherproof Solutions for Your Starlink Setup
Beating the Australian Heat
The Australian sun is no joke, especially when you're travelling through the outback. Those scorching temperatures can affect your dish's electronic components in ways the manufacturer never imagined.
When setting up your Starlink RV roof mount, try to position your dish away from the direct afternoon sun if possible. The beauty of SpaceTek's Carbon Fibre Telescopic RV Mount is that it gives you the flexibility to adjust your dish's position to find that sweet spot. Make sure there's good airflow around the dish too—electronics and extreme heat have never been great mates!
It's worth noting that while Starlink dishes have built-in heating elements for cold weather (not often needed in Australia!), they don't have cooling systems. So keep your dish away from other heat-generating equipment, and be mindful of performance during those sweltering summer days when even the flies are seeking shade.
Dancing in the Rain
While your Starlink dish is designed to operate in wet conditions, Australia's tropical downpours can test the limits of any technology. I remember camping near Cairns during the wet season—the rain wasn't falling so much as being dumped from the sky in buckets!
For proper protection, make sure all connection points are properly sealed with marine-grade sealants at mounting points. Install your dish with a slight tilt to encourage water to run off rather than pooling. After heavy rain events, it's worth doing a quick check of all seals and connection points for any signs of water sneaking in where it shouldn't.

Dealing with Dust and Debris
Anyone who's travelled through the Australian outback knows that red dust gets absolutely everywhere—your clothes, your food, your hair, and yes, your Starlink dish.
"During our time in the Kimberley, the red dust was everywhere," shares full-time traveller Ben Cooper. "We found that a quick, gentle wipe-down of the dish every few days kept our speeds consistent, even during the dustiest conditions."
For Starlink in Remote Australia, regular maintenance is key. Gently remove accumulated dust with a soft brush or cloth, using clean water for stubborn deposits. Never use high-pressure water or harsh chemicals that might damage the dish's surface. The adjustable height of the Carbon Fibre Telescopic RV Mount allows you to position your dish above the worst of the dust-prone areas, which is especially helpful when camping in those dry, dusty regions.
If you're leaving your setup unused for extended periods, consider a dish cover—just remember to remove it before using your Starlink again!
SpaceTek Australia's Carbon Fibre Telescopic RV Mount includes thoughtful features specifically designed for our harsh Australian conditions:
- Vibration-dampening components that reduce stress during those long drives on corrugated outback roads
- Fully corrosion-resistant materials that stand up to coastal salt spray and tropical humidity
- Flexible positioning options that let you adapt to different environmental challenges as you travel
For Starlink for Remote Communities across Australia, these protective measures aren't just nice-to-have features—they're essential for maintaining reliable internet connections in places where alternative options simply don't exist. Whether you're a grey nomad exploring the Nullarbor or working remotely from a station in the Northern Territory, keeping your Starlink dish protected ensures you stay connected to what matters.
Remember though, while protection is important, the dish must remain unobstructed during operation. Any covers should be removed when the system is in use, and the dish surface should remain clean for optimal signal reception. After all, what's the point of having Starlink if a bit of dust or rain is going to knock you offline during that important video call or while streaming the footy finals?
Maximising Wi-Fi Coverage Inside Your RV
Once you've securely installed your Starlink RV roof mount and established reliable satellite internet, the next step is ensuring that superb connectivity extends throughout your RV. Even the fastest satellite connection won't do you much good if your internal Wi-Fi coverage is spotty, inconsistent, or absent in crucial spots.
Because of their size, layout, and construction, RVs present unique challenges for Wi-Fi distribution. Metal surfaces, appliances, cabinetry, and even water tanks can weaken or block Wi-Fi signals, creating frustrating dead zones—particularly in larger motorhomes or caravans.
Optimising Your Internal Network
To ensure your Starlink setup provides the best internet experience inside your RV, you'll need to focus on a few key strategies: router placement, extending your Wi-Fi range, and fine-tuning router settings.
Strategic Router Placement
Choosing the right spot for your router can make a huge difference. Ideally, your Starlink router should be located in a central position within your RV to evenly distribute the signal to all areas. Elevating the router slightly—such as on a shelf or wall mount—can help the signal clear obstacles like furniture or appliances.
Avoid placing your router directly beside large metal objects such as fridges, ovens, or water heaters, as they can severely reduce Wi-Fi signal strength.
You should also be aware of common sources of interference. Microwave ovens, Bluetooth devices, and even certain USB 3.0 equipment can negatively impact your Wi-Fi signal. Try to maintain a comfortable distance between your router and these types of devices—keeping your router clear of interference sources helps your network perform at its best.
SpaceTek Australia offers RV-compatible router mounting solutions, allowing you to securely fix the router in an optimal location that ensures both signal quality and safety during travel.
Extending Your Network
For larger RVs, or those with internal layouts that hinder Wi-Fi signals, you may find that one router alone isn't enough to reach every corner. If you're dealing with stubborn dead zones, consider using a mesh Wi-Fi system or installing Wi-Fi extenders.
Mesh networks provide seamless coverage throughout your RV, automatically steering your devices onto the strongest available signal as you move from one area to another. They're particularly helpful if you regularly require consistent connectivity from front to back of your vehicle—for example, when two people are working remotely at opposite ends of the RV.
Alternatively, if your issue is restricted to a small, specific area, Wi-Fi extenders can represent a simple and cost-effective solution. These compact devices take your router's signal and amplify it, extending coverage into tricky corners or through walls. They're also easy to reposition as needed, giving you flexibility as your travel conditions change.
For some stationary devices such as desktop computers or smart TVs, a wired Ethernet connection can offer even greater reliability, freeing wireless bandwidth for mobile phones, tablets, and other devices.
Digital nomad Lisa Thompson, who travels around Australia in her large motorhome, shares her experience: "We struggled initially with dead spots that made video calls and streaming a headache. After setting up a simple mesh system, we've had great Wi-Fi coverage throughout the RV, from front to back—exactly what we need for remote work."
Optimising Router Settings
A final but often overlooked step in maximising your RV's Wi-Fi coverage is tweaking the router's internal settings.
Selecting the right Wi-Fi channel can noticeably improve your connection quality. Channels become congested—particularly in crowded caravan parks—so switching your router to a less busy channel can dramatically boost performance. Generally, the 5GHz band offers higher speeds but shorter range, making it better for smaller, open areas, while the 2.4GHz band provides greater penetration through walls and obstacles, although at slightly slower speeds.
Using your router's Quality of Service (QoS) settings allows you to prioritise critical activities, ensuring video calls or streaming services receive preferential bandwidth. This can make a real difference, especially if multiple users and devices compete for internet access simultaneously.
Finally, don't forget to set up strong security settings on your router. Enable WPA3 encryption where available, choose a secure password, and consider changing the default network name to keep your RV network safe from unauthorised users.
With these optimisation techniques—strategic router placement, extending your network effectively, and fine-tuning your router settings—you can ensure strong, stable, and reliable Wi-Fi coverage throughout your RV. This means no more frustrating dead zones or dropped signals, allowing you to fully enjoy your Starlink connection as you explore Australia's breathtaking locations.
Frequently Asked Questions about Mounting Starlink on Your RV Roof
How do I properly position my Starlink dish on my RV roof?
Getting the placement of your Starlink RV roof mount just right makes all the difference in maintaining a strong, reliable connection. The most important thing to remember: your Starlink dish needs a clear, unobstructed view of the sky.
In Australia, that means paying special attention to areas of sky where Starlink satellites are most active, particularly towards the northern horizon (since we're in the Southern Hemisphere). Aim for about a 100-degree field of view that's free from obstacles such as trees, buildings, or even rooftop fixtures like air conditioners and solar panels.
To make sure you're choosing the best possible spot, the Starlink mobile app includes a handy "Check for Obstructions" tool. This feature uses your phone's camera to analyse your surroundings and identify any potential signal blockers. Always run this check before finalising your dish's permanent spot.
Height is another key consideration when mounting your dish. The Carbon Fibre Telescopic RV Mount from SpaceTek Australia is ideal because you can easily adjust the height to clear potential obstructions. If you're parked near trees or tall structures, just extend the mount higher. If the area is clear, keep it lower and more compact. This flexibility ensures optimal signal quality wherever you go.
Experienced RV traveller David Wilson notes, "We've been amazed at how even a small adjustment in height can vastly improve our connectivity. The telescopic mount lets us quickly adapt to each new campsite without fuss or hassle."
Can I keep my Starlink dish mounted while driving?
This question comes up quite often among RVers and understandably so—convenience is key on the open road. However, it's important to know that Starlink officially advises against using the dish while your vehicle is in motion. The main reasons are physical stress from wind and vibration, potential misalignment, and the dish's significant power draw when actively tracking satellites in motion.
When travelling, your best practice is either to securely lower and lock your dish in a safe, streamlined travel position or to remove and store it inside your vehicle altogether. The Carbon Fibre Telescopic RV Mount makes this easy. Its secure locking mechanisms and aerodynamic shape mean you can confidently lower it to its minimum height for safe transit.
Full-time traveller Emma Watson shares: "Before hitting the road, we simply lower our Starlink dish down and secure it—seriously, it takes less than two minutes. We've covered thousands of kilometres across Australia's roughest tracks this way, and our mount hasn’t let us down yet."
What accessories do I need for the best Starlink RV setup?
Setting up your Starlink system to perform at its best in remote Australia involves more than just the dish and router. A few well-chosen accessories will ensure your setup stays stable, protected, and performing optimally no matter where your trip takes you.
First, it's absolutely crucial to start with a high-quality mount—this is where the Carbon Fibre Telescopic RV Mount from SpaceTek Australia really shines. Its durability, lightweight construction, and height adjustability are perfectly suited for Australia's tough conditions.
Next, you'll want practical cable management solutions. Weatherproof cable glands or entry ports are a must to seal your cable entry points from dust and moisture. UV-resistant conduit or sleeves keep your cables safe from Australia's intense sun and physical damage, while cable ties and clips ensure a neat, organised installation.
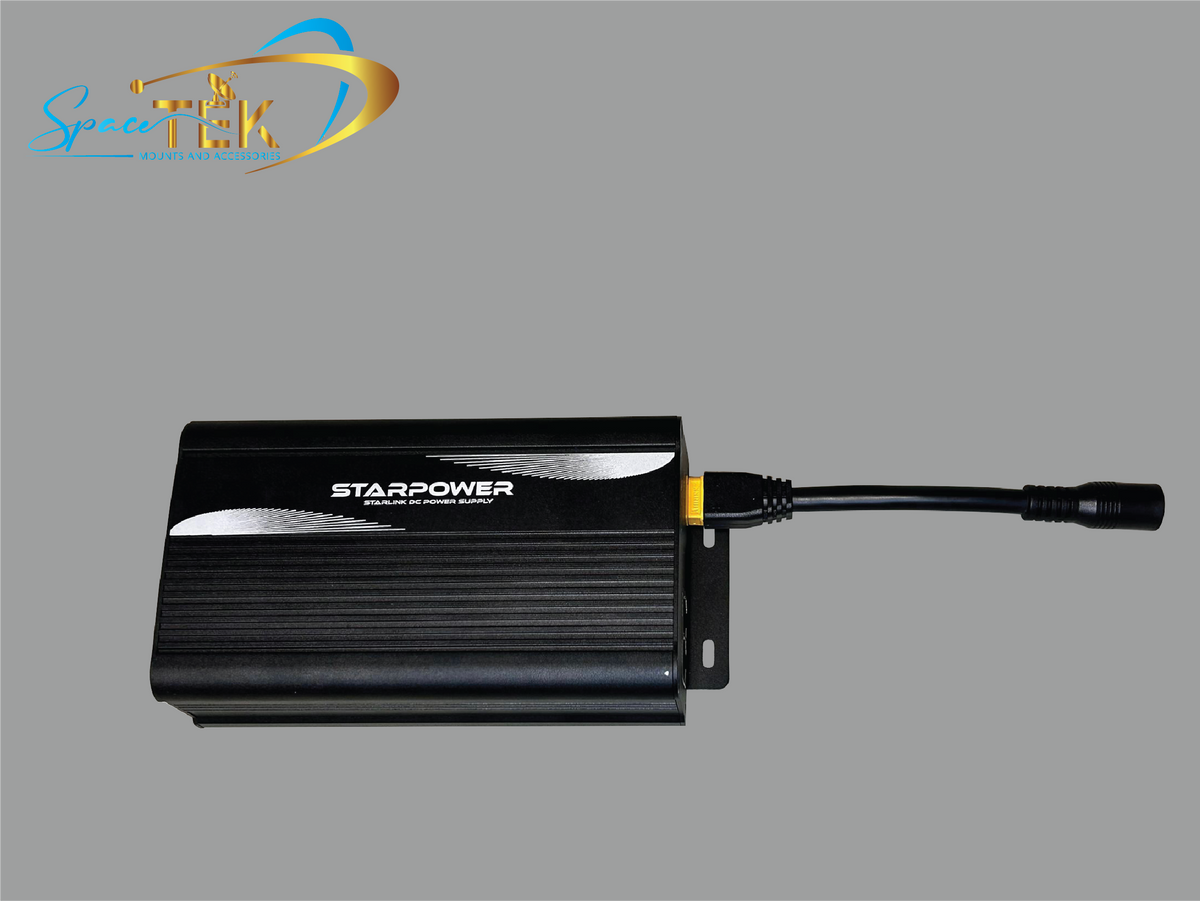
Another smart addition is a surge protection device, particularly if you're travelling during storm season. Australia's electrical storms can pose real risks to your Starlink system, so protecting your gear from power surges can save you major headaches down the road.
Don't overlook your internal network either. Wi-Fi extenders or mesh systems give you better coverage inside your RV, eliminating frustrating dead zones. And if you're often off-grid or dealing with intermittent power, a battery backup or integration with your RV's solar and battery system is a great addition, ensuring your internet stays on when you need it most.
Finally, make sure your roof structure can safely accommodate the installation. Check that your chosen mounting location is structurally sound and plan your cable routes carefully—shorter, well-protected cable runs minimise signal loss.
Remote worker Sarah Jenkins shares her experience: "After our first season exploring remote Australia, we added cable protection and a battery backup system. It's made a huge difference, particularly during frequent evening storms when shore power can be unreliable."
For simplicity and peace of mind, SpaceTek Australia offers comprehensive installation kits designed specifically for Starlink RV setups, equipped with essential accessories to handle Australia's rugged environments.
Reliable Internet Starts with the Right Accessories
Throughout this guide, we've shared detailed insights to help you create the ultimate Starlink RV roof mount installation—perfectly custom to Australia's unique and often challenging conditions. From ensuring the ideal dish placement and protecting your cables, to optimising your RV’s internal Wi-Fi network, every step matters in securing reliable, top-notch connectivity on the road.
At the heart of any great Starlink setup is a rock-solid mounting solution. The Carbon Fibre Telescopic RV Mount from SpaceTek Australia has quickly become the preferred choice for RV triprs across the country, and it's easy to see why. Lightweight yet incredibly strong, it’s built specifically to withstand the extremes of Australian weather, be it scorching sunlight, torrential downpours, or dusty outback winds. Its height-adjustable design means you'll always find that sweet spot for clear, obstruction-free satellite reception—no matter where you pull up for the night.
With Starlink changing internet access for remote communities across Australia—bringing connectivity to even the most isolated corners—having the right gear isn't just about convenience anymore. It's about staying connected with loved ones, accessing essential services, and enabling remote work and education opportunities previously out of reach. Starlink for Remote Australia is making this possible every day, but only if your equipment is up to the task.
Take digital nomads Jamie and Lisa Peterson, for example. They've shared how their Starlink, combined with SpaceTek's trusted mounting system, has allowed them to work remotely from some of Australia's most incredible spots. "From the spectacular Kimberley to Tasmania's secluded wilderness," Jamie says, "it transformed the way we travel; reliable internet means we never feel disconnected—even when we’re miles from anywhere."
As Starlink technology keeps evolving, those who've invested in quality accessories and thoughtful installation will continue enjoying excellent performance and reliability, wherever their trips lead.
If you're ready to level up your RV connectivity for 2025 and beyond, SpaceTek Australia is here to help. As Australia's trusted source for Starlink-compatible accessories, we've custom our mounts to handle Australia's toughest conditions—giving you complete peace of mind wherever your travels take you.
Browse SpaceTek's Starlink Accessories Now to find how our Carbon Fibre Telescopic RV Mount and other customised accessories can improve your Starlink experience. Here's to fast, reliable internet—no matter where in Australia your trips take you next!
Leave a comment
This site is protected by hCaptcha and the hCaptcha Privacy Policy and Terms of Service apply.