Why Choosing the Right Roof Mount for Starlink Matters

A roof mount for Starlink is essential for achieving optimal signal strength and reliable internet connectivity in remote areas. The right mounting solution provides obstruction-free sky access while withstanding Australian weather conditions.
Quick comparison of Starlink roof mount types:
- Pivot Mounts – Ideal for slanted, shingled roofs with adjustable tilt for signal optimisation
- Ridge Mounts – No-drill installation using ballast weights, perfect for avoiding roof penetrations
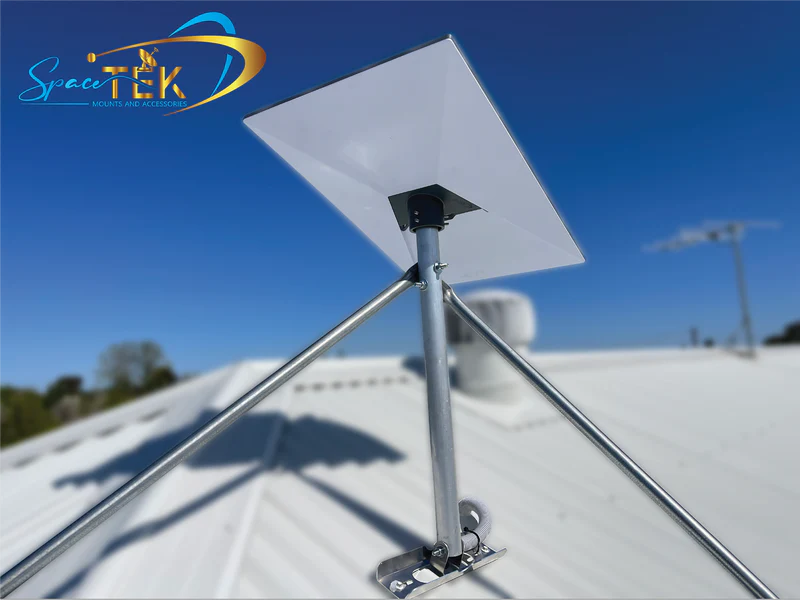
- Pole Mounts – Flexible positioning with existing poles or new installations
- Wall Mounts – Suitable for fascia or gable mounting with overhang clearance
- Non-Penetrating Mounts – Heavy-duty solutions for flat roofs using ballast trays
Over 1,000 Starlink roof mount products are available on the market, but not all are built for Australian conditions. The key differences lie in materials, compatibility with Gen 3 and Gen 2 dishes, wind resistance ratings, and installation complexity.
Most Starlink users require permanent, elevated mounting solutions for optimal performance. The default Starlink mount is designed only for temporary ground-level setups, not long-term roof installations.
Proper roof mounting eliminates obstructions like trees and buildings that cause service interruptions. It also protects your dish from animal damage and provides the height needed to clear snow, leaves, and debris.
Australian conditions demand specific features. Coastal areas require rust-resistant materials like 316-grade stainless steel or marine-grade aluminium. Inland regions need UV-stable components that won't degrade under intense sun. High-wind zones require secure fastening to structural beams and potentially tethering systems.
Installation quality matters as much as the mount itself. Poor sealing techniques lead to water ingress and roof damage. Incorrect structural mounting creates safety hazards, particularly in high winds.
I'm Aaron Wroblewski, founder of SpaceTek Australia, and I've spent over 25 years working with satellite communications and remote connectivity solutions, including designing roof mount for Starlink systems specifically for Australian conditions. My experience across rural installations and harsh coastal environments has shaped every product we develop.
Related content about roof mount for Starlink:
Choosing the Best roof mount for starlink
Selecting the right hardware for your home or business involves more than just finding a bracket that fits. We need to consider the structural integrity of the roof and the specific requirements of the Starlink dish. A high-quality roof mount for Starlink should offer a combination of heavy-duty construction and adjustable tilt to ensure the dish has a clear line of sight to the satellite constellation.

When we look at the different types of mounts, pivot mounts are often the go-to for residential shingle or tin roofs because they can be adjusted to maintain a level base even on a steep pitch. For those who want to avoid making holes in their roof entirely, ridge mounts and non-penetrating frames are excellent alternatives. These rely on weight and gravity rather than screws to stay secure.
If you are wondering why invest in a Starlink roof mount kit?, the answer lies in stability. Cheap, generic mounts often vibrate in high winds, which can lead to micro-interventions in your data stream. Our kits are engineered to keep your connection rock-solid. For more details on the latest hardware, check out our Raise the Roof: A Guide to Starlink Gen 3 Roof Mount Kits.
Comparing Gen 3 and Gen 2 roof mount for starlink Options
It is vital to understand which generation of hardware you own before purchasing a mount. The Starlink Gen 2 (Actuated) dish features a motor that moves the dish into position, while the newer Gen 3 / V3 Standard Dish is a fixed, "kickstand" style dish that requires manual alignment.
The mounting interfaces are completely different. Gen 2 uses a proprietary "plug and click" mast, whereas the Gen 3 requires a pipe adapter or a specific mounting plate to secure the rectangular dish. We offer specialized Starlink Gen 3 V4 Mounts that include the necessary adapters to convert the kickstand base into a secure pole-mounted setup. If you are still running the previous version, our Starlink Gen 2 Mounts are designed to fit the actuated mast perfectly.
No-Drill and Non-Penetrating roof mount for starlink Solutions
For many Australians, particularly those in new builds or rentals, drilling into the roof is a deal-breaker. This is where non-penetrating solutions shine. The Ridgeline Mount is a popular choice; it sits across the peak of the roof and uses ballast weights to remain stationary.
These mounts are compatible with most roof types, including tin and tile, provided the pitch is less than 45 degrees. When using a non-penetrating roof mount for Starlink, it is crucial to calculate the correct amount of weight needed for your specific wind zone. You can use a ballast weight calculator to ensure your dish won't shift during a storm. If you have a tile roof, you must follow specific safety protocols to avoid cracking tiles; learn how to install a Starlink tile roof mount safely to protect your home's waterproofing.
Materials and Durability for Australian Weather
The Australian climate is notoriously harsh on outdoor equipment. Between the salty air of the coast and the blistering UV of the outback, standard plastic or low-grade steel mounts will fail within a few years. At SpaceTek, we prioritise aluminium alloy and 316-grade stainless steel for our mounting kits.
Aluminium is lightweight and naturally resistant to corrosion, while stainless steel provides the heavy-duty strength required for larger High-Performance antennas. These materials ensure that your roof mount for Starlink remains rust-free and structurally sound for the life of the dish. Wind resistance is another major factor; most official mounts are rated up to 80 kph, but in many parts of Australia, we experience much higher gusts. It is important to understand Rooftop Wind Resistance: What Your Starlink Mount Should Handle before you commit to an installation. For technical specs on official hardware, you can also refer to the Official Starlink Pivot Mount Guide.
Conclusion and Final Recommendations
Installing your Starlink dish on the roof is the single best way to ensure you get the high-speed, low-latency internet you’re paying for. Whether you opt for a permanent pivot mount or a no-drill ridgeline solution, the priority must be stability and weather resistance.

We recommend checking your roof type and local wind conditions before selecting a kit. Always use high-quality sealants to prevent leaks and ensure you are mounting to structural beams rather than just the roof sheeting. If you are unsure about the costs involved, take a look at our Price check: How much does a Starlink roof mount cost? guide.
At SpaceTek Australia, we are dedicated to providing the most reliable, rust-resistant, and user-friendly mounts built specifically for our local environment. Our kits are designed for the self-installer, making it easy to get connected without the need for a professional contractor.
If you have questions about which roof mount for Starlink is right for your home, please contact us for expert advice. We are here to help you get the best possible connection, no matter how far off the beaten track you are.


Leave a comment
This site is protected by hCaptcha and the hCaptcha Privacy Policy and Terms of Service apply.