Why Boosting Your Starlink Signal Matters
How can I boost my starlink wifi signal is one of the most common questions from rural Australian users trying to get the most from their satellite internet. If you're looking for quick solutions, here are the most effective ways to improve your connection:
- Position your router centrally in an open space, liftd off the floor
- Check for obstructions around your dish using the Starlink app
- Split your WiFi bands (2.4GHz for range, 5GHz for speed)
- Add a Starlink Mesh node for larger homes
- Use Ethernet cables for critical devices
- Install the dish with clear line of sight to the sky
- Consider a quality mount for stability in harsh weather
Living in remote Australia means reliable internet is not just a convenience—it's essential. Whether you're managing a cattle station via video calls, attending telehealth appointments, or simply wanting to stream without buffering, your Starlink connection needs to be rock solid.
The Starlink router that comes with each kit only covers about 3,200 square feet under ideal conditions. In real-world rural settings with thick walls, metal roofing, and vast spaces, that coverage can shrink dramatically. Add in the unique challenges of the Australian outback—including extreme heat, cyclonic winds, and the occasional curious cockatoo—and maintaining a strong signal becomes even more challenging.
The good news? There are proven ways to boost your Starlink WiFi signal without complex technical knowledge. From simple router placement tweaks to strategic hardware additions, this guide will walk you through everything you need to know to maximise your connection in even the most remote corners of Australia.

How can I boost my Starlink WiFi signal? 7 Key Methods
Getting the most from your Starlink connection doesn't have to be complicated or expensive. After helping hundreds of rural Aussie customers optimise their setups, I've found these seven methods make the biggest difference to your WiFi coverage and speed:
1. Ensure Clear Line-of-Sight for Your Dish
Your Starlink dish needs an unobstructed view of the sky to chat properly with those satellites whizzing overhead. This can be particularly challenging in the Australian bush where tall gum trees, sheds, and rolling hills might get in the way.
The Starlink app makes this dead simple – just use the "Check for Obstructions" tool to find the sweet spot on your property. I've seen customers gain 20-30% better speeds just by moving their dish a few metres to avoid a partially blocking tree!
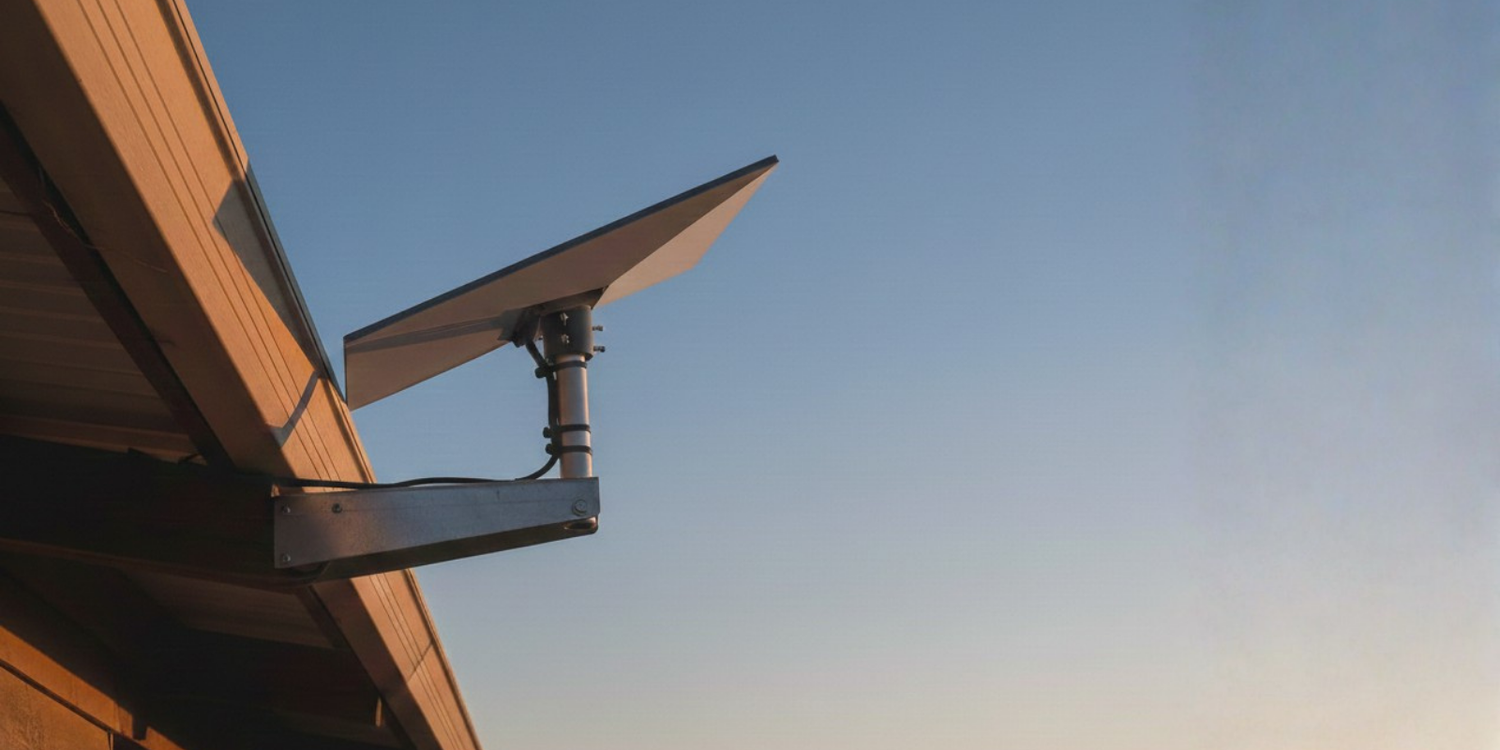
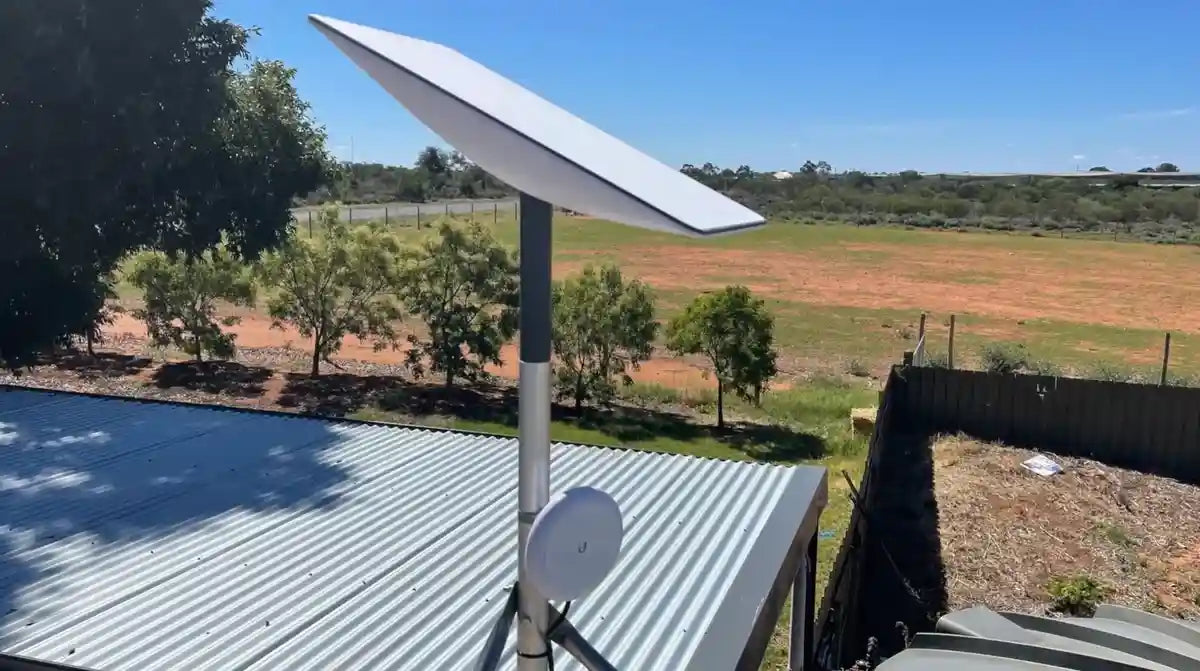
2. Lift Your Dish for Better Reception
Sometimes ground-level placement just won't cut it. Mounting your dish higher – whether on your roof, a sturdy pole, or a purpose-built tower – can dramatically improve your connection quality.
Our SpaceTek Australia mounts are specifically designed for our harsh conditions, with rust-resistant materials that handle everything from tropical downpours up north to the dusty, scorching outback. A proper mount isn't just about signal quality – it's about keeping your valuable dish secure through wild weather.
3. Optimise Router Placement
Your router's location can make or break your WiFi experience. The Starlink router broadcasts signal mainly along the horizontal plane, so height and central positioning matter tremendously.
For the strongest possible signal:
- Place your router centrally where you use your devices most
- Set it on a hard surface at least halfway up the wall – never on the floor
- Keep it in open space – avoid tucking it inside cabinets or media units
- Make sure it's sitting upright on its base, not lying flat
I've seen customers double their effective coverage area just by moving their router from a low shelf in the corner to a bookcase in the middle of the home.
4. Use the Starlink App's Diagnostic Tools
The Starlink app is packed with handy tools to help you fine-tune your setup. The Range tool maps signal strength throughout your home, showing you exactly where coverage drops off. The Advanced Speed Test tells you whether slowdowns are happening between your device and router or between your router and the satellites.
These insights make troubleshooting so much easier – no more guesswork about what's causing your connectivity issues.
5. Keep Firmware Updated
Starlink regularly releases firmware updates that boost performance and add new features. These happen automatically, but it's worth checking that your system isn't being prevented from updating due to power outages or disconnections.
Each update can bring noticeable improvements to speed and stability, especially for rural Australian users dealing with our unique challenges.
6. Split WiFi Bands for Optimal Performance
Your Starlink router broadcasts on two different frequency bands, each with distinct advantages:
2.4GHz travels further and penetrates walls better, making it perfect for reaching distant parts of your property or connecting through thick walls. However, it's more prone to interference.
5GHz delivers faster speeds but has shorter range. It's ideal for devices that need maximum performance like streaming TVs or gaming consoles that are relatively close to the router.
By splitting these bands in the Starlink app, you can connect each device to the most appropriate network – boosting overall performance across your home.
7. Add Mesh Nodes for Extended Coverage
For larger properties or homes with thick walls (common in older Aussie homesteads), a single router often struggles to provide consistent coverage. Starlink Mesh nodes can extend your WiFi dramatically, creating a seamless network that blankets your entire space.
These nodes are particularly brilliant for reaching detached garages, sheds, or guest quarters that are too far from the main router – a common situation on rural Australian properties.
By implementing these seven methods, you'll be well on your way to getting the most from your Starlink service, no matter how remote your corner of Australia might be.
How can I boost my Starlink WiFi signal indoors?
Central Router Placement is Key
The single most effective way to improve your indoor WiFi signal costs absolutely nothing—it's all about where you put your router. Position your Starlink router centrally in the main area where you use your devices most. This simple adjustment can dramatically improve coverage throughout your home.
Many Aussie homeowners make the mistake of tucking their router away in a corner or cupboard, but this immediately handicaps your signal. For best results, place your router in an open space, away from walls and obstructions, where the signal can radiate freely in all directions.
In older Australian homes with thick plaster walls or stone construction, doorways act as natural signal pathways. Placing your router near a doorway can help the WiFi travel between rooms more effectively, especially in farmhouses or heritage buildings with challenging layouts.
Height Matters More Than You Think
Lift your router off the floor for an instant signal boost. The Starlink router broadcasts its signal primarily along the horizontal plane, so keeping it liftd—ideally 1.5-2 metres off the ground—dramatically improves coverage throughout your home.
A bookshelf, desk, or wall-mounted bracket makes an ideal location. Think of your WiFi signal like water flowing outward—you want it positioned to "flow" throughout your living space without obstruction. The higher it sits, the further it can travel without hitting furniture, people, or other obstacles that absorb the signal.
Avoid Metal and Other Interference Sources
Australian homes often feature metal roofing, which can significantly impact WiFi signals. Keep your router away from metal objects that block or reflect signals, creating dead zones or interference.
Common household items that can disrupt your Starlink WiFi include:
Microwave ovens, cordless phones, and baby monitors operate on similar frequencies and can cause intermittent dropouts. Large metal furniture, appliances, and thick concrete walls act as barriers. Even fish tanks can absorb signals due to their water content.
Maintain at least 1-2 metres of distance between your router and these interference sources for noticeably better performance.
Split Bands for Optimal Device Performance
The Starlink router operates on two different frequencies, and separating these bands gives you more control over your home network. Within the Starlink app, you can give your 2.4GHz and 5GHz networks different names, allowing you to connect devices strategically:
Connect devices that need range (like security cameras in the shed or smart devices in distant bedrooms) to the 2.4GHz network, which travels further but at slower speeds.
Reserve the 5GHz network for nearby performance-critical devices like gaming consoles, smart TVs, or your work computer, where speed matters more than range.
This simple split reduces network congestion by balancing devices across both bands, preventing your high-priority devices from competing with background devices for bandwidth.
How can I boost my Starlink WiFi signal outdoors?
Getting your Starlink connection to reach the far corners of your property presents unique challenges compared to indoor coverage. Whether you're trying to connect a shed, workshop, or simply want internet while enjoying your outdoor space, there are proven solutions for the Australian outback.
Connecting to Outbuildings
For those managing larger properties with multiple structures, you've got two reliable options to extend your Starlink connection beyond your main dwelling:
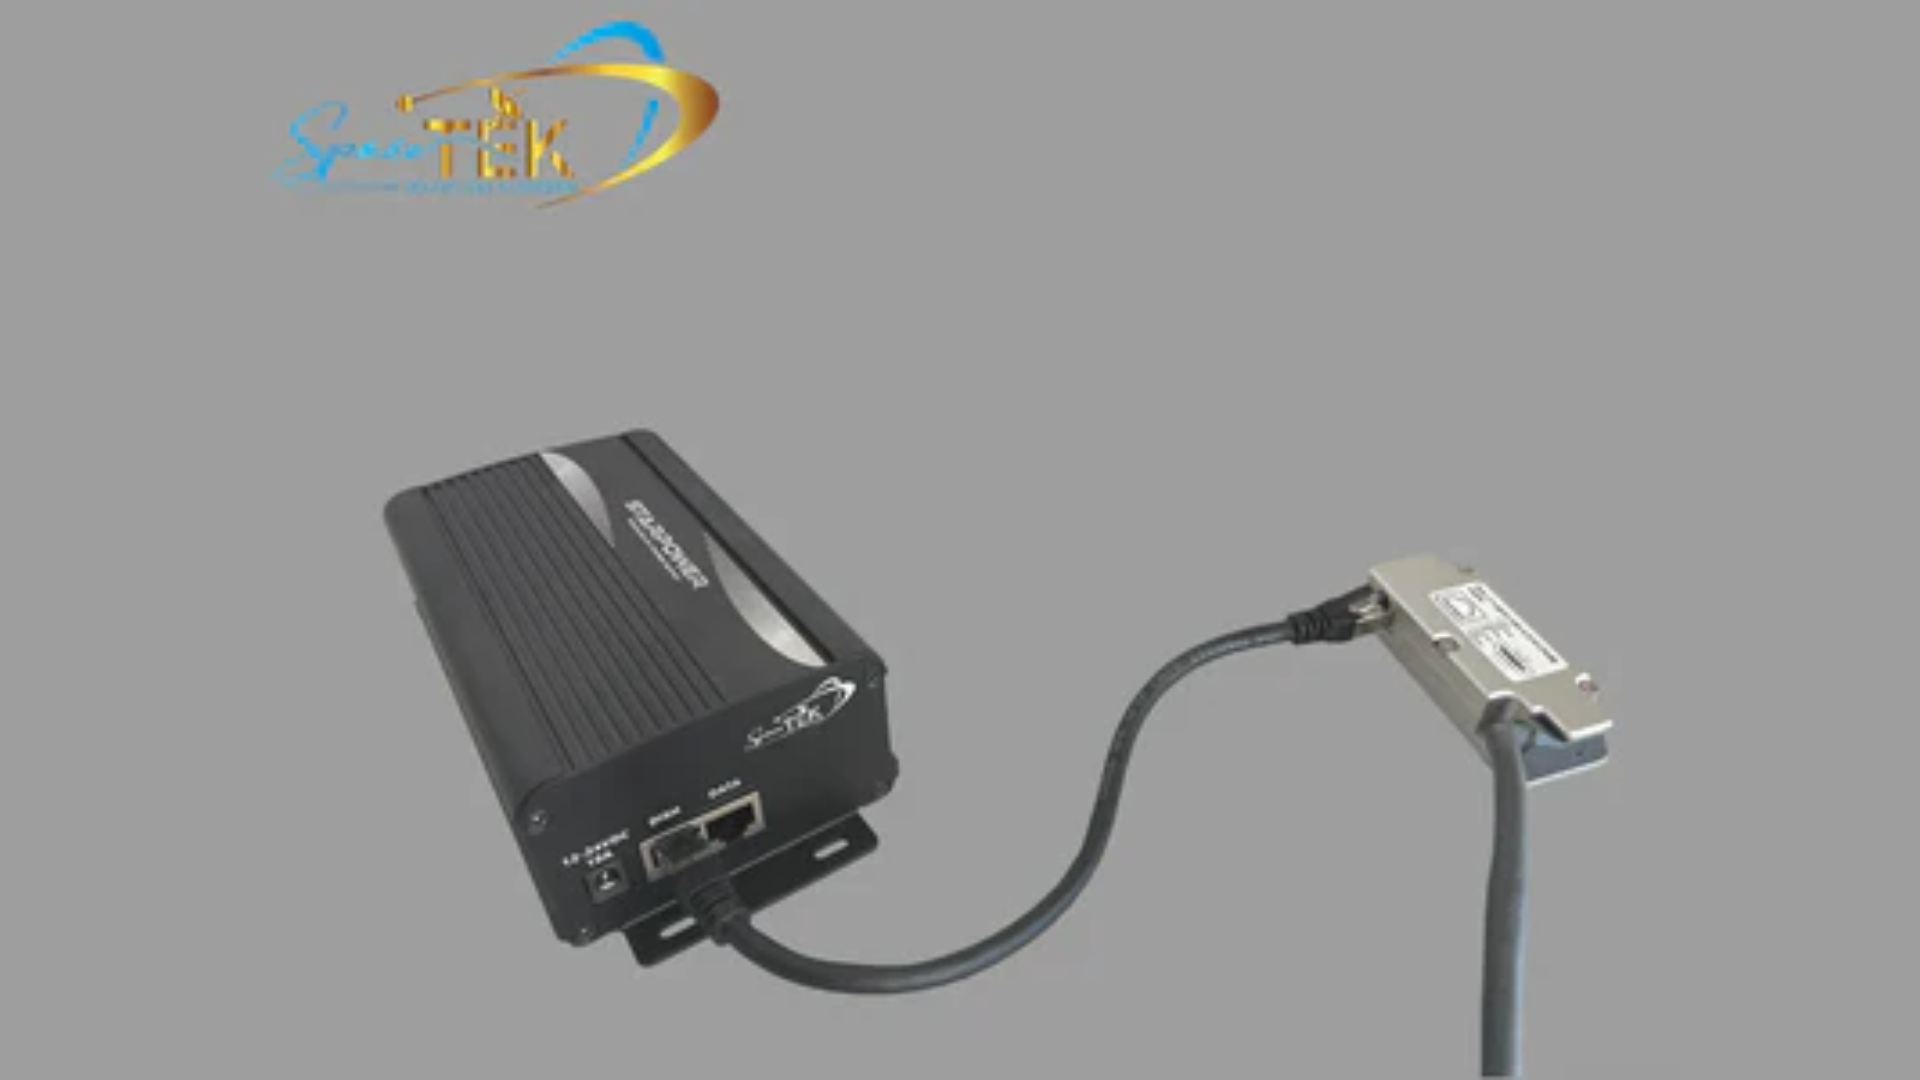
The wired approach works brilliantly for distances up to 100 metres. Start by ordering the Starlink Ethernet adapter, then run CAT6 direct burial cable through proper conduit between your buildings. Once that's in place, install an access point in your second building and you're sorted. This method gives you the most weather-resistant and stable connection possible—perfect for Australia's unpredictable climate.
For longer distances where running cable isn't practical, wireless bridges offer an excellent alternative. These point-to-point systems can span from 50 metres to several kilometres, requiring only clear line-of-sight between buildings. While they need minimal cabling, that unobstructed view between antennas is absolutely essential for reliability.
As many network specialists confirm, "A wireless bridge is the most reliable way to link separate buildings over distances from 10 metres to several kilometres." This makes them particularly valuable for sprawling rural properties.
Outdoor PoE Access Points
For covering your yard or the immediate surroundings of your home, outdoor-rated Power over Ethernet (PoE) access points are your best mate. These sturdy units are built to withstand everything the harsh Australian elements can throw at them.
The beauty of PoE technology is its flexibility—you don't need a power outlet near your installation point, which opens up many more mounting options. For best results, position these access points high on external walls where they can broadcast a strong signal across your outdoor spaces without obstruction.
Weatherproof Cabling is Essential
Anyone who's lived through an Australian summer or wet season knows our climate demands properly protected equipment. When it comes to outdoor cabling, cutting corners simply isn't worth it:
Use UV-resistant, direct burial rated Ethernet cable to withstand the harsh sun and potential moisture. Where possible, install cables in proper conduit to prevent damage from wildlife, machinery, or the elements.
Don't forget to include drip loops wherever cables enter buildings—this simple bend in the cable prevents water from following the line inside. For areas prone to electrical storms, lightning protection is a wise investment that could save your entire system.
With these approaches, you can extend your Starlink connection to every corner of your property, ensuring you stay connected no matter where your day takes you on the land.
Perfect the Dish Position for Remote Australia
Proper dish positioning is critical for reliable Starlink performance, especially in remote Australian locations where service technicians aren't readily available.
Dish Placement Checklist
When installing your Starlink dish, ensure:
- Clear Sky View: The dish needs an unobstructed view of the sky from horizon to horizon
- Minimum 100° Field of View: Starlink satellites move across the sky, requiring a wide viewing angle
- Liftd Installation: Roof mounts or poles often provide better clearance than ground-level tripods
- Obstruction Scan: Use the Starlink app's obstruction checker before finalizing installation
- Gen 3 Considerations: The newer, smaller dishes have slightly different optimal positioning requirements
"The Starlink dish covers about 3,200 sq. ft. under ideal conditions, but real-world coverage can be significantly less due to walls and obstructions," notes industry research.
Mounting for Harsh Aussie Weather
Australian conditions present unique challenges for satellite dish installations:
- Cyclonic Winds: In northern regions, ensure mounts are rated for high wind loads
- Extreme Heat: Position to allow airflow around the dish to prevent overheating
- Corrosion Resistance: Coastal areas require marine-grade materials to prevent salt damage
- Wildlife Protection: In some areas, protective measures against curious birds and animals may be necessary
SpaceTek Australia's mounting solutions are specifically designed with these challenges in mind, using rust-resistant steel and robust designs that withstand everything from Top End tropical storms to Nullarbor dust.
Our adjustable mounts allow for precise positioning, ensuring your dish maintains the optimal angle for your specific location in Australia.
Reduce Interference & Optimise Your Home Network
Even with perfect dish positioning, interference within your home network can significantly impact performance.
Router Height and Positioning
As mentioned earlier, router height dramatically affects coverage. For optimal results:
- Place your router at least 1-2 metres off the ground
- Position centrally in your most-used living space
- Keep away from walls, especially those containing plumbing or electrical wiring
- Avoid placement near large metal objects or appliances
Common Interference Sources in Australian Homes
Several common features in Australian homes can interfere with WiFi signals:
- Metal Roofing: Extremely common in Australia and can reflect or block signals
- Corrugated Iron Walls: Found in many rural structures and acts as a Faraday cage
- Stone or Brick Construction: Thick walls in older homes significantly reduce signal penetration
- Solar Inverters: Can generate electromagnetic interference
- Home Appliances: Microwave ovens, refrigerators, and air conditioners can all create interference
Split 2.4GHz / 5GHz Bands for Range vs Speed
The Starlink router supports both 2.4GHz and 5GHz WiFi bands, each with different characteristics:
-
2.4GHz Benefits:
- Longer range, better penetration through walls
- Compatible with older devices
- Better for outdoor coverage
- Ideal for IoT devices (smart home gadgets)
-
5GHz Benefits:
- Faster speeds (up to several times faster)
- Less crowded spectrum, especially in rural areas
- Lower latency for gaming and video calls
- Better for high-bandwidth applications like 4K streaming
To split these bands in the Starlink app:
- Open the Starlink app
- Go to Settings > Network
- Toggle "Split 2.4/5GHz Networks"
- Name each network distinctly (e.g., "HomeNet" and "HomeNet-5G")
This allows you to connect each device to the most appropriate band for its needs and location.
Use the Starlink App for Live Signal Tests
The Starlink app includes several diagnostic tools that can help identify and resolve connectivity issues:
- Speed Test: Measures both your connection to the internet and between your device and router
- Obstruction Viewer: Shows areas where your dish's view may be blocked
- Statistics: Provides detailed information on outages, latency, and throughput
For best results, regularly check these tools and run tests at different times of day to identify patterns in performance.
Extend Coverage with Mesh & Cabling
When your Starlink signal doesn't quite reach every corner of your property, you don't have to live with those frustrating dead zones. For sprawling Aussie homesteads or houses with thick walls, extending your network with mesh nodes or proper cabling can make all the difference.
Starlink Mesh Setup in Minutes
Adding a Starlink Mesh node is hands-down one of the easiest ways to boost your coverage without any technical headaches. Think of these nodes as friendly signal boosters that work seamlessly with your existing Starlink equipment.
Setting up your mesh network is refreshingly simple:
First, grab yourself a Starlink Mesh node (or repurpose an older Gen 2 router if you've upgraded). Position it no more than 1-2 rooms away from your main router – any further and they might struggle to communicate properly. The sweet spot is usually in a hallway or on a shelf midway between your main router and that troublesome dead zone.
Once you've found the perfect spot, just plug in your node and wait for the LED to indicate it's ready for action. Open up your Starlink app, tap to add and pair the mesh node, and watch as your network diagram shows the expanded coverage. The whole process typically takes less than five minutes.
For larger homes with multiple dead zones, you can add several mesh nodes to create a blanket of connectivity. Just remember that each node should be within range of either your main router or another mesh node to maintain that strong signal chain.
What's brilliant about the Starlink Mesh system is how it intelligently manages your connection. As you move around your property, your devices will automatically connect to the strongest signal without you having to manually switch networks. This means seamless video calls as you wander from the kitchen to the back verandah.
For more information about Starlink Mesh, visit the official Starlink support page.
Hard-wiring to Another Building
For many rural Australians, connecting the main house to outbuildings like workshops, sheds, or granny flats is essential. In these cases, a wired connection often provides the most reliable solution – especially when those buildings are used for work or contain important equipment.
Start with the Starlink Ethernet Adapter – this little device connects to your router and gives you the physical port needed to run cables. From there, you'll need to run appropriate cabling between buildings. For distances up to 100 metres, CAT6 cable is your best mate.
When running cables outdoors in our harsh Australian conditions, always use the right type for your installation. For underground runs, direct burial cable in conduit protects against moisture and curious critters. If you're going overhead, make sure you use UV-resistant, messenger-wire supported cable that can withstand our scorching summer sun and winter storms.
At the receiving end, install a PoE (Power over Ethernet) switch if needed, and add an access point in your secondary building to broadcast WiFi throughout the space.
There are a few important considerations that are uniquely Australian when it comes to these installations:
Lightning protection is absolutely crucial – our summer storms can be fierce, and proper surge protection could save your entire system. Make sure all outdoor connections are properly weatherproofed against our tropical downpours and dust storms. Keep cables at safe distances from power lines, and consider some form of wildlife protection – those cheeky possums and cockatoos have a particular fondness for chewing through exposed cables!
For properties where buildings are spread further apart (beyond 100 metres), a point-to-point wireless bridge becomes your best option. These specialised devices create a wireless link between buildings, effectively extending your network without kilometres of cabling. They require clear line-of-sight between buildings, but can span impressive distances while maintaining solid connection speeds.
With the right approach to extending your Starlink network, even the most remote homestead can enjoy reliable connectivity throughout the property – from the main house to the furthest paddock shed.
Troubleshoot Slow Speeds & Dead Zones
Let's face it—even with the perfect setup, your Starlink connection might occasionally give you grief. The good news is that most issues have straightforward solutions you can tackle yourself before calling in the professionals.
Common Causes & Fast Fixes
Network congestion tends to be most noticeable during those peak evening hours between 6-11 PM when everyone in your area is streaming their favourite shows. If you're consistently experiencing slowdowns during these times, try running speed tests at different hours to spot patterns. Sometimes, simply shifting your data-heavy activities (like downloading large files or system updates) to off-peak hours can make a world of difference.
Those sudden heavy downpours we get in Australia can temporarily affect your Starlink performance. Don't panic—weather-related issues typically resolve themselves once the storm passes. Your Starlink system is designed to handle our weather, but it's worth ensuring your dish is securely mounted to prevent it from shifting position during those gusty winds that often accompany our summer storms.
Our harsh Australian environment can be tough on equipment. Take a moment to inspect your cables for damage from curious wildlife, relentless UV exposure, or physical stress. Those pesky cockatoos and possums have been known to find Starlink cables particularly interesting! Replace any damaged cables promptly, and consider adding extra protection in high-risk areas.
During our scorching summer days, your Starlink equipment might engage in thermal throttling—reducing performance to prevent overheating. Make sure your dish has adequate airflow, and if it's positioned in direct sunlight all day, consider solutions that provide shade without blocking the signal path.
Often, the simplest fix is the most effective. Try a power cycle by unplugging your equipment for about 30 seconds before reconnecting. Check for firmware updates in the Starlink app, and if you're still experiencing persistent issues, a factory reset might be your best bet—just remember this will erase your custom settings.
When to Call in Professional Help
While most Starlink issues can be resolved with a bit of DIY troubleshooting, some situations call for professional expertise:
Complex cabling requirements often benefit from professional installation—especially when dealing with long-distance runs between buildings, installations requiring trenching or aerial cabling, or connecting multiple buildings. Getting these installations right the first time saves headaches down the track.
If you need high mast installations to clear those tall gum trees on your property, consider professional help. Mounting dishes above 3 metres often requires specific expertise, especially when guy wires, reinforcement, or lightning protection systems are needed for safety and stability.
For larger properties requiring multi-unit mesh setups, professional configuration can ensure optimal coverage. This is particularly important for commercial installations with specific coverage requirements or when integrating with existing network infrastructure.
At SpaceTek Australia, we understand the unique challenges of rural Australian installations. We can recommend qualified installers familiar with our mounting systems and Starlink equipment for these more complex situations, ensuring your setup is both safe and effective for the long term.
Frequently Asked Questions about Boosting Starlink
Does weather really affect my speeds?
Yes, weather can impact your Starlink performance, though much less dramatically than traditional satellite internet. When those heavy tropical downpours roll across North Queensland or storm clouds gather over your property, you might notice temporary dips in speed or slight increases in latency.
The good news is that these weather effects are typically brief. Your Starlink system bounces back quickly once conditions clear up. Unlike the old satellite services where rain meant no internet for hours, Starlink's LEO satellite network provides remarkable resilience.
In our Australian context, different weather conditions affect service in different ways:
- Those intense tropical downpours up north might cause brief interruptions
- Dust storms sweeping across central regions can sometimes degrade performance
- Coastal fog has surprisingly minimal impact compared to heavy rain
Most users report that even during moderate rain, they maintain usable connections—just perhaps not quite fast enough for that 4K Netflix stream during the heaviest downpours.
Can I use third-party extenders with Starlink?
Absolutely you can—with a few important considerations. While Starlink's own mesh system offers the most seamless integration, plenty of Aussie users successfully pair their Starlink with third-party WiFi extenders, mesh systems, and access points.
The key requirement is Starlink's Ethernet Adapter, which you'll need to connect most third-party equipment. Once that's sorted, you have several options:
Connect your third-party router or mesh system to the Starlink router using the Ethernet Adapter, keeping both systems active. Or for a cleaner setup, put the Starlink router in bypass mode if you're using a full replacement router.
Many rural Australian users report excellent results with TP-Link Deco mesh systems for whole-home coverage, while WAVLINK outdoor WiFi extenders work brilliantly for stretching your signal to the shed or paddock. Just be sure to follow the manufacturer's instructions for your specific equipment.
What WiFi channel is best in crowded suburbs?
In those densely packed Australian suburbs where everyone and their dog has WiFi, channel selection can make a surprising difference to your performance.
For 2.4GHz networks (which travel further but more slowly), stick with channels 1, 6, or 11. These three don't overlap with each other, reducing interference. The Starlink app or a free WiFi analyser app can help you identify which of these three is least congested in your neighbourhood. Avoid letting your router auto-select, as it sometimes makes poor choices.
For 5GHz networks (faster but shorter range), the higher channels (149-165) often perform better in Australian settings. If you're technically inclined, the DFS channels (52-144) are typically less crowded but might not work with older devices.
The good news for our rural mates is that channel congestion is rarely an issue when your nearest neighbour is a kilometre away! Out in the bush, you can generally stick with default settings and enjoy clearer airwaves than city folk could ever dream of.
Optimal channel selection can be the difference between smooth video calls and frustrating freezes, especially if you're in a townhouse or apartment with WiFi signals competing from every direction.
Starlink Accessories Built for Remote Australia
Living in the Australian outback comes with its own set of challenges, and your Starlink setup deserves equipment that can handle everything from scorching summers to tropical downpours. At SpaceTek Australia, we've developed our range of accessories specifically with these harsh conditions in mind.
Our products aren't just compatible with Starlink systems—they're purpose-built for the unique demands of the Australian environment, where replacement parts might be days or weeks away and reliability isn't just convenient, it's essential.
Custom Mounting Solutions
When it comes to securing your Starlink dish in remote Australia, not just any mount will do. Our corrugated iron roof mounts have been engineered specifically for the most common roofing material across rural Australia, with designs that work with the natural contours rather than against them.
For properties with varying roof pitches or seasonal adjustments, our adjustable tilt brackets allow you to fine-tune your dish position for optimal satellite connection without climbing back on the roof every time.
Need to get your dish away from buildings or trees? Our heavy-duty pole mounts provide the height and stability needed for clear line-of-sight in even the most challenging terrain. And for temporary setups or locations where roof mounting isn't practical, our ground mounts offer rock-solid stability without permanent installation.
What truly sets our mounts apart is the material quality. Every SpaceTek product is manufactured using high-grade, rust-resistant steel that stands up to everything from Top End humidity to desert heat without corroding or weakening over time.
Cable Management Systems
The harsh Australian sun can destroy exposed cables in a matter of months, turning a perfect installation into a troubleshooting nightmare. Our UV-resistant cable conduit systems shield your valuable connections from intense sunlight while still allowing the flexibility needed for proper installation.
During those sudden summer downpours, our weatherproof cable entry points prevent water from finding its way into your home or outbuildings, protecting both your Starlink equipment and your property from moisture damage.
Even cyclonic winds are no match for our secure mounting clips, which keep cables positioned exactly where they should be regardless of weather conditions. These simple additions can mean the difference between continuous connectivity and frustrating outages when you need your connection most.
Additional Accessories
Completing your remote Starlink setup means thinking about protection from all angles. Our lightning protection kits provide essential safeguards in storm-prone regions, helping to prevent costly equipment damage during Australia's dramatic electrical storms.
For areas with frequent debris or wildlife visitors, our dish covers offer protection while carefully maintaining signal quality—a balance that generic covers often fail to achieve.
And in locations where equipment security is a concern, our tamper-resistant security fasteners prevent unauthorised removal of your valuable Starlink components, giving you peace of mind whether you're on-site or away.
What makes SpaceTek different is our testing process—every product in our range has been developed and field-tested under actual Australian conditions, not just in a laboratory. We understand that when you're 500 kilometres from the nearest hardware store, you need equipment that works without fail, season after season.
Our commitment to quality means you'll spend less time troubleshooting and more time enjoying the reliable internet connection that Starlink promises, even in the most remote corners of our sunburnt country.
Reliable Internet Starts with the Right Accessories
When asking how can I boost my Starlink WiFi signal, many outback users find it's not just about tweaking settings or moving your router—it's about creating a complete system that works reliably in your unique corner of Australia.
From the rugged Kimberley to the windswept Nullarbor, each Australian environment presents its own challenges. The way you mount your dish, position your router, and protect your equipment all play crucial roles in your internet experience.
For those in remote Australia, Starlink has been nothing short of revolutionary. Communities that once relied on patchy mobile broadband or expensive traditional satellite now have access to speeds that city-dwellers would envy. But to truly open up Starlink's potential, proper installation and thoughtful optimisation are essential.
At SpaceTek Australia, we've heard countless stories from station owners, remote workers, and rural families who transformed their connectivity with the right accessories. Our mounting solutions are born from understanding the unique Australian challenges—from cyclonic winds in the north to scorching summer heat that can literally melt inferior hardware.
Our rust-resistant, Australian-made mounts are designed specifically for our harsh conditions. They're built to handle everything from tropical downpours to dust storms, ensuring your dish stays perfectly positioned through it all. After all, when the nearest technician is hundreds of kilometres away, reliability isn't just convenient—it's essential.
The beauty of a well-designed Starlink setup is how it simply works, day after day, without fuss. No more climbing on the roof to readjust after a windstorm. No more signal degradation from cables damaged by our harsh UV rays. Just consistent, reliable internet that lets you get on with life.
By following the guidelines we've shared and using quality components designed specifically for Australian conditions, you can dramatically boost your Starlink WiFi signal and enjoy rock-solid internet—whether you're running a remote business, homeschooling the kids, or simply staying connected with family across the country.
For more information on our Starlink-compatible mounting solutions and accessories, visit our website or reach out to our team. We're not just selling hardware—we're sharing expertise gained from hundreds of successful installations across the most challenging locations in Australia.
After all, in the outback, good internet isn't just a luxury—it's a lifeline. Let's make sure yours is as strong and reliable as possible.
Leave a comment
This site is protected by hCaptcha and the hCaptcha Privacy Policy and Terms of Service apply.