Installing Starlink on roof offers a cutting-edge solution for those living in rural and remote areas where traditional internet services fall short. If you're looking for immediate answers, here's a quick snapshot of what you'll need:
- Clear sky view: Locate a spot with the least obstructions to maximize signal strength and ensure stable internet connectivity.
- Mounting hardware: Choose non-penetrating, corrosion-resistant mounts designed for metal roofs to protect your roof’s integrity.
- Starlink app: Use the app to find the optimal spot for installation, minimizing interference from trees or structures.
Staying connected is crucial, yet many find themselves isolated due to connectivity limitations. Starlink, developed by SpaceX, is changing this narrative. Through a constellation of low Earth orbit satellites, Starlink delivers high-speed internet almost anywhere on the planet.
For those like Remote Resident Rob, who often face unreliable connections and installation challenges, Starlink provides an accessible and durable option. Whether it's streaming, online work, or staying connected with loved ones, Starlink makes it possible, regardless of where you reside.
As you start on installing Starlink on roof, you'll not only improve your internet experience but also accept the future of digital connectivity. Stay tuned as we guide you through this simple process to bring the world to your doorstep.

Why Choose Roof Installation for Starlink?
Installing Starlink on your roof is the key to unlocking the full potential of satellite internet, especially in rural or remote areas. Here's why you should consider this option:
Clear Sky View
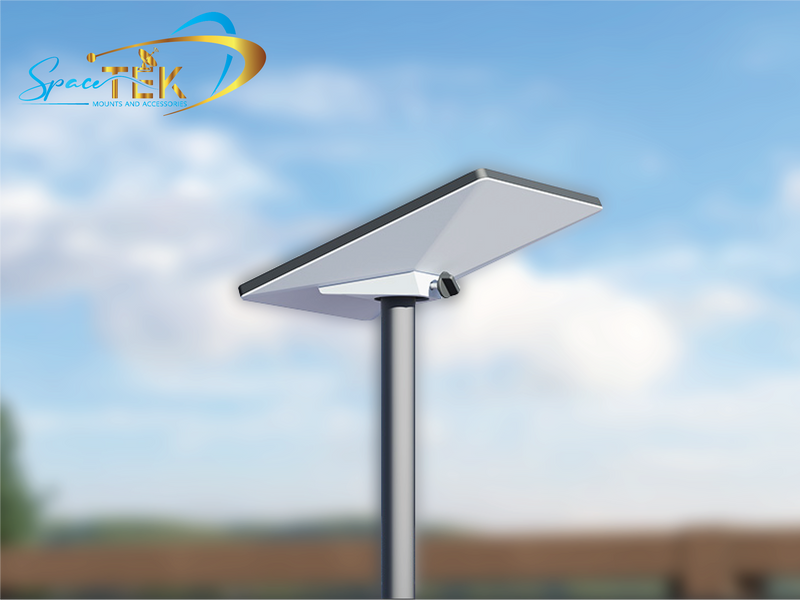
For Starlink to function optimally, a clear sky view is essential. The dish needs an unobstructed line of sight to the satellites zooming overhead. Placing the dish on your roof lifts it, minimizing potential obstructions like trees, buildings, or other structures. This clear vantage point ensures your internet connection is both stable and fast.
Avoiding Obstructions
Obstructions can severely impact your Starlink experience. Trees, poles, or even your own home’s structure can block the signal. By installing Starlink on your roof, you significantly reduce the chances of such interruptions. The Starlink app is a handy tool to scan for obstructions before you even begin installation. It helps pinpoint the best spot on your roof, where the dish can have an unhindered view of the sky.
Lifted Location
A lifted location like a roof offers several advantages. Not only does it ensure a better signal by avoiding ground-level obstacles, but it also protects your dish from accidental damage. This lifted position keeps the dish safe from curious pets or playful kids who might otherwise tamper with it.
Moreover, being high up means the dish is less likely to be affected by ground-level weather disturbances like snow drifts or heavy rain puddles. This helps maintain a consistent connection even in adverse weather conditions.
Real-Life Example
Consider the case of Curtismacc, a dedicated Starlink user who wanted a seamless experience without the hassle of climbing onto his roof repeatedly. By opting for a roof installation, he ensured his Starlink dish had a clear, unobstructed view of the sky, enhancing his internet reliability significantly. Whether parked under a tree or needing a quick setup on the ground, he had the flexibility to adjust without compromising on performance.
In summary, roof installation for Starlink is not just about getting a signal. It's about ensuring that signal is as strong and reliable as possible, providing you with the connectivity you need, when you need it.
Next, we'll dive into the step-by-step guide to help you get started with your installation.
Installing Starlink on Roof: Step-by-Step Guide
Preparing for Installation
Before you start installing Starlink on your roof, it's crucial to prepare adequately. Begin by downloading the Starlink app, which is an indispensable tool for this process.
Obstruction Scan: Use the app to perform an obstruction scan. This feature helps you find the best spot on your roof by identifying any potential obstructions that could interfere with your satellite signal. Trees, buildings, or other structures can block the line of sight needed for optimal performance. The app will guide you to the clearest part of the sky, ensuring a stable and fast connection.
Best Location: Once the obstruction scan is complete, use the app's guidance to pinpoint the ideal location on your roof. The higher and clearer the view, the better your Starlink will perform.
Mounting Options for Starlink
Choosing the right mounting option is essential for a secure and effective installation. Here are some popular options:
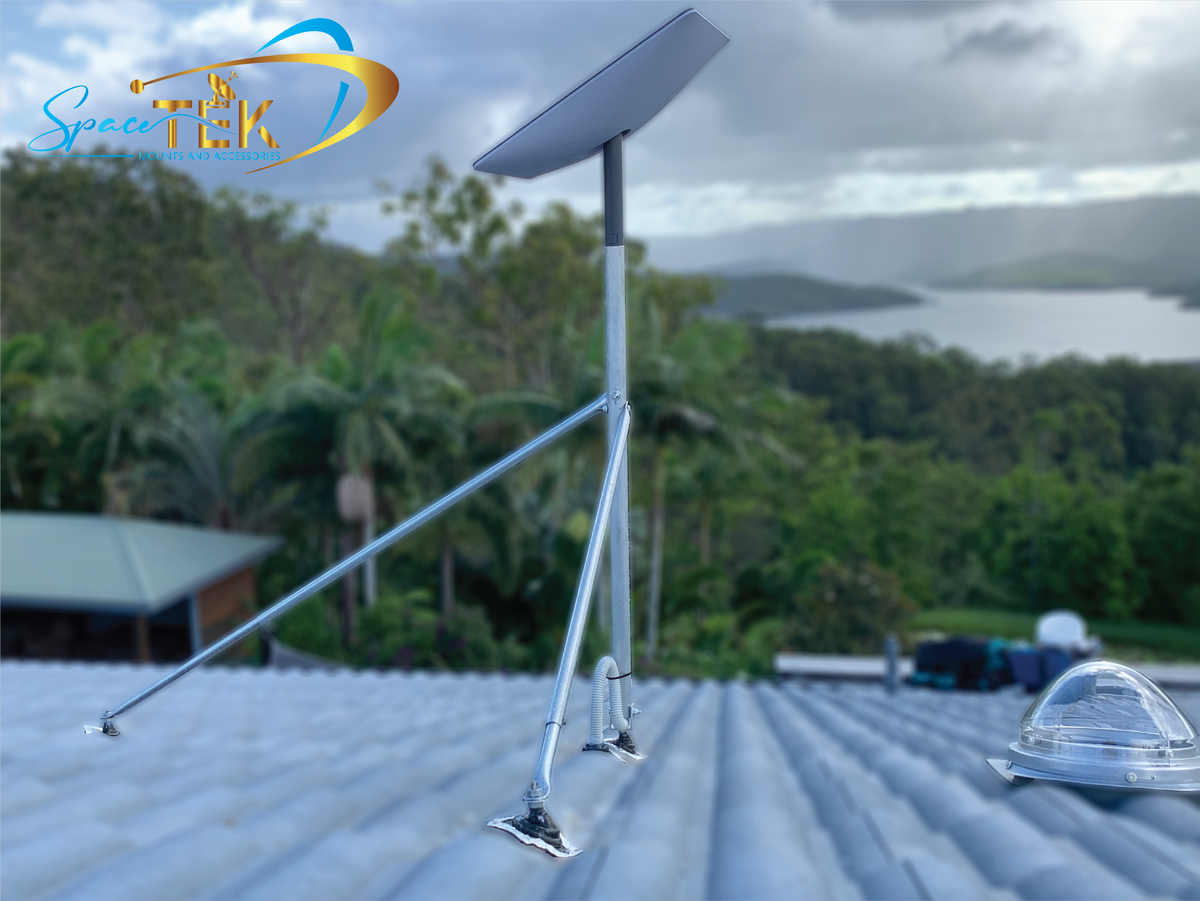
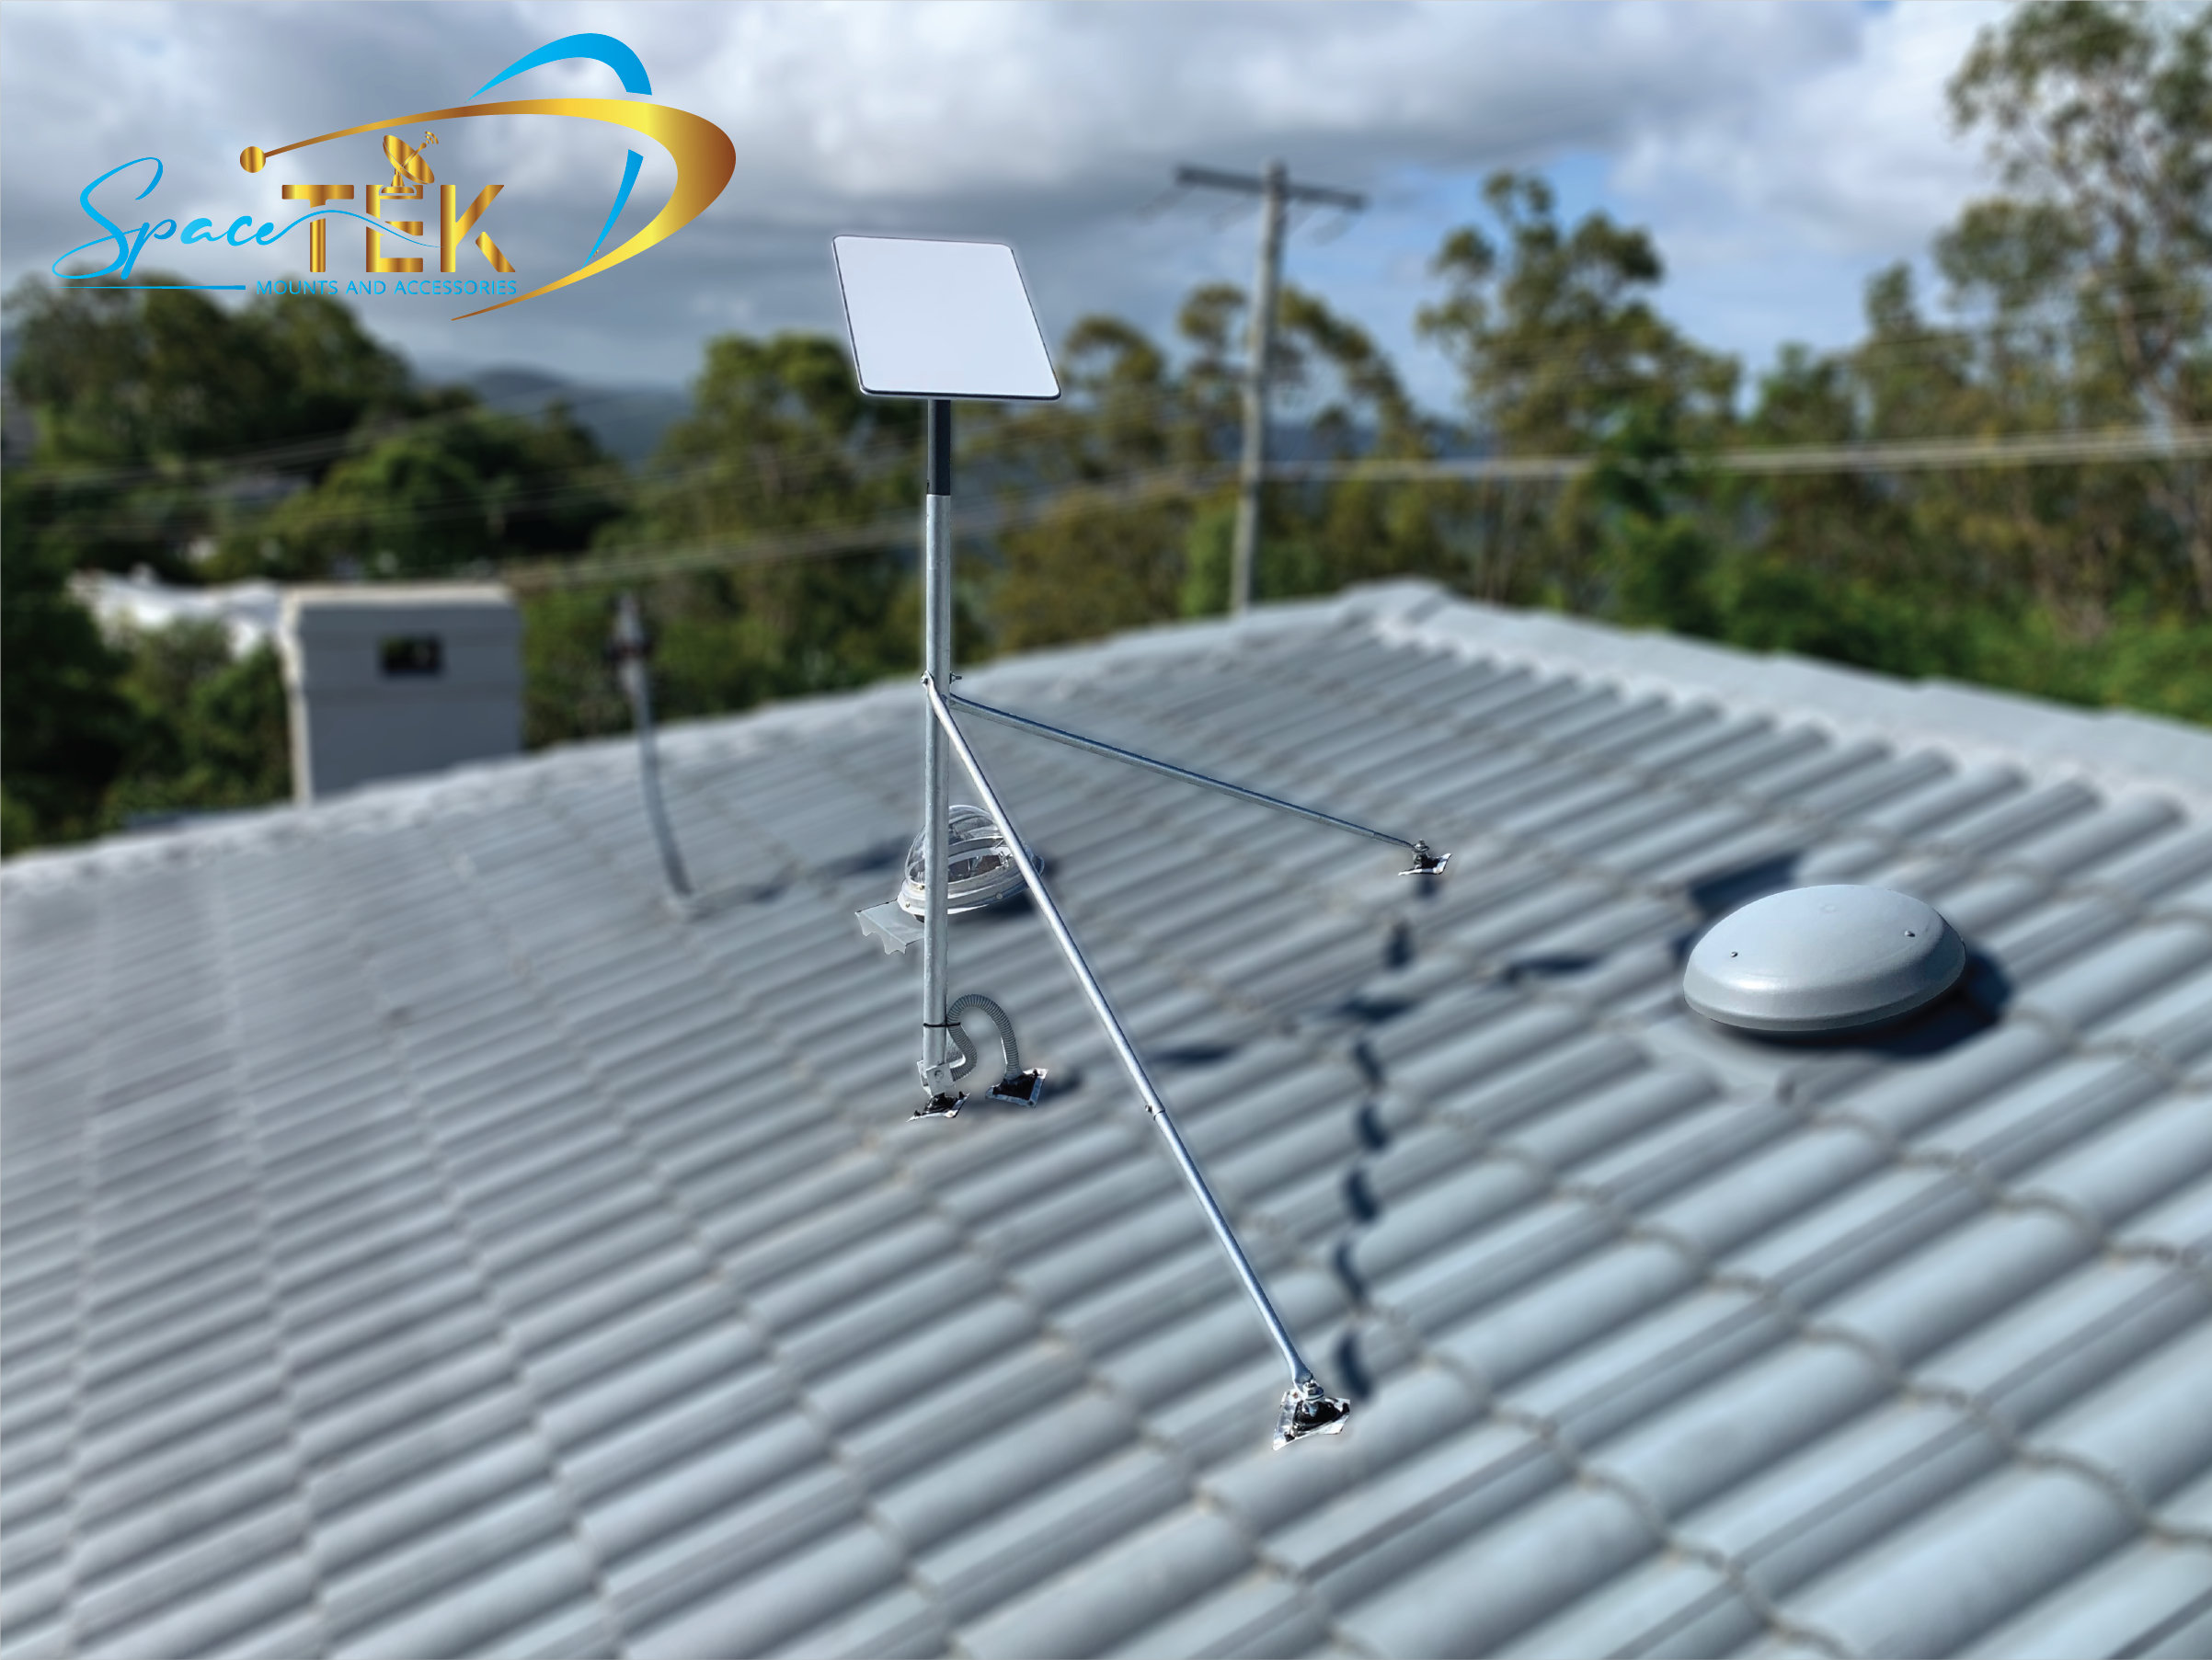
Roof Mounting Kits: These kits are designed to provide a stable base for your Starlink dish. They typically include all necessary hardware for a straightforward installation. Selecting a kit that matches your roof type ensures a snug fit and optimal performance.
Non-Penetrating Clamps: If you're concerned about maintaining your roof's integrity, consider using non-penetrating clamps. These clamps attach securely without the need to drill holes, preventing potential leaks or damage.
Secure Attachments: It's vital to ensure your dish is firmly attached to withstand harsh weather conditions. Avoid using ballast like wood or concrete blocks, as these can damage metal roofs by trapping moisture and causing corrosion.
Installing Starlink on Metal Roofs
Installing on a metal roof requires special considerations to maintain the roof's integrity and prevent moisture issues.
Metal Roof Integrity: When installing on a metal roof, prioritize using non-corrosive materials. This prevents rust and extends the lifespan of both your roof and the mounting equipment.
Non-Corrosive Materials: Opt for mounts made of materials that won't corrode over time. This is crucial to avoid compromising your roof's protective coatings.
Moisture Prevention: Ensure your installation setup includes a double seal against moisture intrusion. This helps prevent leaks and maintains your roof's weather integrity.
By following these steps and choosing the right equipment, you can enjoy a seamless Starlink experience with minimal maintenance.
Next, we'll address some frequently asked questions about installing Starlink on your roof.
Frequently Asked Questions about Installing Starlink on Roof
Can Starlink be mounted on the roof?
Absolutely, Starlink can be mounted on the roof, and it's often the best choice for optimal connectivity. A roof installation provides a clear sky view, which is crucial for maintaining an uninterrupted connection with the satellites.
The Starlink app is your go-to tool here. It helps you determine the best location by performing an obstruction scan, ensuring that your dish has a clear line of sight to the sky. This is particularly important in areas with lots of trees or buildings.
How much does it cost to install Starlink on a roof?
In Australia, the Standard Starlink plan is priced at $139 per month. Additionally, you will incur a one-time hardware cost of $549, plus $30 for shipping. If you opt for professional installation, expect additional fees. This service ensures your dish is securely mounted and optimally positioned, which is beneficial if you're not comfortable with DIY installations.
The cost of professional installation varies based on location and setup complexity, but expert assistance can offer peace of mind and help prevent future problems.
What direction should Starlink face?
For the best performance, your Starlink dish should face the part of the sky with the clearest view, free from obstructions like trees or buildings. The Starlink app is instrumental in guiding you to the ideal direction. It uses augmented reality to show you the clearest part of the sky, ensuring your dish is positioned for the strongest signal. If you're uncertain, professional installation can provide peace of mind. Experts can ensure your dish is aligned correctly, maximizing your internet speed and reliability.
Make the Most of Your Starlink Setup
In conclusion, installing Starlink on your roof can significantly improve your internet connectivity, especially in remote areas. With SpaceTek Australia's custom mounting kits, you can ensure a secure and stable installation that withstands various weather conditions. Our mounts are crafted from high-quality, rust-resistant materials, designed to provide optimal performance for your Starlink setup.
Choosing a roof installation not only offers a clear sky view but also improves the reliability of your connection. Our solutions are custom to be compatible with Starlink's self-installer kits, making the installation process straightforward and efficient. With our expertise, you can open up the full potential of your Starlink investment, enjoying high-speed internet with minimal interruptions.
For more information on how our custom mounting kits can improve your Starlink experience, visit our Starlink Mounting Hardware Guide. Let us help you achieve the best possible connection, no matter where you are in Australia.
Leave a comment
This site is protected by hCaptcha and the hCaptcha Privacy Policy and Terms of Service apply.