
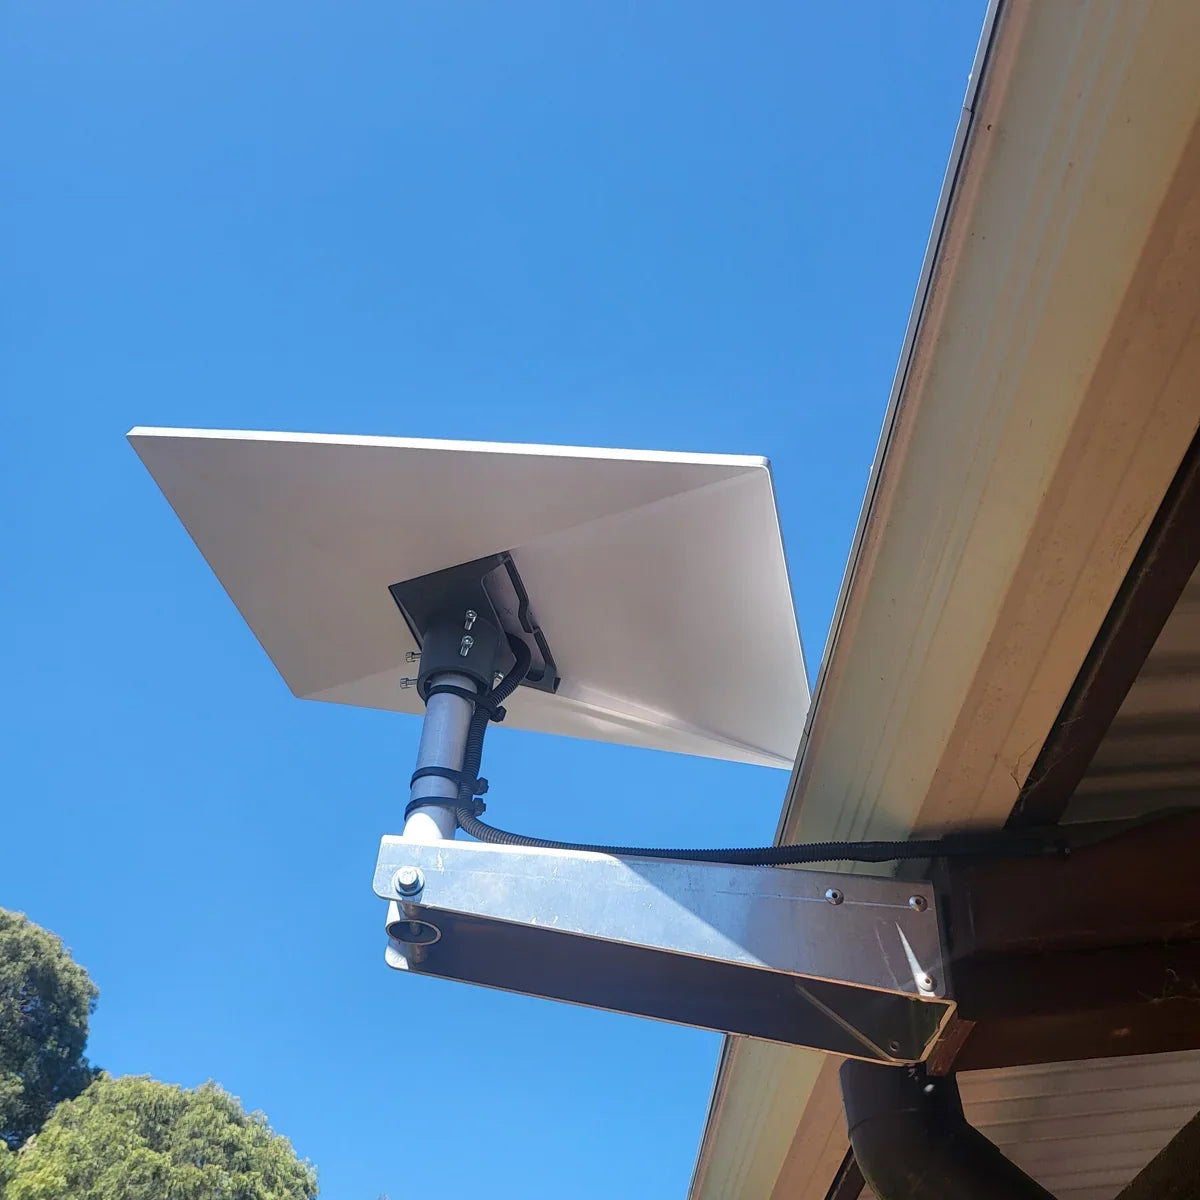
What is Starlink Gen 2 and what does it need for a practical setup?
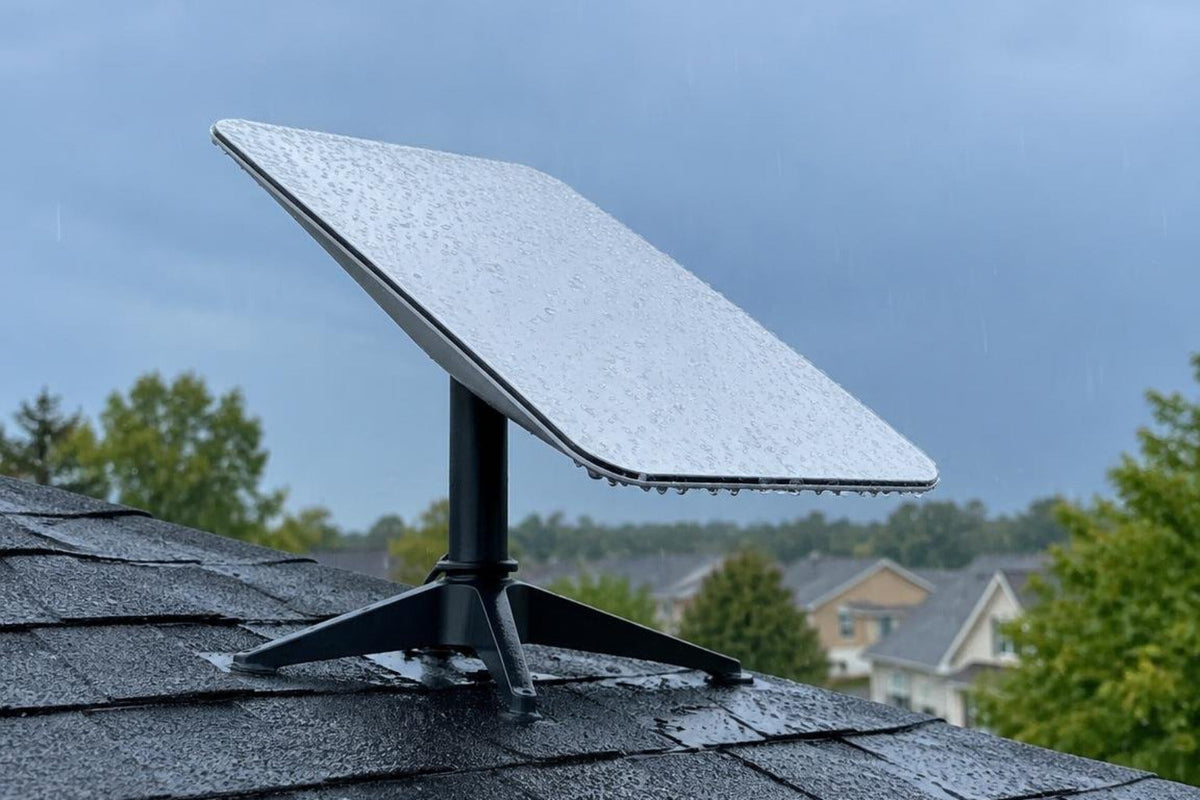
Starlink Gen 2 is the rectangular, motorised Standard Actuated dish. It can still be a practical option for home, caravan, RV and remote use when the dish mount, cable route and power arrangement match the Gen 2 hardware. The priority is not satellite engineering: it is choosing model-specific accessories that fit the mast, protect the cable and suit the installation location.
For a fixed installation, start with the roof material, access for installation and the clearest available view of the sky. For a touring setup, add safe storage, removable placement and protected cable routing to the decision. The dish can position itself during start-up, but the chosen location still needs a clear view and a stable mounting point.
Hi, I'm Andrew Ziogas, managing director at SpaceTek Australia, and I draw on my technology consulting background when assessing practical Starlink Gen 2 setups. I focus on how the dish, cable path, mounting position and power arrangement work together, using current product information and official setup guidance rather than assumptions between Starlink generations.
What Gen 2 specifications matter when choosing mounts and accessories?
The most important Gen 2 detail is the rectangular actuated dish and its model-specific mast stem. The mast shape, locking button and cable route determine whether a dish mount or accessory is suitable. A similar-looking product is not enough: the listing needs to state Starlink Gen 2 or Dishy Rectangle Gen 2 compatibility.

What are the practical Gen 2 dish details?
For day-to-day setup, the Gen 2 terminal has a few traits worth checking before buying or relocating accessories:
- A rectangular dish profile that needs a stable, compatible mounting point.
- An actuated base that moves the dish during initial positioning.
- A Gen 2 mast stem with a spring-loaded push-button that must match the dish mount.
- A proprietary cable connection that needs a route free from strain, sharp bends and crush points.
- A separate indoor router, so the dish location, cable entry point and router location should be considered together.
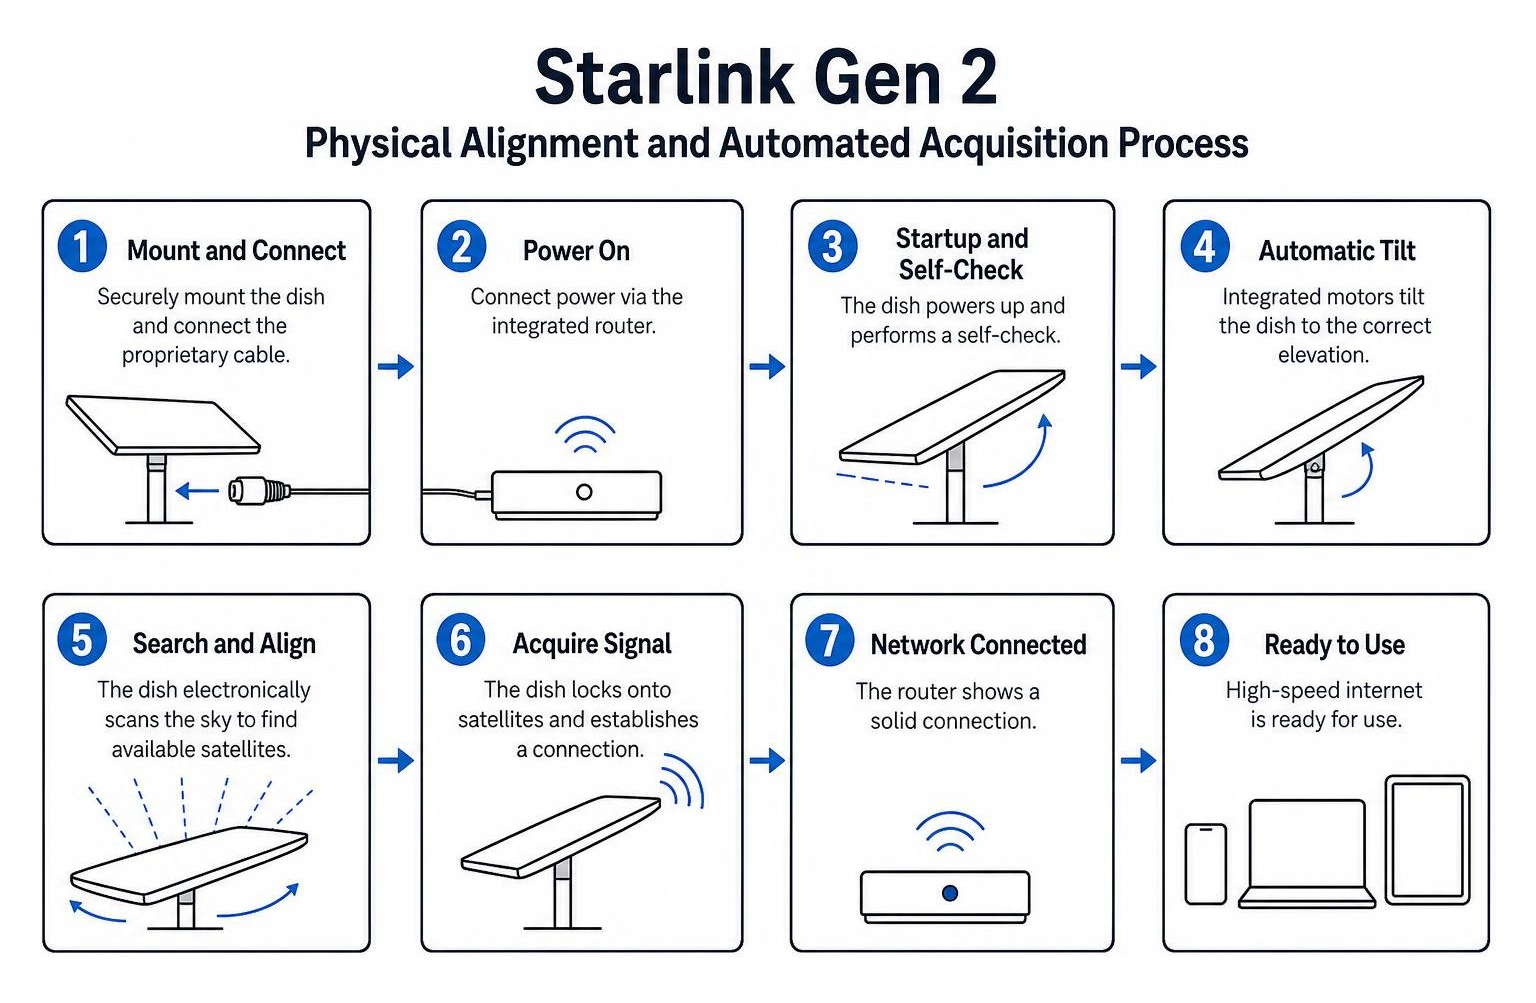
A roof, wall or eave position can be practical when it provides sky visibility and a tidy cable route. For a caravan or portable setup, the same basics apply, but removability and storage matter more. Before changing the physical setup, check Starlink’s official installation support guidance for the current handling and placement advice for the service kit.
What should you know about SPX cabling?
SPX is the proprietary Gen 2 connector style used between the dish and the standard Starlink router. In plain English, Gen 2 cabling is not a standard Ethernet lead. That makes cable care part of the installation rather than an afterthought.
When planning a route, avoid placing the cable where doors, slide-outs, roof edges or stored gear can pinch it. Leave enough slack for normal movement, but do not leave loose loops that can snag during travel. If a cable, router or power arrangement is being replaced, use the current hardware information and confirm the exact Gen 2 compatibility before ordering.
For power-up, resets or other service-kit steps, readers can also refer to Starlink’s official router and connectivity support. These primary-source references help distinguish Starlink’s current setup instructions from product-specific mounting advice.
How does Gen 2 compare with Gen 3, Mini and the broader Starlink range?
The practical difference is simple: Gen 2 uses a rectangular dish with an actuated mast arrangement, while newer models use different physical interfaces and setup approaches. That means the correct dish mount, cable arrangement and power option depend on the exact model, not on a general Starlink label.
| Feature / Model | Starlink Gen 2 (Actuated) | Starlink Gen 3 (Standard) | Starlink Mini |
|---|---|---|---|
| Dish positioning | Dish moves itself during start-up | User positions the dish manually | User positions the dish manually |
| Mount interface | Push-button mast stem | Different generation-specific base | Compact model-specific mounting points |
| Router arrangement | Separate indoor router | Separate router arrangement | Router integrated into the dish |
| Best planning focus | Gen 2-specific fit and cable path | Exact Gen 3-compatible mount choice | Compact portable mounting and storage |
What does this mean for accessories?
Gen 2, Gen 3 and Mini parts should not be treated as interchangeable. A Gen 2 owner should first confirm the dish model, then match the product listing to that model. This avoids buying a Starlink mount that looks suitable but does not lock correctly to the Gen 2 mast.
The same rule applies to cables and power equipment. The physical connector, router arrangement and intended use all affect whether a solution is appropriate. Where the current Starlink instructions and a product listing differ, follow the current official guidance and contact the product supplier before modifying the setup.
Supporting broader Starlink model options
SpaceTek supports a broader Starlink range, but each model serves a different setup style:
- Starlink Gen 2: A model-specific actuated dish that needs verified Gen 2-compatible dish mounts and accessories.
- Starlink Gen 3: A newer dish with a different mounting interface, so it requires its own compatible product option.
- Starlink Mini: A compact system suited to lightweight touring and portable use when paired with Mini-specific accessories.
The useful takeaway is to select by hardware generation first, then by roof type, mounting location and whether the installation is fixed or portable.
What Starlink mounts and replacement accessories matter for Gen 2?
The main Gen 2 accessories to get right are the dish mount, replacement mounting components, cable path and power arrangement. Because the Gen 2 mast profile is generation-specific, only accessories verified for Gen 2 should be used.

How do you choose a Starlink Gen 2 dish mount?
SpaceTek offers several Starlink Gen 2 dish mounts, with the right option depending on the roof type, mounting location and installation requirements. Each product is configured for its stated Starlink model, so select the matching Gen 2 option rather than assuming the mounts are interchangeable.
- Choose a wall or eave position when it gives better clearance from gutters, fascia or roof obstructions.
- Choose a compatible metal-roof ridge position when a fixed roof-mounted installation is preferred.
- Choose a tile-roof kit only when the roof structure and supplied fixing approach are suitable for the specific installation.
- Confirm that the product is listed for the rectangular, actuated Gen 2 dish before buying.
SpaceTek's Starlink Gen 2 Mounting Range
SpaceTek offers model-specific Gen 2 dish mounts for different installation locations. The right option depends on the roof type, mounting position and installation requirements, so the products should not be treated as interchangeable.
Starlink Wall & Eave Mount
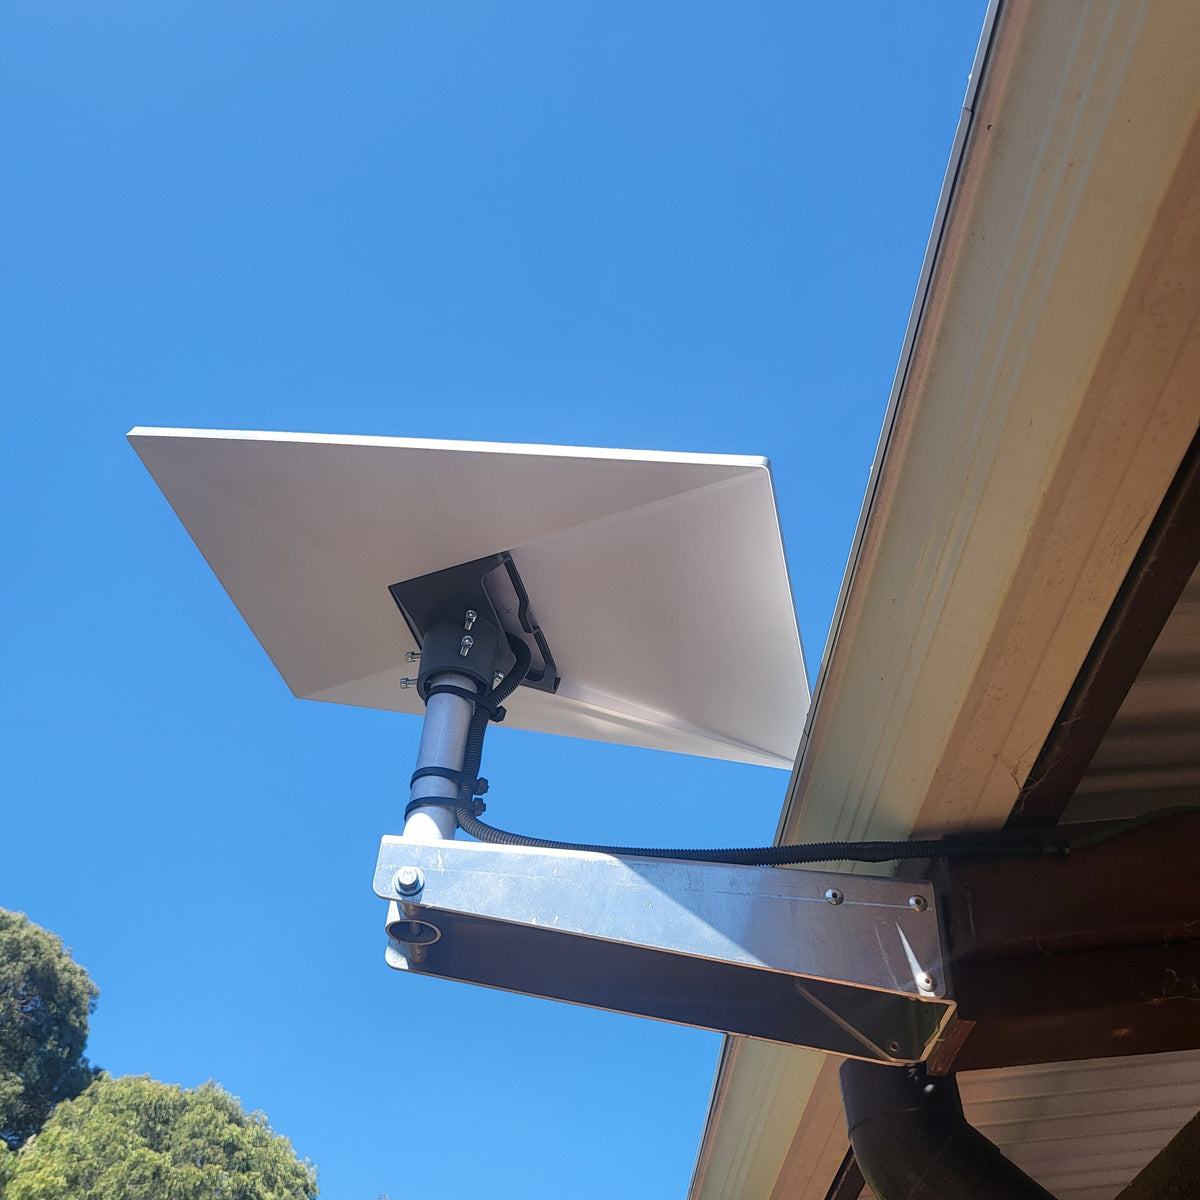
The Starlink Wall & Eave Mount suits wall, eave, shed, demountable and site-hut installations. It is available in model-specific configurations for Starlink Gen 2, Standard Gen 3 / V4 and Mini, with the matching pole adaptor for the selected model and different arm-length options.
For a Gen 2 setup, this is worth considering when a wall or eave position offers a clearer cable path or better dish clearance than a roof location. Select the Gen 2 configuration rather than assuming that another model option will fit the Gen 2 mast.
Starlink Gen 2 Ridge Cap Roof Mount
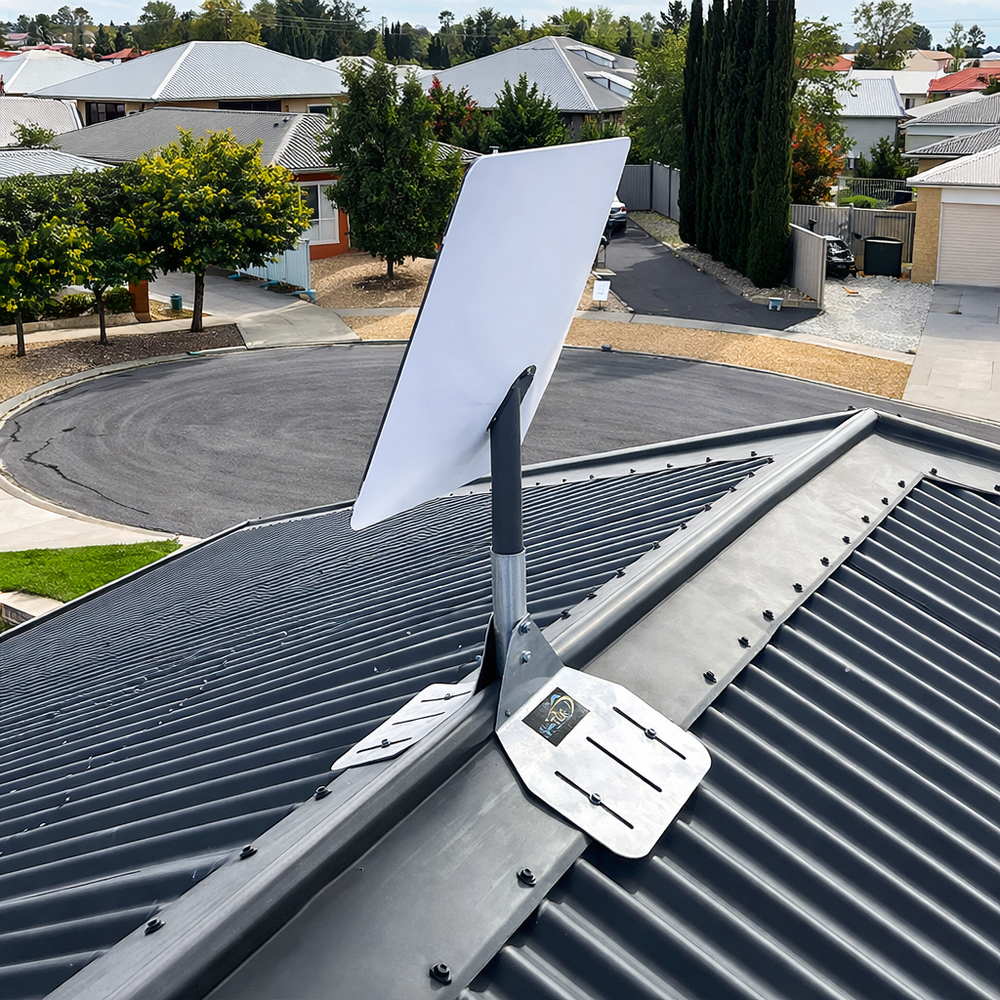
The Starlink Gen 2 Ridge Cap Roof Mount is designed for the rectangular, actuated Gen 2 dish. Its aluminium construction provides a fixed mounting point along a compatible metal roof ridge.
This option suits customers who prefer a roof-mounted installation rather than a wall or eave setup, provided the roof and installation location are appropriate. Check the roof condition, access requirements and cable route before committing to the mounting position.
Starlink Gen 2 Tile Roof Mount Kit
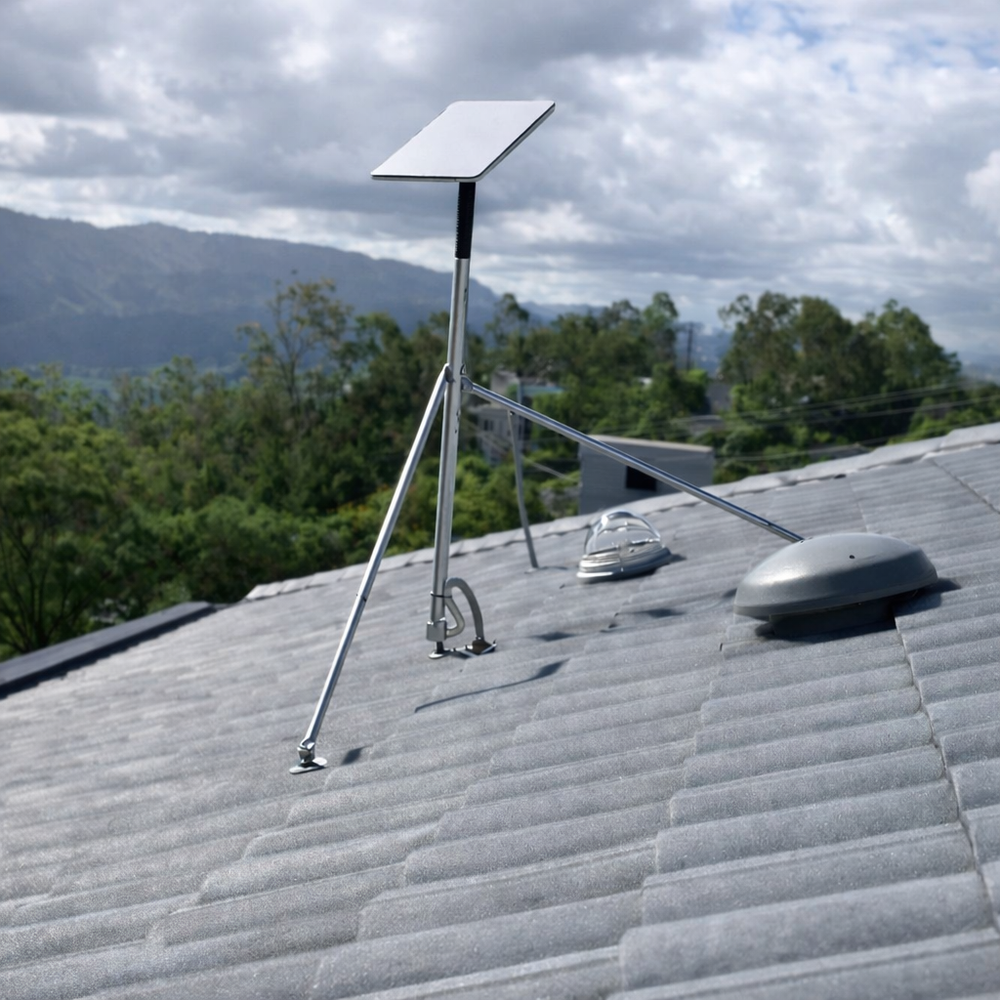
The Starlink Gen 2 Tile Roof Mount Kit is designed for the rectangular Starlink Gen 2 dish. It includes a 1-metre aluminium mast with a Gen 2 adaptor, two structural stay bars, an aluminium tile mount and a generic fixings pack.
Gen 2 poles are no longer manufactured, so the included Gen 2 adaptor fits the supplied Gen 3 pole. This keeps the kit focused on the Gen 2 dish without requiring a separate adaptor purchase or modifications to the dish leg for the intended configuration. The elevated position allows airflow around the dish, but the supplied fixings should still be checked for suitability for the particular roof installation.
SpaceTek components are precision-machined or folded aluminium/reinforced composite, depending on the product. Product selection should always follow the exact Starlink generation named in the listing.
What counts as a replacement accessory for Gen 2?
A replacement accessory is any part bought to replace, relocate or adapt an existing Gen 2 setup. The most useful checks are practical rather than cosmetic:
- Confirm that the listing names Starlink Gen 2 or Dishy Rectangle Gen 2.
- Check that the mast interface is designed for the Gen 2 push-button stem.
- Review where the cable will run before changing the dish position.
- Recheck whether the installation is fixed, removable or frequently packed away.
- Avoid assuming a Gen 3 or Mini product will fit simply because the product category is similar.
This approach keeps an upgrade or replacement focused on compatible parts instead of trial-and-error fitting.
How should caravan, RV and portable Gen 2 setups be planned?
For caravan, RV and portable use, plan around removability, safe storage, cable protection and clear sky view. A practical touring setup needs to cope with movement as well as connectivity.
Before travel, inspect the dish mount for secure hardware, check that the cable is protected at entry points and pack the dish where it cannot be struck by other equipment. At camp, choose a position with clear sky visibility before committing to a longer cable route. Use only current Gen 2-compatible SpaceTek products shown in the catalogue, and avoid improvised arrangements unless the product documentation confirms suitability.
How do you power Starlink Gen 2 in off-grid and touring setups?
A Gen 2 dish can be part of an off-grid or touring setup when the power arrangement is confirmed as compatible with the current hardware. The sensible approach is to plan the battery system, dish location, router position and cable route together rather than treating power as a separate last step.
For mobile use, the main question is whether the system needs to run from an existing auxiliary battery arrangement, through an inverter or through a compatible direct DC-to-DC solution. The right option depends on the specific Starlink hardware and product specifications, so avoid relying on generic electrical figures or assumed cross-model compatibility.
How does StarPower V2 support Gen 2 power setups?
The SpaceTek StarPower V2 DC Power Supply is a direct DC-to-DC power solution for compatible Starlink hardware, including Gen 2 where stated by the current product specifications. Direct DC-to-DC means battery power is converted directly for the Starlink setup instead of first passing through a household-style AC inverter.
Key advantages of a compatible direct DC-to-DC power arrangement include:
- Higher efficiency by avoiding unnecessary DC-to-AC-to-DC conversion stages.
- Lower draw than running the Starlink system through an inverter-based arrangement.
- The ability to bypass the standard Starlink router for custom setups where appropriate.
- Cleaner wiring for touring vehicles, off-grid cabins and portable communications fit-outs.
What should you confirm before choosing a mobile power arrangement?
Confirming compatibility first is the safest way to plan a mobile installation. Check the product listing and current documentation for the exact dish, router and power configuration in use.
- Identify the Starlink generation and router arrangement before selecting power equipment.
- Confirm that the power product specifically supports the planned Gen 2 configuration.
- Plan ventilation, cable protection and access to the equipment for routine checks.
- Keep the system easy to isolate when the vehicle is stored or serviced.
- Do not use estimated wattage, voltage or current figures from unrelated models as a buying guide.
This keeps the article useful without overstating electrical specifications that may change between products or hardware revisions.
Frequently Asked Questions About Starlink Gen 2
Is Starlink Gen 2 still worth using?
Yes. Starlink Gen 2 can remain a useful option when the dish is in good condition and the setup uses Gen 2-compatible mounting, cabling and power components. The key is to choose parts for the rectangular actuated dish rather than assuming newer-generation accessories will fit.
Does Starlink Gen 2 need a special mount?
It needs a dish mount that is listed for its Gen 2 mast arrangement. The spring-loaded push-button stem and rectangular actuated dish make model-specific compatibility important for any fixed, portable or replacement setup.
Can I use Gen 3 dish mounts with a Gen 2 dish?
No, Gen 3 dish mounts should not be treated as a direct fit for Gen 2. The Gen 2 mast uses a push-button locking stem, while Gen 3 has a different base design. Check the exact product configuration instead of assuming that a product range is interchangeable.
What replacement accessories should I check first for Gen 2?
Start with the parts that affect fit and operation:
- The dish mount and Gen 2 mast interface.
- The mounting hardware and suitability for the roof or wall location.
- The cable path and protection at entry points.
- The router arrangement and any compatible direct DC-to-DC power setup.
How does direct DC-to-DC power help a mobile Gen 2 setup?
A compatible direct DC-to-DC setup such as StarPower V2 can avoid unnecessary inverter conversion stages, reduce battery draw and support custom setups that bypass the standard Starlink router where suitable. Check the current product specifications before relying on any particular configuration.
How should I plan a caravan or RV Gen 2 setup?
Plan for clear sky view, secure temporary placement, protected cable routing and safe dish storage during travel. A simple pre-trip check can help prevent avoidable issues:
- Confirm that the dish mount is made for Starlink Gen 2.
- Check that the cable cannot be pinched, crushed or pulled during travel.
- Pack the dish so it is protected from loose gear.
- At the destination, choose the mounting position before laying out the final cable route.
Where can I verify the current Starlink setup steps?
For current kit handling, router and connectivity instructions, use Starlink’s official support resources alongside the product information for the Gen 2 dish mount or power solution being considered. That combination helps keep service-kit guidance separate from model-specific accessory compatibility.
Conclusion
Starlink Gen 2 remains a practical system when the rectangular actuated dish is matched with the right Gen 2-compatible dish mount, protected cable routing and a compatible power arrangement. Start with the installation location, then confirm the exact Starlink generation before selecting accessories.
For a fixed roof, wall or eave setup, the mounting position should provide clear sky visibility, a manageable cable route and suitable support for the installation. For touring use, add removable placement, secure storage and a planned battery arrangement to the checklist. When any detail is uncertain, use current official Starlink guidance and the relevant SpaceTek product listing before ordering.
- Browse the dedicated Gen 2 range
- Check the Starlink Mount Roof Kit for Dishy Rectangle Gen 2
- Visit the contact page for help confirming compatibility before you buy.

Leave a comment
This site is protected by hCaptcha and the hCaptcha Privacy Policy and Terms of Service apply.