
Setting Up Starlink in Australia: Easy as 1-2-3

How to install Starlink is surprisingly straightforward, even for those of us who aren't tech wizards. If you're looking for the quick answer, here's what you need to know:
- Find a spot with clear sky view (use the Starlink app's obstruction tool)
- Assemble the dish with the included kickstand or mount
- Connect cables between dish and router
- Power up and wait for connection (5-20 minutes)
- Set up Wi-Fi through the Starlink app
That's the bare-bones version, but let's dive a bit deeper into what makes Starlink such a game-changer for rural Australians.
Living in the outback or remote parts of Australia often means putting up with dodgy internet connections—if you can get connected at all. Starlink is changing that reality for thousands of Aussies who've been stuck in the digital slow lane.
Unlike traditional satellite internet, Starlink uses a constellation of low-Earth orbit satellites that deliver high-speed, low-latency internet to even the most remote homesteads. Installation doesn't require professional technicians or special tools, making it perfect for self-sufficient rural residents.
Most users report getting their Starlink up and running in under 30 minutes, with speeds typically ranging from 50 to 200 Mbps—a far cry from the frustratingly slow connections many rural Australians have endured for years.
Whether you're setting up Starlink at your remote property, bringing connectivity to Aboriginal communities, or installing it on your caravan for life on the road, the process is designed to be simple enough for anyone to handle.
Starlink 101: How It Works & Who It's For
Starlink represents a major leap forward in satellite internet technology. Unlike traditional satellite services that use a few large satellites in geostationary orbit (about 35,000 km above Earth), Starlink employs a constellation of thousands of smaller satellites in low Earth orbit (LEO), typically 550 km above us.
This lower orbit achieves two critical advantages:
- Significantly reduced latency (the delay in data transmission) – typically 30-40ms compared to 600+ms with traditional satellite internet
- Much higher download speeds – users regularly experience 50-200 Mbps, with some reporting even higher speeds
The system works by having your dish communicate with multiple satellites as they pass overhead. Your Starlink dish (affectionately nicknamed "Dishy McFlatface" by SpaceX enthusiasts) automatically tracks these satellites, maintaining constant communication and seamless handoffs between them.
Starlink offers unlimited data with no long-term contracts, making it ideal for:
- Rural homesteads where NBN fixed wireless or Sky Muster can't deliver adequate speeds
- Remote communities including Aboriginal settlements that have historically lacked reliable connectivity
- Grey nomads and travellers with the Roam service for mobile connectivity
- Maritime users on boats and vessels along Australia's coast
- Emergency backup for businesses and essential services that can't risk downtime
Starlink in Australia at a Glance
Starlink has been expanding its coverage across Australia since 2021, with service now available across most of the country. The coverage map continues to improve as more satellites are launched and ground stations are established.
Currently, Starlink offers several service tiers in Australia:
- Residential ($139/month): For fixed locations like homes
- Business (starting at $535/month): For commercial applications requiring higher speeds and priority support
- Roam ($170/month): For portable use across Australia or globally
- Mini (recently introduced): A more compact, portable solution
Looking ahead to 2025, Starlink plans to expand coverage density and potentially improve speeds further as more satellites join the constellation. This is particularly good news for Australians in very remote areas who may currently be on the edge of coverage zones.
Who Should Jump On-Board?
Starlink makes the most sense for:
- Outback stations and remote properties where traditional internet options are limited or non-existent
- Grey nomads and caravanners who want reliable internet while travelling across Australia
- Boats and maritime vessels seeking connectivity along the coast
- Businesses in rural areas that depend on reliable internet for operations
- Remote workers who need videoconferencing capabilities and reliable uploads
- Emergency services and essential infrastructure requiring backup connectivity
If you're currently struggling with speeds under 25 Mbps or experiencing high latency that makes video calls impossible, Starlink will likely feel like a upgrade.
What's in the Box & What It Costs
When your Starlink kit arrives, you'll find everything needed to get connected. The Standard Kit includes:
- Starlink dish (circular design for newer kits)
- Kickstand for ground mounting
- Gen 3 Router
- 15-metre (49.2 ft) Starlink cable for connecting the dish to the router
- 1.5-metre (4.92 ft) power cable
- Power supply unit
The hardware costs $599 AUD plus shipping, with monthly service at $139 for the standard residential plan in Australia. If you don't want to handle the installation yourself, professional roof installation is available for $199, though most users find the self-installation straightforward.
It's worth noting that the Starlink cable has a proprietary connector on the dish end and a standard weatherproof connector on the router end. The cable carries both power and data, simplifying the setup.
Optional Tools & Nice-to-Haves
While Starlink is designed for simple installation, a few additional tools and accessories can make the process even smoother:
- Drill and bits (if mounting to a roof, wall, or pole)
- Cable routing kit for clean installation through walls (available from SpaceTek Australia)
- Rust-proof bolts and anchors specifically designed for Australian conditions
- Uninterruptible Power Supply (UPS) to protect against power surges and brief outages
- Ladder for roof access if mounting up high
- Weatherproof sealant for any holes drilled for cable routing
- Cable clips or conduit to secure and protect the cable run
We recommend budgeting an additional $100-300 for mounting hardware and accessories, depending on your specific installation needs. SpaceTek Australia offers custom mounting solutions specifically designed for Australian conditions, which can make a significant difference in the long-term durability of your installation.
Finding the Perfect Spot & Mounting Options
The most crucial step in how to install Starlink successfully is finding that sweet spot for your dish. Unlike traditional satellite TV that points at a fixed position, Starlink needs a generous view of the sky to chat with multiple satellites as they zoom overhead.
_compressed.webp?alt=media&token=87b08341-2764-480d-b7f0-1b31ace70c23 "user-inserted")
Your best mate for this job is the Starlink app (available for Android and iOS), which includes a brilliant "Check for Obstructions" tool. This clever bit of tech uses your phone's camera to scan the sky and show you exactly where potential problems might lurk. Always start here before drilling any holes or climbing on your roof!
For your Starlink to perform at its best, it needs:
- A clear view of the sky above 20° elevation from the horizon (think of it as needing to see everything above the height of a typical single-storey house)
- A full 360° clear view around the dish (because those satellites are constantly moving across the sky)
- No trees, buildings, power lines or other structures blocking the view
Even small obstructions can be frustrating – a single gum tree might not seem like much, but it could cause your video calls to freeze right when you're about to land that important contract. The app will highlight problem areas in red and give you feedback on how they might impact your service.
When it comes to mounting options, you've got several choices suited for different Aussie settings:
Ground mount with kickstand is the simplest option and comes included with your kit. Perfect for quick setup or testing different locations before committing to a permanent spot. Just plonk it on flat ground with a clear view upward.
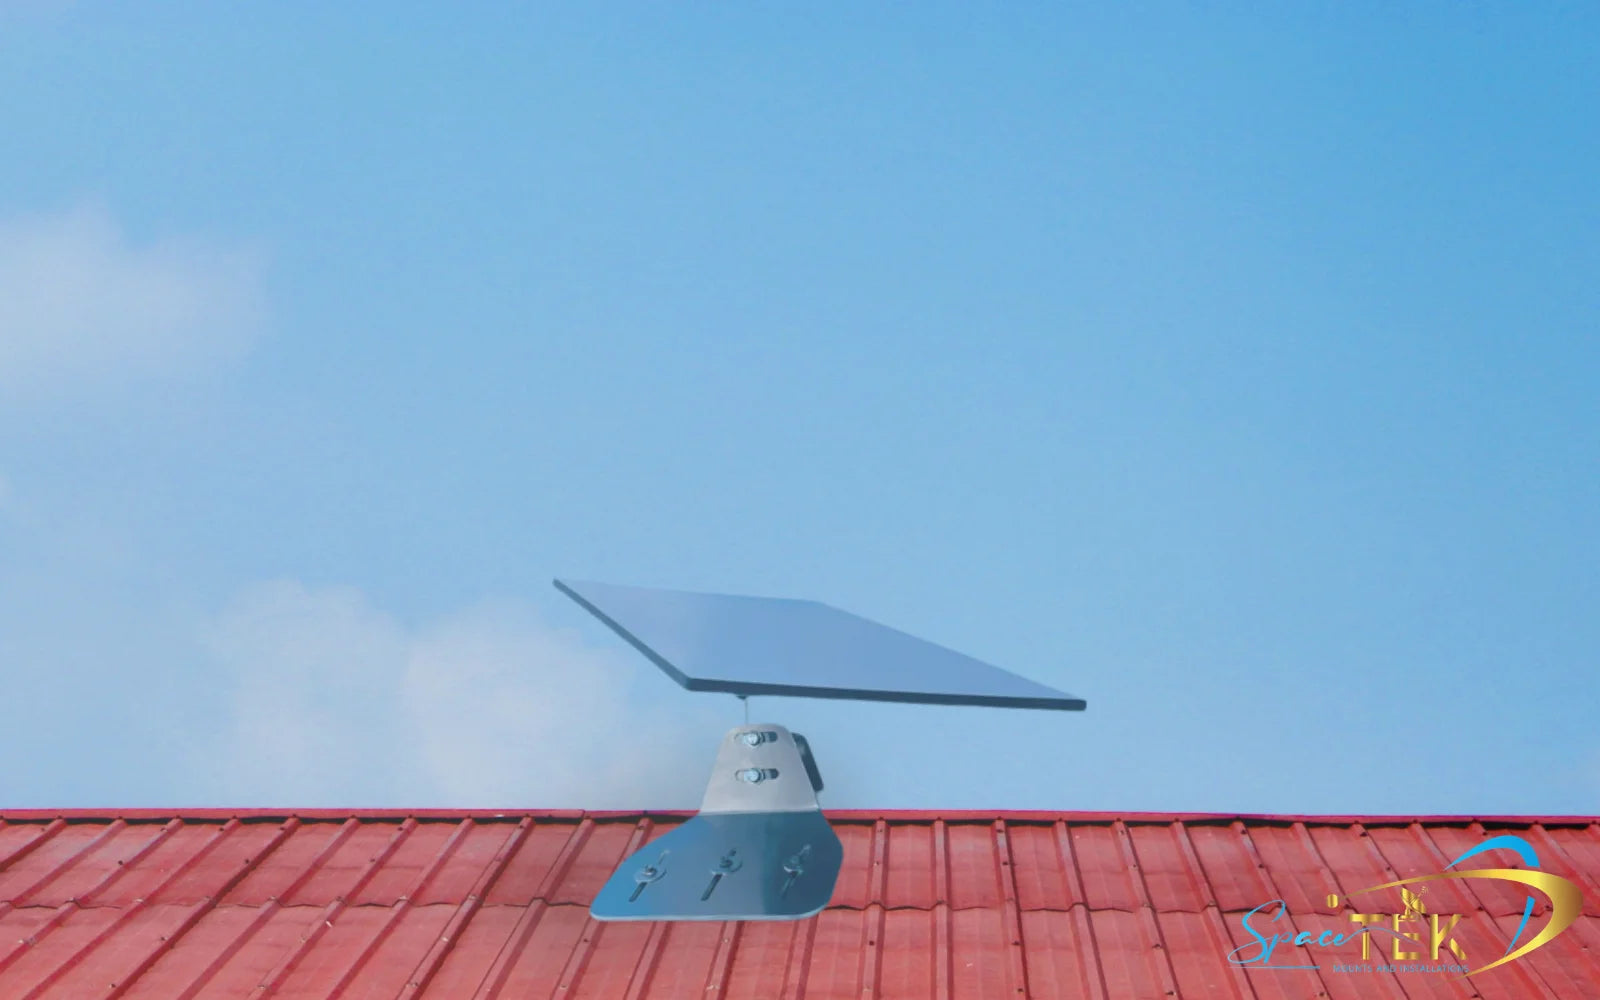
Roof mounting gives you the elevation needed to clear nearby obstacles like trees or sheds. SpaceTek Australia offers specially designed rust-resistant roof mounts that can handle our harsh climate – from scorching summers to coastal salt spray.
Pole mounting attaches your dish to an existing pole or post, which is brilliant for properties where you need to position the dish away from your main building to avoid obstructions. Many outback properties find this ideal for clearing nearby eucalypts.
Wall mounting secures the dish to the side of your building – a good option when roof access is tricky or when you want to keep the dish within easier reach for maintenance.
Eave mounting tucks the dish under the eaves of your roof, providing some protection from direct weather exposure while still maintaining a good view of the sky.
When choosing your mounting spot, don't forget to consider:
Wind loads – Australia's weather can be unpredictable, from cyclones up north to southerly busters along the coast. Make sure your mount is rock solid.
Local council regulations – Some areas have restrictions on visible satellite dishes, particularly in heritage zones or body corporate properties.
Cable routing – Plan how you'll run that 15-metre cable from dish to router. The straighter and shorter, the better.
Accessibility – Can you reach the location for occasional cleaning or adjustments? Nobody wants to hire a cherry picker just to brush off some cockatoo droppings.
Lift or Relocate?
If your initial scan shows obstructions, you've got two main options:
Lifting the dish higher by mounting it on a roof or tall pole can help clear obstacles. The 20° elevation rule works in your favour here – objects further away need to be taller to cause problems. That gum tree 30 metres away might not be an issue if your dish is mounted high enough.
Alternatively, sometimes simply relocating the dish a few metres can make all the difference. Walk around your property with the app and scan different spots – you might be surprised how much the obstruction map changes with just a small position change.
Your dish needs visibility in all directions because Starlink satellites are constantly moving across the sky. Your dish will automatically track them, but it needs a clear view to do its job properly.
Cable Routing & Weatherproofing
Once you've found that perfect spot, you'll need to consider how to get the cable from dish to router without creating problems. The standard 15-metre cable is generous for most installations, but planning your route carefully will save headaches later.
For a professional-looking installation that will stand up to the harsh Australian elements:
Use cable sleeves or conduit to protect against UV damage, curious cockatoos, and hungry possums. The Australian sun is particularly harsh on plastics, so proper protection will extend the life of your equipment.
Install weatherproof grommets wherever the cable enters your home. This prevents water ingress during those sudden summer downpours.
Create a drip loop (a downward curve in the cable before it enters the building) to ensure water runs away from, not into, your home.
Secure the cable every metre or so to prevent wind damage – those afternoon southerlies can really whip unsecured cables about.
Maintain a minimum bend radius of 10 cm to prevent internal cable damage. Think of bending it no tighter than around a stubby holder.
SpaceTek Australia offers cable routing kits specifically designed for our unique conditions, including UV-resistant sleeves and weatherproof entry points that can handle everything from tropical downpours to desert dust storms. A small investment here can save you from costly repairs down the track.
For more detailed guidance, check out Starlink Installation Guide: Where Should You Set Up Your Dish and DIY Starlink Pole Mount: Step-by-Step Instructions for specific mounting options suited to Australian conditions.
How to Install Starlink: Step-by-Step Guide
Getting your Starlink up and running is surprisingly straightforward. Most Aussies complete the entire setup in under 30 minutes, though I'd recommend taking your time with the mounting and cable routing for a professional-quality installation that'll stand up to our harsh climate.
Step 1: Unbox, Assemble & Power-Up
Start by unpacking everything and checking that all components are present. If you're using the included kickstand, simply lift it up from the dish—no tools required. Connect the Starlink cable to the dish, making sure the locking feature is correctly oriented (typically facing upward). You'll hear a satisfying click when it's properly seated.
Route the other end of the cable to where you'll place your router, then connect it to Port 1—don't worry, it only fits one way. Finally, connect the power supply to the router and plug it into a power outlet. Your dish will start to power up immediately.
Safety tip: While the components themselves are weatherproof, try to keep the connection points protected where possible. A little bit of planning now can save you headaches down the track.
Step 2: Scan the Sky with the App
Download the Starlink app from the Android Play Store or iOS App Store and either create an account or sign in. The app's "Check for Obstructions" tool is brilliant—it uses your phone's camera to scan your surroundings and identify potential obstacles.
Follow the on-screen instructions to scan the entire sky view, moving your phone slowly to capture everything. The app will show you areas in red where obstructions might affect your service. This step is absolutely crucial for optimal performance, so don't rush it. If you spot significant obstructions, you might need to rethink your dish location or consider a more liftd mounting solution.
Step 3: Position & Align – how to install starlink dish
For Standard and Mini kits, place your dish in the chosen spot using either the kickstand or your mount. Open the app and look for the Alignment Tool alert, which will guide you through rotating the dish until it's properly aligned. The dish typically needs a specific tilt angle for the best reception, and the app will let you know when you're within 5° of the ideal position.
If you've got a Standard Actuated or High Performance kit, you're in luck—simply place the dish in position and let it do the work. These models will automatically self-level and find the optimal orientation without any manual adjustment. Important: Don't manually adjust actuated or high-performance dishes as this can damage the motorized components.
Step 4: Secure Your Mount & Run the Cables
If you're using a permanent mount rather than the kickstand, secure it firmly to your chosen surface using appropriate fasteners. For roof installations, apply quality weatherproof sealant around any penetrations to prevent leaks—especially important in areas prone to heavy rainfall.
Attach your dish to the mount following the specific instructions, then secure the cable along its route using clips or conduit. Remember to maintain a minimum bend radius of 10 cm to prevent cable damage, and create a drip loop before the cable enters your home. Use a weatherproof grommet where the cable passes through walls to keep the elements out.
SpaceTek Australia's mounting solutions include detailed instructions and all the necessary hardware for a secure installation that's built specifically for our harsh Australian conditions—from scorching summers to tropical downpours.
Step 5: Fire Up the Router & Name Your Network
Once everything's connected and powered, your router will begin booting up. The single LED indicator on its underside tells you what's happening:
- Flashing white means it's attempting to connect
- Solid white indicates it's connected (the light turns off after an hour)
- Red means there's no internet connection
- No light after the first hour is normal operation
- Violet indicates bypass mode
Connect your device to the default "STARLINK" WiFi network, then open the app to customize your settings. You can set a unique network name, create a strong password, and configure any advanced settings you might need.
Step 6: Connect & Configure – final touches on how to install starlink
After connecting to your newly named network, run a speed test to see how you're doing. Be patient—your Starlink system may take up to 12 hours to reach its full potential as it downloads firmware updates and maps the satellites in its field of view.
During the first day, you might notice some fluctuations in speed and occasional brief outages as the system optimizes itself. The Statistics page in the app is your friend here—it shows your download and upload speeds, latency, obstruction statistics, and outage data.
Once everything's up and running, your Starlink system is remarkably low-maintenance. The dish even has a built-in heating element to melt snow (though that's less relevant for most parts of Australia), and the system automatically updates its firmware overnight while you sleep.
Keeping Your Connection Strong: Troubleshooting & Upgrades for 2025
As Starlink continues to evolve, there are several ways to ensure your system remains in top condition and performs optimally through 2025 and beyond.
Weather Impacts:
- Heavy rain can temporarily reduce signal strength, though the system is designed to maintain connectivity in most weather conditions.
- If you experience heavy snow (rare in Australia but possible in alpine regions), the dish's built-in snow melt mode will activate automatically when needed.
- For extreme weather areas, consider additional protection like dish covers designed to prevent debris accumulation while allowing signal transmission.
Cable Protection:
- Inspect your cables periodically for signs of damage from wildlife, UV exposure, or physical stress.
- Consider upgrading to SpaceTek Australia's UV-resistant cable sleeves for added protection.
- Secure any loose cables that might be affected by wind.
Firmware Updates:
- Allow your system to remain powered overnight at least once a week to receive automatic updates.
- Check the app occasionally to ensure you're running the latest firmware version.
WiFi Coverage Improvements:
- If you have a large property, consider adding mesh WiFi nodes to extend your coverage.
- Position your router centrally for optimal signal distribution.
- For multi-story buildings, place the router on the middle floor if possible.
Hardware Durability:
- Standard Starlink mounts can corrode in coastal or harsh environments. Consider upgrading to SpaceTek Australia's rust-resistant mounts designed specifically for Australian conditions.
- Dish covers can protect your investment from debris, bird droppings, and environmental damage.
5 Quick Fixes for Connection Drop-outs
- Check for new obstructions: Trees grow and new obstacles may appear. Re-run the obstruction check periodically.
- Reboot the system: Unplug both the router and dish power for 30 seconds, then reconnect.
- Check for cable damage: Inspect the entire cable run for signs of wear or animal damage.
- Verify mount stability: Ensure your dish hasn't shifted position due to wind or other factors.
- Update the app: Make sure you're running the latest version of the Starlink app.
Frequently Asked Questions about Installing Starlink
Will Starlink work during bushfires or cyclones?
Starlink is designed to function in most weather conditions, but extreme events can impact performance. During bushfires, heavy smoke and ash can temporarily reduce signal strength. Similarly, the torrential rain associated with cyclones may cause brief interruptions.
However, Starlink often remains operational when terrestrial internet services fail, making it valuable for emergency communications. For critical applications, we recommend having a backup power source like a generator or large UPS to keep your Starlink powered during outages.
Can I use my own router with Starlink?
Yes, you can use your own router with Starlink by enabling "Bypass Mode" in the Starlink app settings. This allows you to connect your third-party router to the Ethernet port on the Starlink router.
Benefits of using your own router include:
- More advanced network configuration options
- Better control over port forwarding and firewall settings
- Potential for extended WiFi range with high-performance routers
- Integration with existing home networks
How long until the dish reaches full speed?
When first set up, your Starlink system may take up to 12 hours to reach optimal performance. During this initial period, the system downloads firmware updates and maps satellite paths for your specific location.
Most users report usable speeds within 5-20 minutes of powering up, but performance typically improves over the first day of operation. If you're still experiencing speeds significantly below 50 Mbps after 24 hours, you may want to check for obstructions or contact Starlink support.
Reliable Internet Starts with the Right Accessories
_compressed.webp?alt=media&token=2dce6c61-79b7-4016-9901-08ffa687df6b "user-inserted")
Let's be honest: while Starlink works brilliantly straight out of the box, the harsh Australian climate can be tough on equipment. From scorching outback heat to coastal salt spray and tropical downpours, your Starlink setup faces challenges that the standard kit just wasn't specifically designed to handle long-term.
That's where quality accessories make all the difference. At SpaceTek Australia, we've developed mounting solutions specifically for our unique Australian conditions. Our rust-resistant mounts are engineered to withstand everything Mother Nature throws at them, whether you're setting up in the salty air of a coastal property or the extreme temperature swings of the outback.
Why invest in better mounting hardware? Simply put, it's the difference between a setup that lasts for years and one that might need replacing after a particularly rough season. Our Australian-made mounts provide rock-solid stability even during those wild summer storms, keeping your dish perfectly positioned for optimal signal strength.
The range includes everything from specialised roof mounts designed to fit Australian roof profiles to heavy-duty pole mounts for lifting your dish above obstructions. Our wall mounts offer alternative placement options, particularly useful for properties where roof access is limited or challenging.
Beyond just mounts, we've thought about the complete installation process. Our UV-resistant cable routing kits protect your cables from the harsh Australian sun that can degrade standard materials surprisingly quickly. Our weatherproofing accessories ensure every aspect of your installation is protected from our sometimes extreme elements.
Installing Starlink doesn't need to be complicated. With the right location, proper mounting hardware, and a bit of care during setup, you'll be enjoying high-speed internet even in the most remote corners of Australia. Most of our customers complete their installation in under 30 minutes and are amazed at how straightforward the process is.
The single most important factor in how to install Starlink successfully is finding that perfect spot with a clear view of the sky. Take your time with the obstruction check—it's worth moving or lifting your dish if needed to get the best possible performance.
With Starlink providing the technology and SpaceTek Australia's mounting solutions keeping everything secure, reliable high-speed internet is finally accessible virtually anywhere—from the coastal communities of Tasmania to the red dirt stations of the Northern Territory and everywhere in between.
For more information about how Starlink works and to explore our full range of Australian-designed mounting solutions, visit our comprehensive guide on how Starlink works.

Leave a comment
This site is protected by hCaptcha and the hCaptcha Privacy Policy and Terms of Service apply.