

A Gen 2 actuated Starlink kit is still a solid option for Australian rural homes, remote properties and fixed installations when it is in good working order. If you are starting fresh, the Gen 3 Standard is usually the simpler long-term choice thanks to its manual setup, Wi-Fi 6 router, built-in Ethernet ports and standard RJ45 cabling.
Key Takeaways
- A well-maintained Gen 2 dish can still provide dependable Starlink connectivity for rural and remote Australian properties.
- Its motorised setup is handy, but the moving parts need more care than the Gen 3 Standard’s fixed design.
- Gen 3 brings simpler cabling, built-in Ethernet ports and a newer Wi-Fi 6 router.
- A secure dish mount and clear view of the sky matter more to day-to-day reliability than the generation alone.
- Review these Gen 2 vs Gen 3 Mount Upgrade Considerations before choosing mounting hardware.
The Gen 2 is a good fit when self-aiming setup matters. It uses electronic phased-array technology to track satellites, while its built-in motors position the dish during setup. The Gen 3 Standard uses app-guided manual positioning instead, so there are fewer moving parts to look after.
The best choice comes down to the condition of the dish and your installation. A well-maintained Gen 2 unit with a clear view of the sky can still deliver dependable Starlink service, while the Gen 3 is generally the easier option for a new setup.
SpaceTek Australia supports robust Gen 2 installations with Australian-designed precision-machined or folded aluminium and reinforced composite Starlink mounts built for rural, coastal and mobile environments.
What Is the Gen 2 Actuated Starlink Kit?
The Gen 2 kit is the rectangular Starlink dish with built-in motors that position the antenna during first setup. Once it is pointed, electronic beam steering keeps the connection aligned with passing satellites.
The Gen 3 Standard takes a different approach. It has no internal positioning motors, so you use the Starlink app to find the best placement and set the dish manually. That means fewer mechanical components to maintain over time.
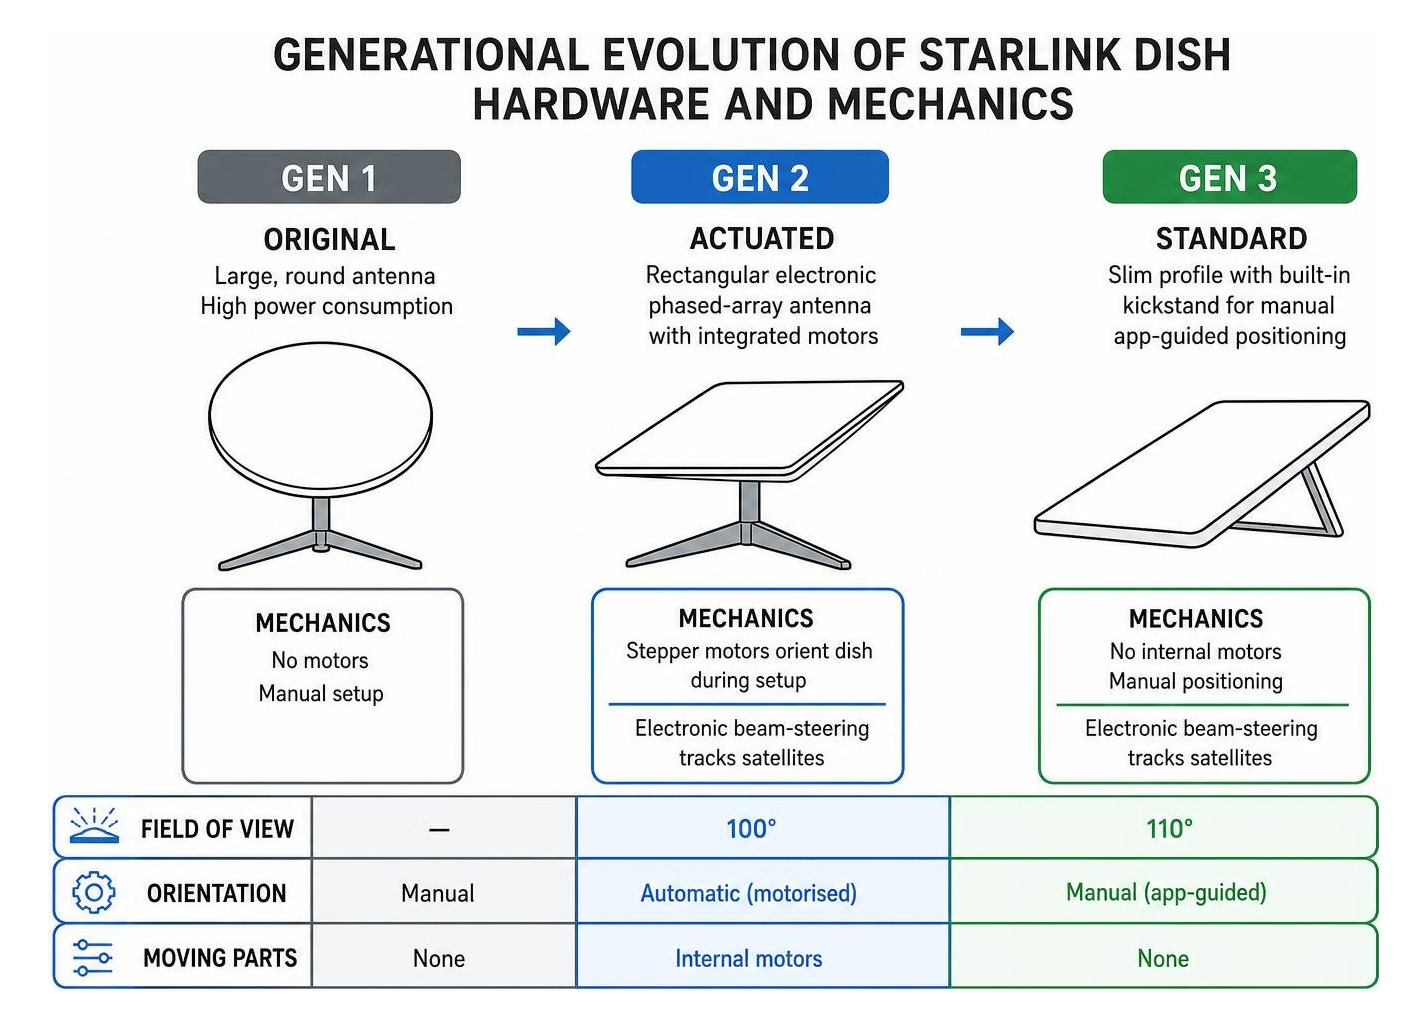
The Gen 2 dish has a narrower field of view than the Gen 3 hardware. In practice, both need a clear, obstruction-free view of the sky, so placement matters more than small differences on a specification sheet.
What Are the Key Hardware Specifications?
The Gen 2 dish is a compact terminal measuring about 503 mm by 303 mm and weighing roughly 2.9 kg without its mounting base.
- Dual-axis motorised positioning for initial setup
- Electronic phased-array beam steering for satellite tracking
- Snow-melting capability for cold conditions
- IP54-rated protection against dust and water splashes
- Operating range suited to demanding outdoor environments
- Efficient, reliable power during standard operation
Is Motorised Self-Aiming Better Than Manual Alignment?
It depends on what matters most for your setup. A Gen 2 dish can point itself after power-up, which makes initial installation straightforward. The trade-off is that its motors and gears are extra components exposed to years of wind, dust and coastal conditions.
The Gen 3 Standard needs a quick app-guided manual adjustment, but there are no drive gears inside the dish. For many new installations, that simpler design is easier to live with.
How Do You Set Up a Gen 2 Dish?
- Secure the dish mast in a suitable dish mount with a clear view of the sky.
- Route the proprietary dish cable safely indoors to the router and power equipment.
- Power on the system and allow the dish to position itself.
- Check signal lock and field-of-view clearance in the Starlink app.
How Do Real-World Performance and Connectivity Compare?
For everyday use in regional Australia, both generations can handle remote work, streaming and voice calls reliably when the installation has a clear view of the sky. Network demand and satellite coverage usually have more impact on performance than the dish’s positioning system.
Electronic beam steering does the work on both models, handing the connection from one satellite to the next without physical movement. That is why a healthy Gen 2 can still feel very capable in daily use.
How Do the Gen 2 and Gen 3 Routers Compare?
The main day-to-day difference is often inside the home rather than on the roof. The Gen 2 package uses a Wi-Fi 5 router, while Gen 3 includes a Wi-Fi 6 router with built-in Ethernet ports for wired devices.
For a Gen 2 setup, the router can still be a practical part of the system, especially when paired with a Starlink Gen 2 Router and Mesh Node if you need a genuine replacement.
- Gen 2 uses dual-band Wi-Fi 5, while Gen 3 uses Wi-Fi 6.
- Gen 3 includes built-in Ethernet ports, while Gen 2 needs a compatible Ethernet adapter for wired connections.
- Both can support typical home and remote-work setups when the local network is configured well.
What About Cables and Service Plans?
The Gen 2 kit uses proprietary connectors on its dish cable. They are designed for outdoor use, but the connection still needs careful handling to avoid stress, bent pins and moisture entering the socket.
Gen 3 uses standard RJ45-style connections with weather-resistant protection, making cable runs simpler to manage.
Both hardware generations can be used with the Starlink service options available for fixed homes, travel and higher-priority business use in Australia.
Which Dish Mounts and Hardware Upgrades Matter Most?
A secure dish mount gives your Starlink hardware the stable base it needs. The Gen 2 dish uses an integrated rotating mast, so the mount needs to suit the rectangular dish’s collar and your roof type.
For off-grid homes, caravans and remote work sites, direct DC-to-DC power can be a better fit than running an AC inverter continuously. It offers higher efficiency, lower draw and the option to bypass the Starlink router when you are building a custom network setup.
Which Dish Mounts Suit a Gen 2 Actuated Starlink Kit?
SpaceTek Australia makes precision-machined or folded aluminium and reinforced composite dish mounts for tough regional and coastal conditions. The aim is simple: keep the dish steady, aligned and protected from the conditions it faces.
- Folded aluminium base assemblies for demanding wind conditions
- Corrosion-resistant hardware for metal roofing
- Exact-tolerance mast collars to help prevent dish movement
- Adaptable bases for corrugated iron, Trimdek and tile roof profiles
For residential iron roofs, a Starlink Roof Mount Kit for Rectangular Gen 2 Dishes provides a stable installation. If you are using an existing antenna pole, a Gen 2 Mast Adapter helps secure the dish post in place.
Which Accessories Help Protect the Installation?
The right accessories help keep the cable route tidy, reduce strain on connections and make the installation easier to maintain.
- Mast adapters for suitable existing antenna poles
- StarPower DC power supplies for efficient off-grid and battery-based setups
- UV-stabilised cable-routing accessories for harsh sun exposure
- Weatherproof wall-entry fittings to help seal cable access points
Should You Keep a Gen 2 Dish or Upgrade to Gen 3?

If you already have a Gen 2 kit in good condition, there is usually no reason to replace it just because newer hardware is available. With a clear view of the sky and a secure dish mount, it can still handle everyday browsing, streaming and remote work well.
If you are setting up a new system, the Gen 3 Standard is generally easier to install and maintain. It has no internal drive gears, includes a Wi-Fi 6 router with Ethernet ports and uses simpler RJ45 cabling.
Existing Gen 2 owners can also improve their home network by using bypass mode with a suitable third-party router or mesh system.
Frequently Asked Questions About Gen 2 Starlink Hardware
Can You Use Your Own Router with a Gen 2 Kit?
Yes. The factory Gen 2 router does not include built-in Ethernet ports, so you need a genuine Starlink Ethernet adapter before connecting another router or network switch. Once it is connected, bypass mode in the Starlink app turns off the built-in Wi-Fi and passes the connection to your own network equipment.
Does the Gen 2 Dish Handle Severe Weather and Snow?
The Gen 2 dish is designed for outdoor conditions and has an IP54 environmental rating. Its heating function can help clear snow from the dish surface, while a sound installation and secure dish mount help it cope with wind and rain. Very heavy rain can still cause short interruptions to any satellite connection.
Is the Gen 2 Actuated Kit Still Usable in Australia?
A working Gen 2 dish can still be used on compatible Starlink services in Australia. Before buying a second-hand unit, check that the hardware can be transferred to your account and that it is in good condition.
Is a Gen 2 Actuated Starlink Kit Right for Your Setup?
For Australian rural, coastal and remote setups, a Gen 2 actuated Starlink kit can still be a dependable choice when it is in good condition and installed properly. The Gen 3 Standard offers newer Wi-Fi, built-in Ethernet ports and fewer moving parts, but a well-mounted Gen 2 dish remains capable for everyday satellite internet.
The key is to give the dish a clear view of the sky and a stable foundation. SpaceTek Australia’s precision-machined or folded aluminium and reinforced composite Starlink mounts are designed to help keep Gen 2 installations secure in demanding conditions.


Leave a comment
This site is protected by hCaptcha and the hCaptcha Privacy Policy and Terms of Service apply.