Why Your Starlink Mount Choice is Critical
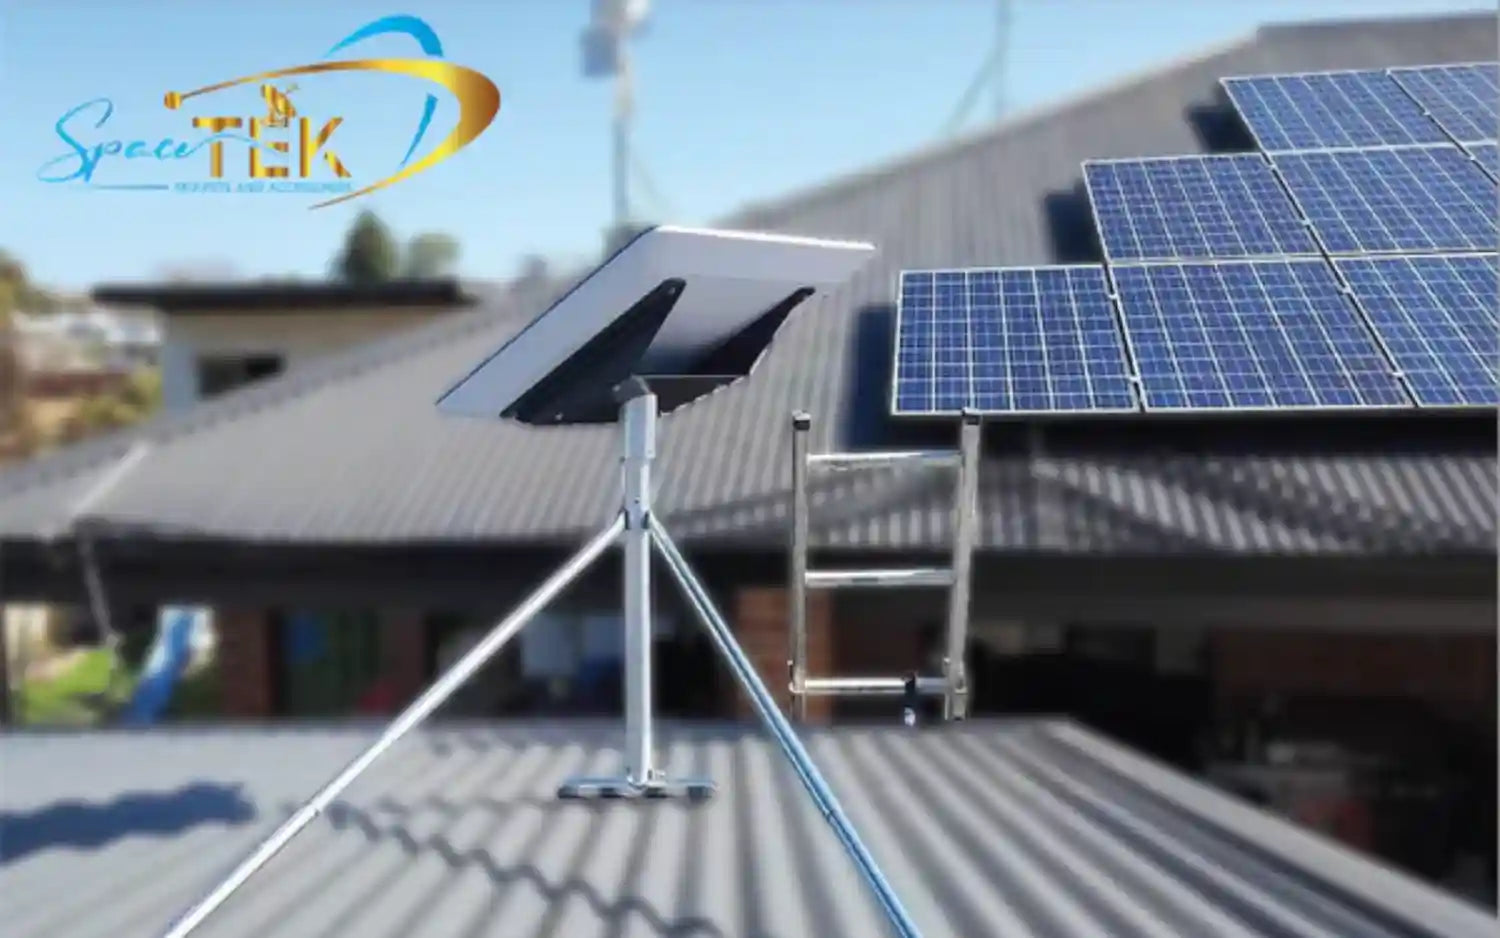
Choosing the right Starlink roof mount is crucial for a stable, high-speed internet connection, especially in Australia's harsh conditions. The basic stand included with your Starlink kit is only for temporary use and won't withstand strong winds or weather, leading to signal dropouts and potential damage.
A high-quality, permanent mount ensures your dish has a clear, unobstructed view of the sky, which is essential for optimal performance. There are several types to consider:
- Penetrating Mounts: These are bolted directly to your roof structure for maximum stability.
- Non-Penetrating Mounts: Ideal for flat roofs or for those who want to avoid drilling, these use weights to stay in place.
- Pole and Pipe Adapter Mounts: These let you attach your dish to an existing mast or pole.
When selecting a mount, prioritise materials like galvanised steel or marine-grade aluminium for corrosion resistance. Ensure it's compatible with your Starlink generation (Gen 2, Gen 3, or Mini) and designed to handle local weather conditions. A proper mount is not just an accessory; it's an investment in reliable internet.
Choosing the Right Starlink Roof Mounts to Withstand the Elements

Selecting the ideal Starlink roof mount for your needs means considering a range of factors that ensure both performance and longevity, especially given Australia's unique environmental challenges. This isn't just about getting your dish up high; it's about securing it against everything from scorching sun and heavy rain to cyclonic winds and corrosive salt air.
When choosing a mount, we always advise our customers to think about their specific roof type. Are you dealing with a metal roof, traditional tiles, or perhaps a flat commercial roof? Each presents different installation considerations. The material of the mount itself is paramount – we need solutions that are built to last in Australian conditions. This means focusing on durability factors like corrosion resistance, UV stability, and structural strength.
Key Features of High-Quality Starlink Roof Mounts
When we talk about high-quality Starlink roof mounts, we're not just talking about something that holds your dish in place. We're talking about a robust, weather-defying solution engineered to protect your investment and ensure uninterrupted connectivity, especially in Australia's challenging environment.
First and foremost, material is crucial. We advocate for mounts made from heavy-gauge, durable materials like galvanised steel or marine-grade aluminium. These materials offer superior strength and longevity compared to lighter alternatives. For instance, mounts hot-dip galvanised after fabrication provide excellent corrosion resistance, a non-negotiable feature for any outdoor equipment in Australia, particularly near the coast or in high-humidity areas. Our blog post, How to Find Durable Starlink Mounts for Harsh Aussie Conditions, digs into this in detail.
Weather resistance goes hand-in-hand with material quality. A top-tier mount must be able to withstand everything our climate throws at it – from intense UV radiation and extreme heat to torrential rain and powerful winds. This includes robust construction that prevents flexing or deformation under stress, ensuring your dish remains stable and aligned.
Corrosion protection, as mentioned, is vital. Beyond galvanisation, some mounts benefit from powder coating or other protective finishes that add an extra layer of defence against rust and degradation. This is particularly important for all hardware, including bolts, nuts, and washers.
Adjustability is another key feature. While Starlink dishes self-orient to a degree, having a mount that allows for fine-tuning of position can be invaluable for optimising signal strength and avoiding minor obstructions. Multiple directions of adjustment ensure you can achieve the best possible angle for your dish.
Finally, compatibility is non-negotiable. Ensure your chosen mount is designed to work seamlessly with your specific Starlink dish version, whether it's Gen 1, Gen 2, Gen 3, or the Starlink Mini. Many high-quality mounts are designed with universal compatibility for all generations, simplifying your choice. Furthermore, a good mount will come with all necessary hardware for installation, including bolts, nuts, washers, Allen wrenches, and often crucial sealing components like Loctite and sealant, simplifying your installation process.
Installation Essentials: Tools and Best Practices
Installing a Starlink roof mount can be a rewarding DIY project, but it requires careful planning, the right tools, and adherence to best practices to ensure safety, performance, and roof integrity. If you're uncomfortable with heights or drilling into your roof, we always recommend consulting a professional installer.
For a DIY installation, here are the typical tools you'll need:
- Drill: For pilot holes and securing penetrating mounts.
- Drill Bits: Appropriate sizes for your lag screws and pilot holes (e.g., 6 mm or 1/4 inch).
- Hex Socket/Wrenches: To tighten bolts and nuts securely.
- Marker: For marking drilling locations.
- Level: To ensure your mount is installed straight.
- Measuring Tape: For accurate placement.
- Stud Finder: Crucial for locating roof trusses or rafters for secure attachment.
- Sealant: High-quality, weather-resistant silicone or mastic tape is essential for sealing any penetrations to prevent water leaks.
- Safety Gear: Gloves, safety glasses, and appropriate footwear for roof work.
Best Practices for Installation:
- Locate Optimal Position: Use the Starlink app's obstruction tool to find the clearest view of the sky from your roof. This is paramount for signal quality.
- Find Structural Support: For penetrating mounts, always attach to roof trusses or rafters, not just the sheeting. This provides the necessary strength to withstand wind loads.
- Seal All Penetrations: This cannot be stressed enough. Every screw hole must be thoroughly sealed with high-quality sealant or mastic tape to prevent water ingress.
- Cable Management: Route your Starlink cable neatly and securely, away from moving parts or sharp edges. Use cable clips to prevent it from flapping in the wind or becoming a tripping hazard. This also protects the cable from UV degradation and physical damage.
- Check for Level: Use a level to ensure your mount is installed straight. While Starlink dishes self-adjust, a level mount ensures optimal initial orientation and stability.
- Tighten Securely: Ensure all bolts and screws are tightened to the manufacturer's specifications. Over-tightening can strip threads, while under-tightening can lead to instability.
A secure and properly sealed installation is key to long-term, reliable Starlink service. For a comprehensive guide on the entire process, including crucial tips for Australian conditions, consult our article Skys The Limit: How to Install a Starlink Roof Mount.
Choosing the Right Starlink Roof Mount for Your Model
Starlink has released different versions of its satellite dish, and each has a unique mounting system. It's crucial to choose a mount that is specifically designed for your model.
Starlink Gen 2 (Standard Actuated): The original rectangular dish with a motor. It requires a mount that can securely hold its pipe-style mast. Our Gen 2 mounts are engineered to provide a stable base for this self-aligning dish.
Starlink Gen 3 (Standard): The latest model features a kickstand and a different mounting mechanism. It's not compatible with older mounts. Our Gen 3 mounts and accessories are designed for a perfect fit, ensuring your new dish is secure.
Starlink for RVs & Portability: For those on the move, a portable solution is key. Our RV and Portability mounts are designed for quick setup and takedown, offering stability without permanent installation.
Starlink Mini: This compact, portable dish is ideal for travel. Our Starlink Mini mounts provide secure, temporary mounting options for vehicles, tripods, and more, ensuring you get a great signal wherever you are.
Installation Essentials: Tools and Best Practices
For a DIY installation, here are the typical tools you'll need:
- Drill: For pilot holes and securing penetrating mounts.
- Drill Bits: Appropriate sizes for your lag screws and pilot holes (e.g., 6 mm or 1/4 inch).
- Hex Socket/Wrenches: To tighten bolts and nuts securely.
- Marker: For marking drilling locations.
- Level: To ensure your mount is installed straight.
- Measuring Tape: For accurate placement.
- Stud Finder: Crucial for locating roof trusses or rafters for secure attachment.
- Sealant: High-quality, weather-resistant silicone or mastic tape is essential for sealing any penetrations to prevent water leaks.
- Safety Gear: Gloves, safety glasses, and appropriate footwear for roof work.
Best Practices for Installation:
- Locate Optimal Position: Use the Starlink app's "Check for Obstructions" tool to find the clearest view of the sky from your roof. This is paramount for signal quality.
- Find Structural Support: For penetrating mounts, always attach to roof trusses or rafters, not just the sheeting. This provides the necessary strength to withstand wind loads.
- Seal All Penetrations: This cannot be stressed enough. Every screw hole must be thoroughly sealed with high-quality sealant or mastic tape to prevent water ingress.
- Cable Management: Route your Starlink cable neatly and securely, away from moving parts or sharp edges. Use cable clips to prevent it from flapping in the wind or becoming a tripping hazard.
- Check for Level: Use a level to ensure your mount is installed straight. While Starlink dishes self-adjust, a level mount ensures optimal initial orientation and stability.
- Tighten Securely: Ensure all bolts and screws are tightened to the manufacturer's specifications. Over-tightening can strip threads, while under-tightening can lead to instability.
A secure and properly sealed installation is key to long-term, reliable Starlink service. For a comprehensive guide on the entire process, including crucial tips for Australian conditions, consult our article Skys The Limit: How to Install a Starlink Roof Mount.
Secure Your Connection with Expert Advice
Choosing the right Starlink roof mount is a critical investment in your internet's reliability. The standard-issue base is not designed for Australia's harsh weather, and a poor-quality mount can lead to signal dropouts, damage, and costly repairs.
A high-quality, properly installed mount ensures your Starlink dish has a clear, stable view of the sky, delivering the fast, consistent performance you expect. At SpaceTek, we engineer mounts specifically for Australian conditions, using heavy-gauge, corrosion-resistant materials to guarantee longevity.
Whether you have a Gen 2, Gen 3, or the new Starlink Mini, we have a solution for you. If you're unsure which mount is right for your roof, location, or Starlink model, our team is here to help. We have over 25 years of experience in remote communications and can provide the expert advice you need.
Don't leave your connection to chance. For personalised recommendations, contact us and secure your Starlink for the long haul.

Leave a comment
This site is protected by hCaptcha and the hCaptcha Privacy Policy and Terms of Service apply.