
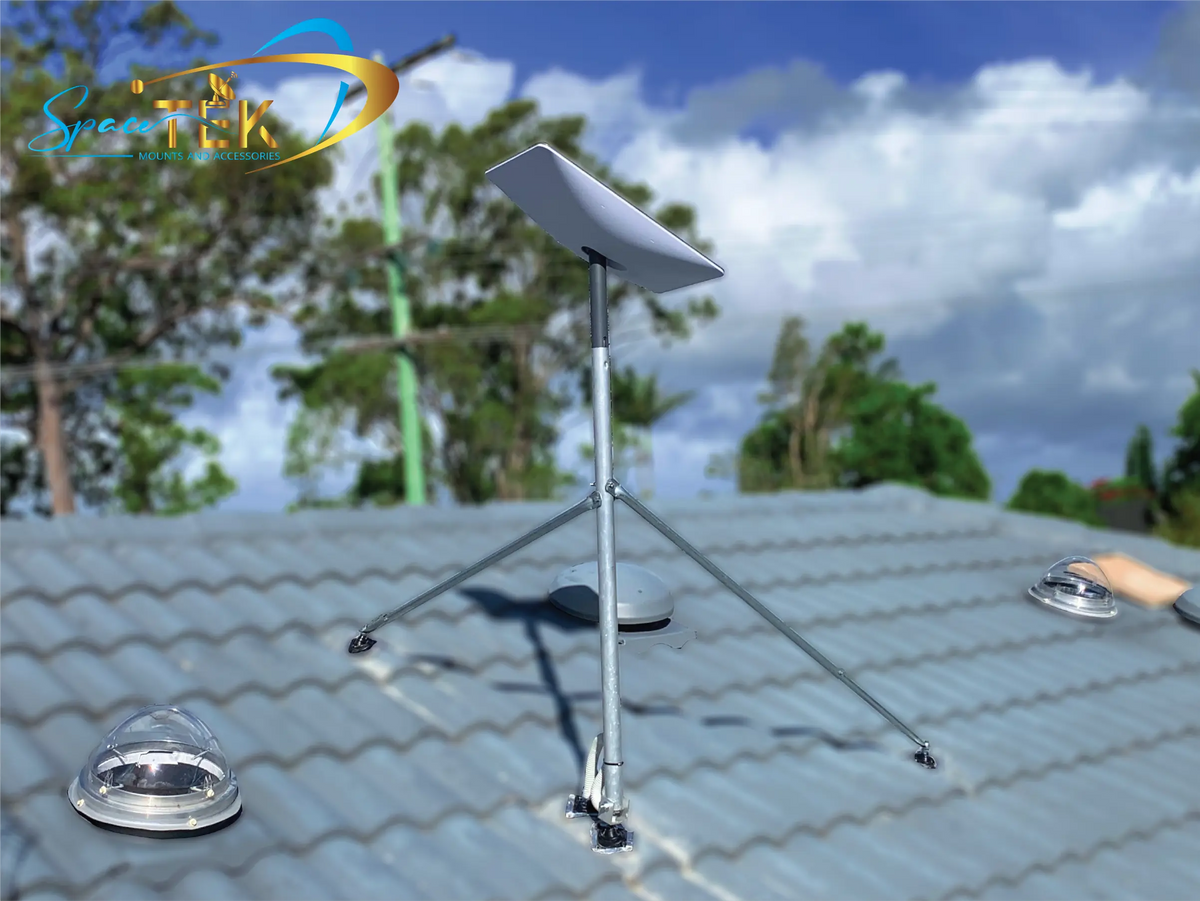
Why the Best Mount for Starlink Is the Foundation of Your Connection
Choosing the best mount for Starlink comes down to how and where you use your dish. For most Australian homes, a sturdy roof or pole setup makes sense, while caravans, 4WDs and off-grid campers usually need a portable Starlink mount that is quick to set up and easy to pack away.
Key Takeaways
- Match the Starlink mount to your setup: fixed roof and pole options suit homes, while portable options suit touring, camping and temporary installs.
- Clear sky matters more than clever gear. If trees, sheds or other obstacles block the view, lift the dish higher with a suitable pole or roof setup.
- Australian weather is rough on cheap hardware, so look for rust-resistant materials, solid anchoring and a tidy cable route.
- Starlink Mini users have more lightweight mounting options, especially for 4WDs, vans and quick campsite setups.
- If you want gear built for local conditions, start with SpaceTek Australia's Gen 3 mounts and accessories.
A poor Starlink mount can mean dropouts, wind movement and avoidable damage, especially in regional Australia where the weather can turn quickly. The right setup keeps your dish pointed at a clear patch of sky, holds firm when the wind kicks up and saves you from having to fiddle with the dish every time the connection drops.
How Do You Choose the Best Mount for Starlink Based on Your Setup?
Finding the best mount for Starlink is not a one-size-fits-all job. A fixed dish mount for a tin roof in outback Queensland is going to be very different from the Starlink mount you would use on a caravan heading along the Great Ocean Road.
The easiest way to choose is to think about three things: sky clearance, wind exposure and whether the dish will stay put or travel with you.
Obstruction Clearance
Your Starlink dish needs a wide, clear view of the sky to maintain a stable connection with the satellite network. If you have tall gums, nearby sheds, rooflines or power lines around the install spot, a low setup may not be enough.
In that case, a taller pole or roof-mounted option can help lift the dish above local obstacles. Even a modest lift can reduce dropouts if it gives the dish a cleaner view of the sky. For more help choosing the right setup, read SpaceTek's Starlink mounts guide.
Wind and Weather Exposure
Australia is not gentle on outdoor gear. Heat, UV, dust, coastal salt and sudden wind gusts can all punish a flimsy dish mount.
If your dish is going on an exposed roof, shed or open campsite, choose a solid Starlink mount made from durable materials such as precision-machined or folded aluminium and reinforced composite. Avoid anything that feels light, brittle or poorly supported, because small movements in the dish can affect the connection.
Permanent vs Portable
If the dish is staying at home, go for a fixed Starlink mount that can be properly secured into the structure. That means a clean install, careful sealing and a setup you do not need to keep adjusting.
If you are travelling, convenience matters. Caravan, camper and 4WD setups usually work best with portable or low-profile options that are quick to deploy, easy to remove and simple to stow before the next leg of the trip.
What Are the Main Types of Starlink Mounts Available?
The right dish mount depends on whether you are setting up at home, on a caravan, on a 4WD or at a temporary campsite. Here are the main options worth considering.
- Roof mounts: A common choice for homes and sheds where the dish needs a stable, elevated position.
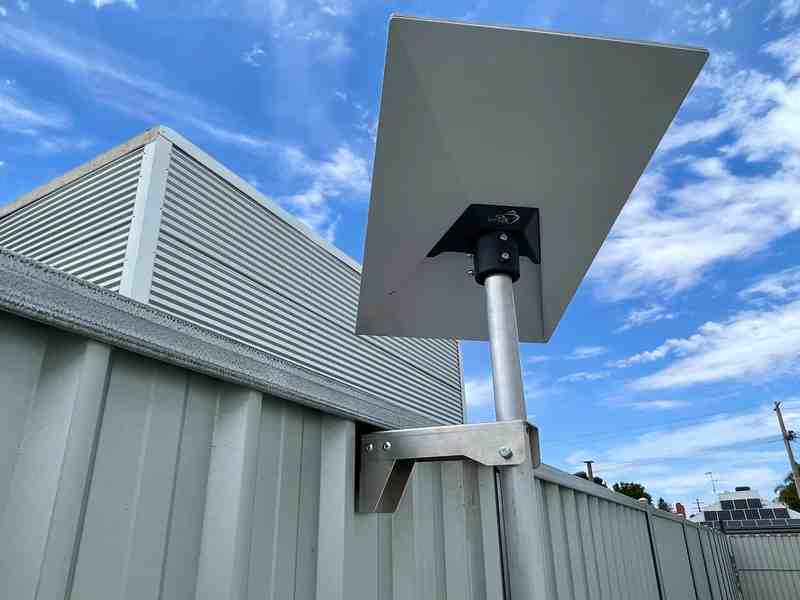
- Wall mounts: Useful when a side wall, fascia or eave gives the dish a cleaner view of the sky than the roof surface.
- Pole mounts: A good option when you need extra height to clear trees, rooflines or nearby structures.
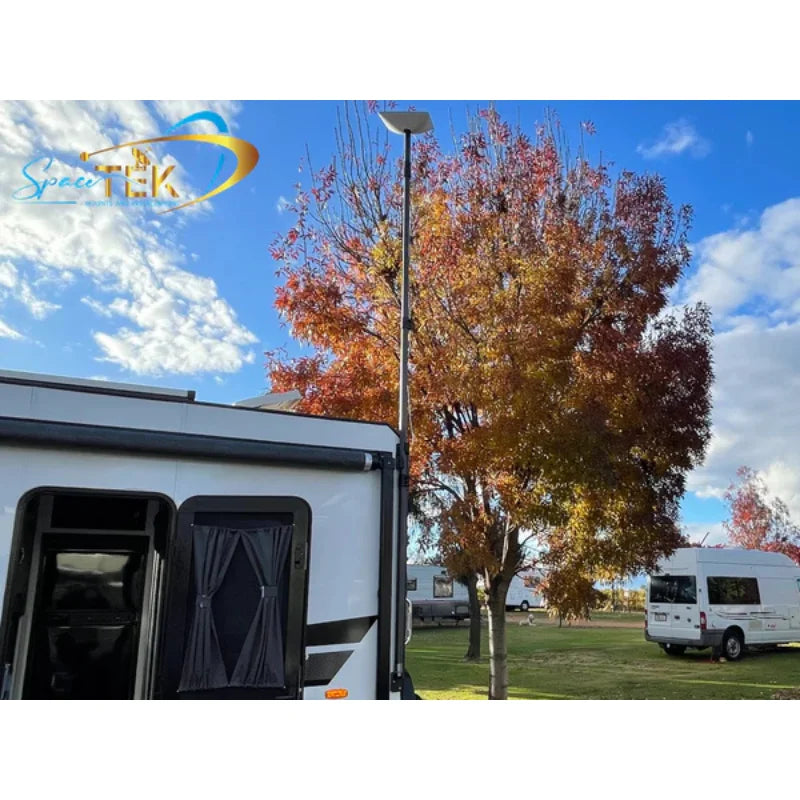
- Hitch mounts: Handy for caravan and RV users who want a temporary setup without drilling into the vehicle.
- Suction mounts: Built for short-term use on smooth surfaces such as glass or suitable vehicle panels.
- Magnetic mounts: Useful on compatible steel surfaces where a quick, removable setup is the priority.
Which Starlink Mount Works Best for Gen 3 and Standard Dishes?
The Starlink Gen 3 Standard dish has a flat-panel shape, which changes how it handles wind compared with older motorised designs. Because it has a broad surface, the dish mount needs to be rigid enough to stop wobble in exposed conditions. Check the current Starlink hardware specifications before choosing a setup.
Compatibility also matters. Some older Starlink mounts will not suit newer dishes without the right adapter, so it is worth checking your exact dish version before buying anything.
At SpaceTek Australia, Gen 3 options are designed around precision-machined or folded aluminium and reinforced composite components. That keeps the focus on strength, durability and real-world use in Australian conditions.
For caravans and 4WDs, a low-profile flatmount-style setup can be a practical choice because it keeps the dish close to the roofline and reduces the need to pack and unpack at every stop.
Which Starlink Mount Is Best for Starlink Mini and Portable Setups?
Starlink Mini is much easier to move around than the larger Standard dish, so it opens up more portable mounting options for campers, tourers and off-grid travellers.
For portable setups, SpaceTek's Starlink Mini mount collection is the most relevant place to start. Popular Mini options include:
- Suction cup Starlink mounts for smooth surfaces when parked.
- Magnetic Starlink mounts for compatible steel vehicle surfaces.
- Clamp-style Starlink mounts for roof racks, rear ladders, bull bars and campsite poles.
Why Does DC-to-DC Power Matter for Portable Starlink Setups?
If you are running Starlink off-grid, power efficiency matters just as much as the dish mount. DC-to-DC power is generally a better fit than running through an AC inverter because it reduces conversion waste, lowers draw and can bypass the Starlink router in custom setups.
Pairing Starlink Mini with SpaceTek's StarPower DC power supplies gives travellers a cleaner, more efficient way to run their setup from a vehicle or house battery system without relying on a bulky inverter arrangement.
How Do You Install and Maintain a Starlink Mount Properly?
A good Starlink mount still needs a good install. If the mount is not anchored, sealed and checked properly, the dish can move, leak points can appear and cables can wear faster than they should.

How Should You Anchor a Starlink Mount?
When installing a roof mount, anchor it into the structure beneath the roof skin wherever possible. Screwing only into thin roof sheeting can lead to movement, leaks and failure once wind starts working on the dish.
For taller pole setups, use the right support method for the height, exposure and location. If in doubt, get a qualified installer to check the plan before the dish goes up.
How Do You Keep a Roof Install Watertight?
Every roof penetration needs proper sealing. Use quality outdoor-rated sealant around mounting points and make sure cable entries are protected with a suitable waterproof cable gland.
On caravans and campers, take extra care with roof penetrations and cable routes. Dust, rain and vibration can all find weak points over time.
How Should You Route the Starlink Cable?
Treat the Starlink cable carefully. It carries data and power, so avoid crushing, kinking or rubbing it against sharp edges.
- Avoid sharp bends, especially tight right-angle bends.
- Secure the cable so it does not flap in the wind.
- Use a drip loop before the cable enters a wall, roof or vehicle.
- Keep connections clean, dry and protected from corrosion.
What Maintenance Should You Do?
A quick check every few months can save a lot of trouble later, especially before a big trip or after heavy weather.
- Check bolts, fasteners and mounting points for movement.
- Look for lifted tape, sealant cracks or any sign of water entry.
- Inspect cable runs for rubbing, UV damage or loose ties.
- Make sure the dish still has a clear view of the sky.
For a deeper look at secure setup choices, read the Starlink mounts buying guide.
What Do People Usually Ask About Starlink Mounts?
Do I Need to Drill Holes to Mount Starlink on My RV?
No, you do not always need to drill holes to mount Starlink on an RV, caravan or camper. The right option depends on your vehicle surface, how permanent you want the setup to be and whether you need to remove the dish between stops.
Suction and magnetic Starlink mounts can suit temporary setups when the surface is compatible. Low-profile mounted options can also suit more permanent caravan installs when installed correctly.
How Does Pole Height Affect Starlink Signal Obstruction?
Pole height can make a big difference if trees, sheds, rooflines or other vehicles are blocking the dish's view of the sky. Starlink needs a clear view in more than one direction, so even one awkward obstacle can cause repeated dropouts.
Raising the dish can often turn a frustrating setup into a steadier one. This is especially useful in the bush, where finding a perfectly open patch of sky is not always easy.
Can I Use My Starlink Dish While Driving?
Yes, but only with the right dish, plan and mounting setup. Larger Standard dishes need careful mounting because of their size and wind load, while Starlink Mini is better suited to compact mobile arrangements.
A low-profile Starlink mount is usually the safer style for vehicle movement because it keeps the dish closer to the roofline. For off-grid touring, pairing the setup with an efficient DC-to-DC power supply can also make the system easier to run from your vehicle power setup.
Which Starlink Mount Will Stay Secure Long Term?
The best long-term Starlink mount is the one that suits your dish, your roof or vehicle, and the weather it has to survive. For a home, that usually means a properly anchored roof, wall or pole setup. For a caravan, camper or 4WD, it usually means a low-profile or portable Starlink mount that is secure enough for the conditions but still practical on the road.
SpaceTek Australia focuses on premium, rust-resistant Starlink mounts and efficient StarPower DC power solutions built for Australian homes, sheds, caravans and off-grid travel.
If you want help choosing the right setup, contact SpaceTek Australia and the team can point you towards a Starlink mount and power solution that suits the way you actually use your dish.

Leave a comment
This site is protected by hCaptcha and the hCaptcha Privacy Policy and Terms of Service apply.